Ricoh Aficio SP 4310N Manuals - Page 109
Setting Items of IEEE 802.1X for Wireless LAN, Select [CHAP], [MSCHAP], [PAP] - reset
 |
View all Ricoh Aficio SP 4310N manuals
Add to My Manuals
Save this manual to your list of manuals |
Page 109 highlights
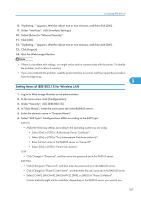
Configuring IEEE 802.1X 8. "Updating..." appears. Wait for about one or two minutes, and then click [OK]. 9. Under "Interface", click [Interface Settings]. 10. Select [Active] in "Ethernet Security". 11. Click [OK]. 12. "Updating..." appears. Wait for about one or two minutes, and then click [OK]. 13. Click [Logout]. 14. Quit the Web Image Monitor. • If there is a problem with settings, you might not be able to communicate with the printer. To identify the problem, print a network summary. • If you cannot identify the problem, reset the printer interface to normal, and then repeat the procedure from the beginning. 5 Setting Items of IEEE 802.1X for Wireless LAN 1. Log in to Web Image Monitor as an administrator. 2. In the menu area, click [Configuration]. 3. Under "Security", click [IEEE 802.1X]. 4. In "User Name", enter the user name set in the RADIUS server. 5. Enter the domain name in "Domain Name". 6. Select "EAP Type". Configurations differ according to the EAP Type. EAP-TLS • Make the following settings according to the operating system you are using: • Select [On] or [Off] in "Authenticate Server Certificate". • Select [On] or [Off] in "Trust Intermediate Certificate Authority". • Enter the host name of the RADIUS server on "Server ID". • Select [On] or [Off] in "Permit Sub-domain". LEAP • Click Change in "Password", and then enter the password set in the RADIUS server. EAP-TTLS • Click [Change] in "Password", and then enter the password set in the RADIUS server. • Click [Change] in "Phase 2 User Name", and then enter the user name set in the RADIUS server. • Select [CHAP], [MSCHAP], [MSCHAPv2], [PAP], or [MD5] in "Phase 2 Method". Certain methods might not be available, depending on the RADIUS server you want to use. 107
-
 1
1 -
2
-
3
-
4
-
5
-
6
-
7
-
8
-
9
-
10
-
11
-
12
-
13
-
14
-
15
-
16
-
17
-
18
-
19
-
20
-
21
-
22
-
23
-
24
-
25
-
26
-
27
-
28
-
29
-
30
-
31
-
32
-
33
-
34
-
35
-
36
-
37
-
38
-
39
-
40
-
41
-
42
-
43
-
44
-
45
-
46
-
47
-
48
-
49
-
50
-
51
-
52
-
53
-
54
-
55
-
56
-
57
-
58
-
59
-
60
-
61
-
62
-
63
-
64
-
65
-
66
-
67
-
68
-
69
-
70
-
71
-
72
-
73
-
74
-
75
-
76
-
77
-
78
-
79
-
80
-
81
-
82
-
83
-
84
-
85
-
86
-
87
-
88
-
89
-
90
-
91
-
92
-
93
-
94
-
95
-
96
-
97
-
98
-
99
-
100
-
101
-
102
-
103
-
 104
104 -
 105
105 -
 106
106 -
 107
107 -
 108
108 -
 109
109 -
 110
110 -
 111
111 -
 112
112 -
 113
113 -
 114
114 -
115
-
116
-
117
-
118
-
119
-
120
-
121
-
122
-
123
-
124
-
125
-
126
-
127
-
128
-
129
-
130
-
131
-
132
-
133
-
134
-
135
-
136
-
137
-
138
-
139
-
140
-
141
-
142
-
143
-
144
-
145
-
146
-
147
-
148
-
149
-
150
-
151
-
152
-
153
-
154
-
155
-
156
-
157
-
158
-
159
-
160
-
161
-
162
-
163
-
164
-
165
-
166
-
167
-
168
-
169
-
170
-
171
-
172
-
173
-
174
-
175
-
176
-
177
-
178
-
179
-
180
-
181
-
182
-
183
-
184
-
185
-
186
-
187
-
188
-
189
-
190
-
191
-
192
-
193
-
194
-
195
-
196
-
197
-
198
-
199
-
200
-
201
-
202
-
203
-
204
-
205
-
206
-
207
-
208
-
209
-
210
-
211
-
212
-
213
-
214
-
215
-
216
-
217
-
218
-
219
-
220
-
221
-
222
-
223
-
224
-
225
-
226
-
227
-
228
-
229
-
230
-
231
-
232
-
233
-
234
-
235
-
236
-
237
-
238
-
239
-
240
-
241
-
242
-
243
-
244
-
245
-
246
-
247
-
248
-
249
-
250
-
251
-
252
 |
 |
