Sony Ericsson Xperia X2 User Guide - Page 36
Finding company contacts using Microsoft® Exchange Server, Contacts, Filter, Device Contacts, Several - performance
 |
View all Sony Ericsson Xperia X2 manuals
Add to My Manuals
Save this manual to your list of manuals |
Page 36 highlights
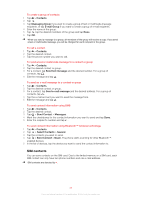
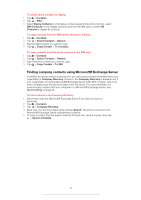
To select which contacts to display 1 Tap > Contacts. 2 Tap > Filter. 3 Select Device Contacts to only display contacts saved in the phone memory, select SIM Contacts to only display contacts saved on the SIM card, or select All Contacts to display all contacts. To copy contacts from the SIM card to the phone memory 1 Tap > Contacts. 2 Tap > Select Contacts > Several. 3 Tap the SIM contacts you want to copy. 4 Tap > Copy Contact > To Contacts. To copy contacts from the phone memory to the SIM card 1 Tap > Contacts. 2 Tap > Select Contacts > Several. 3 Tap the phone contacts you want to copy. 4 Tap > Copy Contact > To SIM. Finding company contacts using Microsoft® Exchange Server In addition to having contacts in your phone, you can access contact information from your organization's Company Directory. Access to the Company Directory is available only if your organization is running Microsoft® Exchange Server 2003 SP2 or higher, and if you have completed your first synchronization with the server. For more information on synchronizing contacts with your computer or a Microsoft® Exchange Server, see Synchronizing on page 39. To find contacts in the Company Directory 1 Synchronize with the Microsoft® Exchange Server if you have not done so previously. 2 Tap > Contacts. 3 Tap > Company Directory. 4 Enter part of or the full contact name and tap Search. The phone connects to the Microsoft® Exchange Server and performs a search. 5 To save a contact from the search result list to the phone, tap the contact, then tap > Save to Contacts. 36 This is an Internet version of this publication. © Print only for private use.
-
 1
1 -
2
-
3
-
4
-
5
-
6
-
7
-
8
-
9
-
10
-
11
-
12
-
13
-
14
-
15
-
16
-
17
-
18
-
19
-
20
-
21
-
22
-
23
-
24
-
25
-
26
-
27
-
28
-
29
-
30
-
 31
31 -
 32
32 -
 33
33 -
 34
34 -
 35
35 -
 36
36 -
 37
37 -
 38
38 -
 39
39 -
 40
40 -
 41
41 -
42
-
43
-
44
-
45
-
46
-
47
-
48
-
49
-
50
-
51
-
52
-
53
-
54
-
55
-
56
-
57
-
58
-
59
-
60
-
61
-
62
-
63
-
64
-
65
-
66
-
67
-
68
-
69
-
70
-
71
-
72
-
73
-
74
-
75
-
76
-
77
-
78
-
79
-
80
-
81
-
82
-
83
-
84
-
85
-
86
-
87
-
88
-
89
-
90
 |
 |
