Sony Ericsson Xperia X2 User Guide - Page 38
Company Directory, Add Optional
 |
View all Sony Ericsson Xperia X2 manuals
Add to My Manuals
Save this manual to your list of manuals |
Page 38 highlights
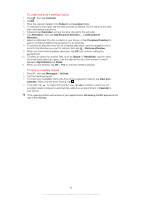
To create and send a meeting request 1 Press , then tap Calendar. 2 Tap . 3 Enter the relevant details in the Subject: and Location: fields. 4 To change the start date, tap the date and edit as desired. Do the same for the start time, end date and end time. 5 If desired, tap Reminder: and set the time interval for the reminder. 6 Tap Attendees:, then tap Add Required Attendee... or Add Optional Attendee.... 7 Select an attendee from the contacts in your phone, or tap Company Directory to search the Microsoft® Exchange Server for an attendee. 8 To remove an attendee from the list of added attendees, use the navigation key to scroll to the attendee you want to remove, then tap > Remove attendee. 9 When you have finished adding attendees, tap OK and continue editing the appointment. 10 To select an option for another field, such as Status: or Sensitivity:, tap the name of the field and select an option. Use the tabs at the top of the screen to switch between Appointment and Notes. 11 When you are finished, tap OK > Yes to send the meeting request. To reply to a meeting request 1 Press , then tap Messages > Outlook. 2 Tap the meeting request. 3 To check your availability during the time of the requested meeting, tap View your calendar. When you are done viewing, tap . 4 To accept, tap . To respond in another way, tap and select a response. An accepted meeting request is automatically added as an appointment in Calendar in your phone. If the meeting conflicts with another of your appointments, Scheduling Conflict appears at the top of the message. 38 This is an Internet version of this publication. © Print only for private use.
-
 1
1 -
2
-
3
-
4
-
5
-
6
-
7
-
8
-
9
-
10
-
11
-
12
-
13
-
14
-
15
-
16
-
17
-
18
-
19
-
20
-
21
-
22
-
23
-
24
-
25
-
26
-
27
-
28
-
29
-
30
-
31
-
32
-
 33
33 -
 34
34 -
 35
35 -
 36
36 -
 37
37 -
 38
38 -
 39
39 -
 40
40 -
 41
41 -
 42
42 -
 43
43 -
44
-
45
-
46
-
47
-
48
-
49
-
50
-
51
-
52
-
53
-
54
-
55
-
56
-
57
-
58
-
59
-
60
-
61
-
62
-
63
-
64
-
65
-
66
-
67
-
68
-
69
-
70
-
71
-
72
-
73
-
74
-
75
-
76
-
77
-
78
-
79
-
80
-
81
-
82
-
83
-
84
-
85
-
86
-
87
-
88
-
89
-
90
 |
 |
