Toshiba 19CV100U User Manual - Page 15
Adjusting the screen angle, Applicable to 19CV100U/22CV100U
 |
View all Toshiba 19CV100U manuals
Add to My Manuals
Save this manual to your list of manuals |
Page 15 highlights
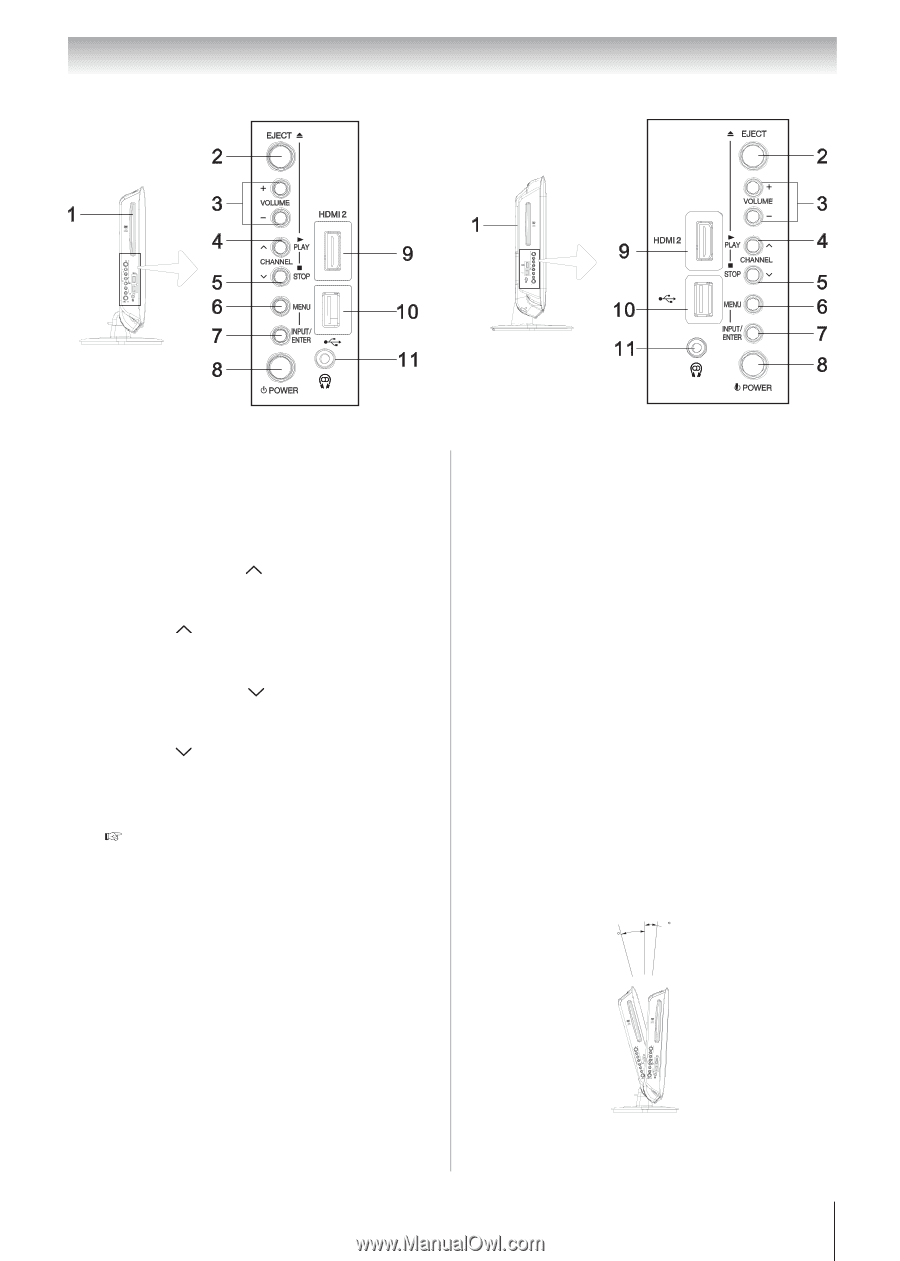
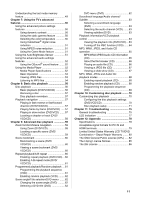
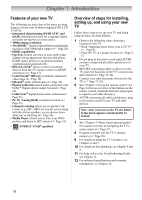
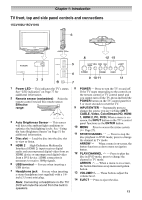
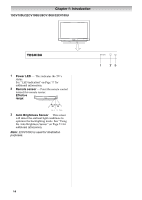
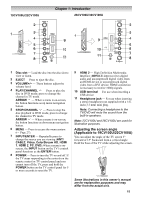
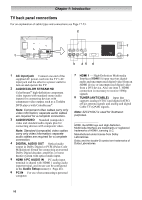
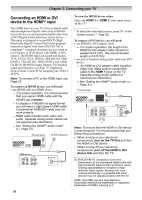
19CV100U/22CV100U Chapter 1: Introduction 26CV100U/32CV100U 1 Disc slot ─ Load the disc into the disc slot to view or listen. 2 EJECT ─ Press to eject the disc. 3 VOLUME+/- ─ These buttons adjust the volume level. 4 PLAY/CHANNEL ─ Press to play the disc in DVD mode; press to change the channel in TV mode. ARROW ─ When a menu is on-screen, the button functions as up menu navigation button. 5 STOP/CHANNEL ─ Press to stop the disc playback in DVD mode; press to change the channel in TV mode. ARROW ─ When a menu is on-screen, the button functions as down menu navigation button. 6 MENU ─ Press to access the menu system ( Page 27). 7 INPUT/ENTER ─ Repeatedly press to change the source you are viewing (ANT/ CABLE, Video, ColorStream HD, HDMI 1, HDMI 2, PC, DVD).When a menu is onscreen, the INPUT button on the TV's control panel functions as the ENTER button. 8 POWER ─ Press to turn the TV on and off. If the TV stops responding to the controls on the remote control or TV control panel and you cannot turn off the TV, press and hold the POWER button on the TV control panel for 5 or more seconds to reset the TV. 9 HDMI 2 ─ High-Definition Multimedia Interface (HDMI 2) input receives digital audio and uncompressed digital video from an HDMI device or uncompressed digital video from a DVI device. HDMI connection is necessary to receive 1080p signals. 10 USB terminal ─ For use when inserting a USB device. 11 Headphone jack ─ For use when inserting a stereo headphone (not supplied) with a 1/8inch (3.5 mm) mini plug. Note: Connecting a headphone to the TV/DVD will mute the sound from the built-in speakers. Note: 22CV100U and 26CV100U are used for illustration purposes. Adjusting the screen angle (Applicable to 19CV100U/22CV100U) You can adjust the angle of the TV screen 3° forward or 15° backward from a vertical angle. Hold the base of the TV while adjusting the screen. 3 15 Some illustrations in this owner's manual are for explanation purposes and may differ from the actual unit. 15
-
 1
1 -
2
-
3
-
4
-
5
-
6
-
7
-
8
-
9
-
 10
10 -
 11
11 -
 12
12 -
 13
13 -
 14
14 -
 15
15 -
 16
16 -
 17
17 -
 18
18 -
 19
19 -
 20
20 -
21
-
22
-
23
-
24
-
25
-
26
-
27
-
28
-
29
-
30
-
31
-
32
-
33
-
34
-
35
-
36
-
37
-
38
-
39
-
40
-
41
-
42
-
43
-
44
-
45
-
46
-
47
-
48
-
49
-
50
-
51
-
52
-
53
-
54
-
55
-
56
-
57
-
58
-
59
-
60
-
61
-
62
-
63
-
64
-
65
-
66
-
67
-
68
-
69
-
70
-
71
-
72
-
73
-
74
-
75
-
76
-
77
-
78
-
79
-
80
-
81
-
82
-
83
-
84
-
85
-
86
-
87
-
88
 |
 |