Toshiba Tecra R850 User Manual - Page 98
Inserting a Smart Card, Safely Remove Hardware and Eject Media, Smart Card
 |
View all Toshiba Tecra R850 manuals
Add to My Manuals
Save this manual to your list of manuals |
Page 98 highlights
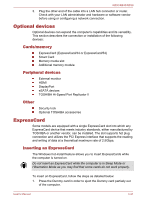
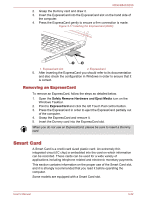
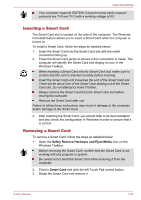
R850/R840/R830 Your computer supports ISO7816-3 asynchronous cards (support protocols are T=0 and T=1) with a working voltage of 5V. Inserting a Smart Card The Smart Card slot is located on the side of the computer. The Windows hot-install feature allows you to insert a Smart Card while the computer is turned on. To install a Smart Card, follow the steps as detailed below: 1. Insert the Smart Card into the Smart Card slot with the metal connectors facing up. 2. Press the Smart Card gently to ensure a firm connection is made. The computer will identify the Smart Card and display an icon in the Windows Taskbar. When inserting a Smart Card into the Smart Card slot, make sure to confirm that the card is oriented correctly before inserting. Insert the Smart Card until it reaches the end of the Smart Card slot. There will be about 2cm of the Smart Card sticking out of the Smart Card slot. Do not attempt to insert it further. Always remove the Smart Card from the Smart Card slot before moving the computer. Remove the Smart Card after use. Failure to follow these instructions may result in damage to the computer and/or damage to the Smart Card. 3. After inserting the Smart Card, you should refer to its documentation and also check the configuration in Windows in order to ensure that it is correct. Removing a Smart Card To remove a Smart Card, follow the steps as detailed below: 1. Open the Safely Remove Hardware and Eject Media icon on the Windows Taskbar. Before removing the Smart Card, confirm that the Smart Card is not working with any program or system. Be careful not to bend the Smart Card while removing it from the computer. 2. Point to Smart Card and click the left Touch Pad control button. 3. Grasp the Smart Card and remove it. User's Manual 3-33
-
 1
1 -
2
-
3
-
4
-
5
-
6
-
7
-
8
-
9
-
10
-
11
-
12
-
13
-
14
-
15
-
16
-
17
-
18
-
19
-
20
-
21
-
22
-
23
-
24
-
25
-
26
-
27
-
28
-
29
-
30
-
31
-
32
-
33
-
34
-
35
-
36
-
37
-
38
-
39
-
40
-
41
-
42
-
43
-
44
-
45
-
46
-
47
-
48
-
49
-
50
-
51
-
52
-
53
-
54
-
55
-
56
-
57
-
58
-
59
-
60
-
61
-
62
-
63
-
64
-
65
-
66
-
67
-
68
-
69
-
70
-
71
-
72
-
73
-
74
-
75
-
76
-
77
-
78
-
79
-
80
-
81
-
82
-
83
-
84
-
85
-
86
-
87
-
88
-
89
-
90
-
91
-
92
-
 93
93 -
 94
94 -
 95
95 -
 96
96 -
 97
97 -
 98
98 -
 99
99 -
 100
100 -
 101
101 -
 102
102 -
 103
103 -
104
-
105
-
106
-
107
-
108
-
109
-
110
-
111
-
112
-
113
-
114
-
115
-
116
-
117
-
118
-
119
-
120
-
121
-
122
-
123
-
124
-
125
-
126
-
127
-
128
-
129
-
130
-
131
-
132
-
133
-
134
-
135
-
136
-
137
-
138
-
139
-
140
-
141
-
142
-
143
-
144
-
145
-
146
-
147
-
148
-
149
-
150
-
151
-
152
-
153
-
154
-
155
-
156
-
157
-
158
-
159
-
160
-
161
-
162
-
163
-
164
-
165
-
166
-
167
-
168
-
169
-
170
-
171
-
172
-
173
-
174
-
175
-
176
-
177
-
178
-
179
-
180
-
181
-
182
-
183
-
184
-
185
-
186
-
187
-
188
-
189
-
190
-
191
-
192
-
193
-
194
-
195
-
196
-
197
-
198
-
199
-
200
-
201
-
202
-
203
-
204
-
205
-
206
-
207
-
208
 |
 |