Xerox 3300MFP User Guide
Xerox 3300MFP - Phaser B/W Laser Manual
 |
UPC - 095205744415
View all Xerox 3300MFP manuals
Add to My Manuals
Save this manual to your list of manuals |
Xerox 3300MFP manual content summary:
- Xerox 3300MFP | User Guide - Page 1
Phaser® 3300MFP Multifunction Printer Phaser® 3300MFP User Guide - Xerox 3300MFP | User Guide - Page 2
to use of this manual. • Phaser 3300MFP is model name of Xerox Corporation. • Xerox and Xerox logo are trademarks of Xerox Corporation. • PCL and PCL 6 are trademarks of Hewlett-Packard company. • Microsoft, Windows, Windows 2000, Windows XP, Windows 2003, and Windows Vista are registered trademarks - Xerox 3300MFP | User Guide - Page 3
using the number keypad ...2.3 Using the save modes ...2.4 Setting print job timeout ...2.4 3. Software overview Supplied software ...3.1 Printer driver features ...3.2 System requirements ...3.2 4. Network setup Introduction ...4.1 Supported operating systems ...4.1 Locating the 3300MFP IP Address - Xerox 3300MFP | User Guide - Page 4
receiving mode ...9.5 Receiving faxes in memory ...9.5 Printing received faxes on both sides of paper ...9.6 Sending a fax to multiple destinations ...9.6 Sending a delayed fax ...9.6 Sending a priority fax ...9.7 Forwarding faxes ...9.7 Sending a Fax from a PC ...9.8 10. Fax setup Changing the fax - Xerox 3300MFP | User Guide - Page 5
Maintenance Parts ...13.6 Managing your machine from the website ...13.7 Checking the machine's serial number ...13.8 14. Troubleshooting Clearing document jams ...14.1 Clearing paper jams ...14.2 Understanding display messages ...14.7 Print cartridge-related messages ...14.10 Solving other problems - Xerox 3300MFP | User Guide - Page 6
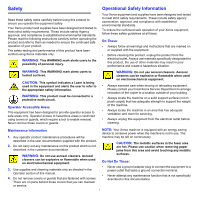
. described in the user documentation supplied with the product. 2. Do not carry out any maintenance on this product which is not described in the customer documentation CAUTION: The metallic surfaces in the fuser area are hot. Please use caution when removing paper jams from this area and - Xerox 3300MFP | User Guide - Page 7
cable(s) from the electrical outlet(s). Contact anauthorized Xerox Service Representative to correct the problem: The equipment emits unusual odours or makes unusual noises. The power cable is damaged or frayed. A wall panel circuit breaker, fuse, or other safety device has been tripped. Liquid - Xerox 3300MFP | User Guide - Page 8
package or container. • Keep all consumables away from the reach of children. • Never throw print cartridges or toner containers into an open flame. • Cartridges: When handing cartridges, for example ink, fuser, etc, avoid skin or eye contact. Eye contact can cause irritation and inflammation. Do - Xerox 3300MFP | User Guide - Page 9
digital device, pursuant to Part 15 of the FCC Rules accordance with the instructions, may cause receiver is connected. • Consult the dealer or an experienced radio/TV technician for help. Changes or modifications to this equipment not specifically approved by the Xerox Corporation may void the user - Xerox 3300MFP | User Guide - Page 10
such bonds.) Internal Revenue Stamps (If it is necessary to copy a legal papers. • Draft Registration cards. • Selective Service Induction papers Copying of the following is also prohibited in certain states: automobile licences, driver's licenses, and automobile Certificates of Title. This list - Xerox 3300MFP | User Guide - Page 11
modifications to maintain uninterrupted service. If trouble is experienced with this Xerox equipment, for repair or warranty information, please contact the appropriate service center; details of which are displayed either on the machine or contained within the user guide. If the equipment is - Xerox 3300MFP | User Guide - Page 12
ES 103 021-1/2/3 or ES 203 021-1/2/3, technical specifications for terminal equipment for use on analogue-switched telephone networks in the European Economic Area. The product may be configured to be compatible with other country networks. Please contact your Xerox representative if it needs to be - Xerox 3300MFP | User Guide - Page 13
not cryptographic related. 4. If you include any Windows specific code (or a derivative thereof) from the apps directory (application code) you must include an acknowledgement: "This product includes software written by Tim Hudson ([email protected])" THIS SOFTWARE IS PROVIDED BY ERIC YOUNG ``AS IS - Xerox 3300MFP | User Guide - Page 14
efficient copiers, printers, fax, multifunction machine, factory. Your machine will be delivered with the timer for switching to Power Save Mode from the last copy/print out, set at 30 minutes. A more detailed description of this feature can be found in the Machine Setup Section of this guide - Xerox 3300MFP | User Guide - Page 15
waste authorities and request disposal guidance. EH&S Contact Information For more information on Environment, Health and Safety in relation to this Xerox product and supplies, please contact the following customer help lines: • USA: 1-800 828-6571 • Canada: 1-800 828-6571 • Europe: +44 1707 353 434 - Xerox 3300MFP | User Guide - Page 16
below lists a general overview of features supported by your machine. (I: Installed, O: Option, NA: Not Available) Features Phaser 3300MFP USB 2.0 I USB Memory I PostScript Emulation I Network Interface I (Ethernet 10/100 Base TX) Duplex printing1 I 1. Printing on both sides of paper - Xerox 3300MFP | User Guide - Page 17
paper level indicator 18 print cartridge * The figure above shows Phaser 3300MFP with all available accessories. 1 control board cover 2 network port 3 USB port 4 optional tray 2 cable connector 5 telephone line socket (LINE)a 6 extension telephone socket (EXT) 7 duplex unita 8 power receptacle - Xerox 3300MFP | User Guide - Page 18
USB memory port on the front of your machine. 6 Fax: Activates Fax mode. 18 Duplex: Allows you to print documents on both sides of the paper. 7 Copy: Activates Copy mode. 19 Toner Saver: Allows you to save on toner by using less toner in printing. 8 Scan: Activates Scan mode. 20 Number keypad - Xerox 3300MFP | User Guide - Page 19
use the supplied software utilities. Note You can access the user guides in other languages from the Manual folder on the printer software CD. Provides you with help information on printer driver properties and instructions for setting up the properties for printing. To access a printer driver help - Xerox 3300MFP | User Guide - Page 20
Ignore Toner CLR Empty Msg. Supplies Life Serial Number Clear Setting System Setup Machine Setup Machine ID Machine Fax No. Date & Time Clock Mode Language Default Mode Power Save Scan PWR Save Timeout NetScanTimeout Job Timeout Import Setting Export Setting Scan Setup Change Default USB Memory - Xerox 3300MFP | User Guide - Page 21
on and ready to work. For the Phaser 3300MFP, all of your faxes will have the date and time printed on them. Note If power to the machine is cut off, you need to reset the correct time and date once the power has been restored. 1 Press Menu until System Setup appears on the bottom line of the - Xerox 3300MFP | User Guide - Page 22
. For example, when you set up your machine, you enter your name or your company's name, and the fax number. When you store fax numbers or email addresses in memory, you may also enter the corresponding names. Entering alphanumeric characters 1 When you are prompted to enter a letter, locate the - Xerox 3300MFP | User Guide - Page 23
quality. To turn this mode on or off, press Toner Saver. Note When PC-printing, you can also turn on or off Toner Save mode in the printer properties. See the Software Section. Power Save mode Power Save mode allows your machine to reduce power consumption when it is not in actual use. You can turn - Xerox 3300MFP | User Guide - Page 24
and graphics in the PS language. • User Guide in PDF Macintosh • Postscript Printer Description (PPD) file: Use this file to run your machine from a Macintosh computer and print documents. • Scan driver: TWAIN driver is available for scanning documents on your machine. 3.1 - Xerox 3300MFP | User Guide - Page 25
features: • Paper source selection • Paper size, orientation and media type • Number of copies In addition, you can use various special printing features. The following table shows a general overview of features supported by your printer drivers: Feature PCL 6 Windows Toner save O Print quality - Xerox 3300MFP | User Guide - Page 26
Linux Item Operating system CPU RAM free HDD space Software Requirements (Recommended) RedHat 8.0, 9.0 (32 bit) RedHat Enterprise Linux WS 4, 5 (32/64 bit) Fedora Core 1~7 (32/ GHz (IntelCore2) 512 MB (1024 MB) 1 GB (1 GB) Linux Kernel 2.4 or higher Glibc 2.2 or higher CUPS 3.3 - Xerox 3300MFP | User Guide - Page 27
up server lists for scanning to an FTP or SMB servers. - Customize printer, copy, and fax settings. • SetIP: Utility program allowing you to select a network interface and manually configure the IP addresses for use with the TCP/IP protocol. See the Software Section. Via the control panel You can - Xerox 3300MFP | User Guide - Page 28
manually by the system administrator. • Dynamic addressing via BOOTP/DHCP (default): A TCP/IP address is assigned automatically by the server. Note Before configuring TCP/IP, you need to set the network protocol to TCP/IP. Static addressing To enter a TCP/IP address from your machine's control panel - Xerox 3300MFP | User Guide - Page 29
to its default settings. 1 Press Menu until Network appears on the bottom line of the display and press Enter. 2 Press the Scroll buttons until Clear Setting appears and press Enter. 3 Press Enter when Yes appears to restore the network configuration. 4 Power the machine off and back on. Printing - Xerox 3300MFP | User Guide - Page 30
corner of the glass. Loading originals You can use the scanner glass or ADF to load an original for copying, scanning, and sending a fax. On the scanner glass Make sure that no originals are in the ADF. If an original is detected in the ADF, the machine gives it priority over the original on the - Xerox 3300MFP | User Guide - Page 31
that it meets the requirements specified in this user guide. Caution Using print media that does not meet these specifications may cause problems, requiring repairs. Such repairs are not covered by Xerox's warranty or service agreements. Note Dust on the ADF glass may cause black lines on the - Xerox 3300MFP | User Guide - Page 32
Supported print media types and sizes Type Plain paper Size Letter Legal Folio Oficio A4 JIS B5 ISO B5 Executive Dimensions 216 mm (6.38 x 9.02 inches) 114 x 162 mm (4.49 x 6.38 inches) Refer to the Plain paper section 138 to 146 g/m2 (37 to 39 lb bond) Labels Letter, Legal, Folio, A4, JIS B5 - Xerox 3300MFP | User Guide - Page 33
conform with the specifications listed on page 5.3. • Attempting to print on damp, curled, wrinkled, or torn paper can cause paper jams and poor print quality. • For the best print quality, use only high quality copier grade paper specifically recommended for use in laser printers. • Avoid using the - Xerox 3300MFP | User Guide - Page 34
not use labels with wrinkles, bubbles, or other indications of separation. • Make sure that there is no exposed adhesive material between labels. Exposed areas can cause labels to peel off during printing, which can cause paper jams. Exposed adhesive can also cause damage to machine components. • Do - Xerox 3300MFP | User Guide - Page 35
the guide lock, and slide the paper length guide to locate it in the correct paper size slot. 2 After loading paper, set the paper type and size for the multipurpose tray. See page 5.8 for copying and faxing or the Software Section for PC-printing. Notes • If you experience problems with paper feed - Xerox 3300MFP | User Guide - Page 36
the paper with the side to be printed on facing up. 5 After loading paper, set the paper type and size for the multipurpose tray. See page 5.8 for copying and faxing or the Software Section for PC-printing. Note The settings made from the printer driver override the settings on the control panel - Xerox 3300MFP | User Guide - Page 37
2 rear cover The printer sends output to the output tray by default. To use the output tray, make sure that the rear cover is closed. Notes • If paper coming out of the output tray has problems, such as excessive curl, try printing to the rear cover. • To avoid paper jams, do not open or close the - Xerox 3300MFP | User Guide - Page 38
from the multi-purpose tray to the rear cover provides a straight paper path. Using the rear cover might improve the output quality with special print media. To use the rear cover, open it by pulling down. Caution The fuser area inside the rear cover of your machine becomes very hot when in use - Xerox 3300MFP | User Guide - Page 39
• Changing the default copy settings • Using special copy features • Copying on both sides of paper • Setting copy timeout Selecting the paper tray After loading the print media for copy output, you must select the paper tray you will use for copy jobs. 1 Press Menu until System Setup appears on the - Xerox 3300MFP | User Guide - Page 40
, original type, copy size, and number of copies, can be set to those most frequently used. When you copy a document, the default settings are used unless they have been changed by using the corresponding buttons on the control panel. 1 Press Copy. 2 Press Menu until Copy Setup appears on the - Xerox 3300MFP | User Guide - Page 41
prints one side of the original on the upper half of the paper and the other side on the lower half without reducing the size of the original. This feature is helpful for copying a small-sized item, such as a name card. This copy feature is available only when you place originals on the scanner - Xerox 3300MFP | User Guide - Page 42
is enabled, the Duplex button is backlit. 4 Start copying a document. Setting copy timeout You can set the time the machine waits before it restores the default copy settings, if you do not start copying after changing them on the control panel. 1 Press Menu until System Setup appears on the bottom - Xerox 3300MFP | User Guide - Page 43
: 1 Click the Windows Start menu. 2 For Windows 2000, select Settings and then Printers. For Windows XP/2003, select Printers and Faxes. For Windows Vista, select Control Panel > Hardware and Sound > Printers. 3 Double-click the Xerox Phaser 3300MFP PCL 6 or Xerox Phaser 3300MFP PS icon. 4 From - Xerox 3300MFP | User Guide - Page 44
, enabling you to control the scanning process. See the next section. • Via the Windows Images Acquisition (WIA) driver. See the Software Section. • To a portable USB memory device, if inserted into the USB memory port on your machine. See page 11.1. Also, you can send scanned images to several - Xerox 3300MFP | User Guide - Page 45
will prompt for a Login. Enter a valid My login ID, Password, and Destination Email. 4 The machine will open the email service. If an invalid set of credentials was entered the Phaser MFP will return Scan. Setting up an e-mail account To scan and send an image as an email attachment, you need to - Xerox 3300MFP | User Guide - Page 46
computer in JPEG, TIFF, or PDF file format. Scanning 1 Make sure that your machine and the computer are connected to a network and Network Scan is running on the computer. 2 Load originals face up into the ADF, or place a single original face down on the scanner glass. For details about loading an - Xerox 3300MFP | User Guide - Page 47
not appear if you have activated the Send To Self option in the email account setup. 8 Enter an email subject and press Enter. 9 Press the Scroll buttons until the file format you want appears and press Enter or Start. The machine begins scanning and then sends the email. 10 If the machine asks if - Xerox 3300MFP | User Guide - Page 48
then send it to an SMB server. You need to set up parameters for access to SMB servers from CentreWare IS. See page 8.3. Before scanning, you can set the scan options for your scan job. See page 8.5. 1 Make sure that your machine is connected to a network. 2 Load originals face up into the ADF or - Xerox 3300MFP | User Guide - Page 49
server port number, from 1 to 65535. The default port number is 389. 6 Click Add. Using Address Book entries To retrieve an email address, use the following ways: Speed email numbers When you are prompted to enter a destination address while sending an email, enter the speed email number at which - Xerox 3300MFP | User Guide - Page 50
of the name associated with the address. Searching sequentially through memory 1 If necessary, press Scan. 2 Press Address Book until Search&Send appears on the bottom line of the display and press Enter. 3 Press the Scroll buttons until the number category you want appears and press Enter. 4 Press - Xerox 3300MFP | User Guide - Page 51
in secure receiving mode • Receiving faxes in memory • Printing received faxes on both sides of paper Other ways to fax • Sending a fax to multiple destinations • Sending a delayed fax • Sending a priority fax • Forwarding faxes • Sending a Fax from a PC Sending a fax Setting the fax header In - Xerox 3300MFP | User Guide - Page 52
only if the machine with which you are communicating supports color fax reception and you send the fax manually. In this mode, memory transmission is not available. Note The resolution setting is applied to the current fax job. To change the default setting, see page 10.2. Darkness You can select - Xerox 3300MFP | User Guide - Page 53
goes wrong while sending your fax, an error message appears on the display. For a list of error messages and their meanings, see page 14.7. If you receive an error message, press Stop/Clear to clear the message and try to send the fax again. You can set your machine to print a confirmation report - Xerox 3300MFP | User Guide - Page 54
Distinctive Ring service must be installed on your telephone line by the telephone company. To set up DRPD, you will need another telephone line at your location, or someone available to dial your fax number from outside. To set up the DRPD mode: 1 Press Fax. 2 Press Menu until Fax Setup appears on - Xerox 3300MFP | User Guide - Page 55
password and press Enter. The mode is deactivated and the machine prints all faxes stored in memory. 4 Press Stop/Clear to return to Standby mode. Receiving faxes in memory Since your machine is a multi-tasking device, it can receive faxes while you are making copies or printing. If you receive - Xerox 3300MFP | User Guide - Page 56
have finished entering fax numbers, select No at the Another No.? prompt and press Enter or Start. The original is scanned into memory before transmission. The display shows memory capacity and the number of pages being stored in memory. 10 If an original is placed on the scanner glass, select Yes - Xerox 3300MFP | User Guide - Page 57
begins sending the fax. Forwarding faxes You can forward your incoming and outgoing faxes to another fax machine or email address. Forwarding sent faxes to another fax machine You can set the machine to send copies of all outgoing faxes to a specified destination, in addition to the fax numbers you - Xerox 3300MFP | User Guide - Page 58
printer. To send a fax from your PC, you need to install the PC-fax software and customize the software setting's. See the Software Section. Installing PC-Fax Software 1 To install the PC-Fax, insert the supplied Xerox Drivers CD. 2 The CD-ROM should automatically run, and the installation window - Xerox 3300MFP | User Guide - Page 59
Programs or All Program → Xerox Phaser 3300MFP → Configure PC Fax. 2 Enter your name and fax number. 4 Select OK. 5 Compose the cover page and click Continue. 3 Select the address book you will use. 4 Select the multi-function printer you will use by choosing Local or Network. 5 If you select - Xerox 3300MFP | User Guide - Page 60
6 Enter the recipients' numbers and click Continue. Remove a Add a new selected Phone entry phone entry 7 Select the resolution and click Send Fax. Your PC begins to send the fax data and multi-function printer sends the fax. 9.10 - Xerox 3300MFP | User Guide - Page 61
machine for receiving and sending faxes. This chapter includes: • Changing the fax setup options • Changing the default document settings • Printing sent fax report automatically • Setting up Phone Book Changing the fax setup options Your machine provides you with various user-selectable options - Xerox 3300MFP | User Guide - Page 62
• Speed buttons • Speed/Group dial numbers Note Before beginning to store fax numbers, make sure that your machine is in Fax mode. Speed buttons The 15 speed buttons on the control panel lets you store frequently-used fax numbers. You will be able to enter a fax number with the touch of a button. By - Xerox 3300MFP | User Guide - Page 63
Enter to confirm the number. Using speed buttons When you are prompted to enter a fax number while sending a fax: • To retrieve a number from speed buttons 1 also search through memory for an entry by pressing Address Book. See page 10.4. Group dial numbers If you frequently send the same document - Xerox 3300MFP | User Guide - Page 64
you need to search for and select it from memory. When you are prompted to enter a fax number while sending a fax, press Address Book. See below. Searching Phone Book for an entry There are two ways to search for a number in memory. You can either scan from A to Z sequentially, or you can search by - Xerox 3300MFP | User Guide - Page 65
memory device: • Scan documents and save them on a USB memory device. • Print data stored on a USB memory device. • Back up Address Book/Phone Book entries and the system settings of your machine. • Restore backup files to the machine's memory. • Format the USB memory device. • Check the available - Xerox 3300MFP | User Guide - Page 66
file, rather than printed on paper. Only PRN files created in this fashion can be printed directly from USB memory. See the Software Section to learn how to create a PRN file. • BMP: BMP Uncompressed • TIFF: TIFF 6.0 Baseline • JPEG: JPEG Baseline • PDF: PDF 1.4 and below To print a document from - Xerox 3300MFP | User Guide - Page 67
a note pad. • 1->2Side Long: Prints pages to be read like a book. 2 3 2 5 1->2Side Long 3 5 1->2Side Short 3 Press Enter to save your selection. If the mode is enabled, the Duplex button is backlit. Backing up data Data in the machine's memory can be accidentally erased due to power failure - Xerox 3300MFP | User Guide - Page 68
. 5 Press the Scroll buttons until Format appears and press Enter. 6 Press Enter when Yes appears to confirm your selection. 7 Press Stop/Clear to return to Standby mode. Viewing the USB memory status You can check the amount of memory space available for scanning and saving documents. 1 Insert the - Xerox 3300MFP | User Guide - Page 69
If you are experiencing frequent paper supply problems, you can attach an additional 250 sheet tray. You can print documents on various sizes and types of print materials. Extends your machine's memory capacity. Part number 097N01693 • 256 MB: 097S03761 Note The Phaser 3300MFP comes with 64 MB of - Xerox 3300MFP | User Guide - Page 70
/List Description Configuration This list shows the status of the user-selectable options. You may print this list to confirm your changes after changing settings. Address Book This list shows all of the fax numbers and email addresses currently stored in the machine's memory. Send Report - Xerox 3300MFP | User Guide - Page 71
. Scan Setup Restores all of the scan options to the factory default. System Setup Restores all of the system options to the factory default. Network Restores all of the network options to the factory default. Address Book Clears all of the fax number and email address entries stored in memory - Xerox 3300MFP | User Guide - Page 72
. 1 Slightly dampen a soft lint-free cloth or paper towel with water. 2 Open the scanner lid. 3 Wipe the surface of the scanner glass and ADF glass until it is clean and dry. 1 3 2 4 5 Reinsert the print cartridge and close the front cover. 6 Plug in the power cord and turn the machine on. 1 white - Xerox 3300MFP | User Guide - Page 73
this area. 4 Hold the print cartridge by the handle and slowly insert the cartridge into the opening in the machine. Tabs on the sides of the cartridge and corresponding grooves within the machine will guide the cartridge into the correct position until it locks into place completely. 5 Close - Xerox 3300MFP | User Guide - Page 74
this area. 5 Hold the print cartridge by the handle and slowly insert the cartridge into the opening in the machine. Tabs on the sides of the cartridge and corresponding grooves within the machine will guide the cartridge into the correct position until it locks into place completely. 6 Close - Xerox 3300MFP | User Guide - Page 75
you bought printer performs this maintenance activity. Checking replaceables If you experience frequent paper jams or printing problems, check the number of pages the machine has printed or scanned. Replace the corresponding parts, if necessary. The following information is available for checking - Xerox 3300MFP | User Guide - Page 76
other network parameters. • Change the printer properties. • Set the machine to send email notifications to let you know the machine's status. • Get support for using the machine. To access CentreWare IS: 1 Start a web browser, such as Internet Explorer, from Windows. 2 Enter the machine IP address - Xerox 3300MFP | User Guide - Page 77
for service or register as a user on the Xerox website, the machine's serial number may be required. You can check the serial number by taking the following steps: 1 Press Menu until System Setup appears on the bottom line of the display and press Enter. 2 Press the Scroll buttons until Maintenance - Xerox 3300MFP | User Guide - Page 78
14 Troubleshooting This chapter gives helpful information for what to do if you encounter an error. This chapter includes: • Clearing document jams • Clearing paper jams • Understanding display messages • Print cartridge-related messages • Solving other problems Clearing document jams When an - Xerox 3300MFP | User Guide - Page 79
/Close Door [Paper Jam 1] Open/Close Door [Paper Jam 2] Check Inside [Duplex Jam 0] Check Inside [Duplex Jam 1] Check Inside Location of jam Go to In the paper feed area (tray 1, optional tray 2, or multipurpose tray) below and page 14.3 In the fuser area or around the page 14.3 print cartridge - Xerox 3300MFP | User Guide - Page 80
the fuser area or around the print cartridge Note The fuser area is hot. Take care when removing paper from the machine. 1 Open the front cover and pull the print cartridge out, lightly pushing it down. 5 Insert the trays back into the machine. Printing automatically resumes. 14.3 - Xerox 3300MFP | User Guide - Page 81
4 If you see the jammed paper, push the pressure lever on each side up and remove the paper. Skip to step 9. 1 3 Replace the print cartridge and close the front cover. Printing automatically resumes. In the paper exit area 1 Open and close the front cover. The jammed paper is automatically ejected - Xerox 3300MFP | User Guide - Page 82
the duplex guide fully. 1 8 Pull the jammed paper out. If the jammed paper does not move when you pull, push the pressure lever on each side up to loosen the paper, and then remove it. 1 1 duplex guide 7 While pushing the fuser lever to the right, open the fuser door. 1 2 1 fuser lever 2 fuser - Xerox 3300MFP | User Guide - Page 83
• If paper jams occur frequently when you print on A5-sized paper: Load the paper into the tray with the long edge facing the front of the tray. 1 1 duplex guide In the printer properties window, set the page orientation to be rotated 90 degrees. See the Software Section. 14.6 - Xerox 3300MFP | User Guide - Page 84
File Name Over Limit File Format Not Supported Fuser Door Open Global Address Not Found Global Query Size Exceeded Meaning Paper has jammed during duplex printing. Paper has jammed during duplex printing. You entered an unavailable item. Login to the network server was successful. However, access - Xerox 3300MFP | User Guide - Page 85
Error Cycle Power LSU Motor Error Cycle Power LSU Hsync Error Cycle Power Main Motor Locked Mail Exceeds Server Support Memory Full MP Tray Paper Empty Network Error [No Answer] Not Assigned [No Paper] Add Paper One Page is Too Large Meaning Suggested solutions There is a problem in the fuser - Xerox 3300MFP | User Guide - Page 86
Over Heat Error Cycle Power Paper Jam 0 Open/Close Door Paper Jam 1 Open/Close Door Paper Jam 2 Check Inside Power Failure Retry Redial? Scanner locked Self Diagnostic LSU Self Diagnostic Temperature Send Error (AUTH) Meaning Suggested solutions There is a problem in the fuser unit. Unplug - Xerox 3300MFP | User Guide - Page 87
is reached. The lifespan of the print cartridge is reached. The lifespan of the print cartridge is reached. Suggested solutions Install a print cartridge. Install a Xerox-genuine print cartridge, designed for your printer. Take out the print cartridge and thoroughly shake it. By doing this - Xerox 3300MFP | User Guide - Page 88
and the power source. Select Xerox Phaser 3300MFP PCL 6 as your default printer in your Windows. Check the machine for the following: • The front cover is not closed. Close the cover. • Paper is jammed. Clear the paper jam. See page 14.2. • No paper is loaded. Load paper. See page 5.5. • The print - Xerox 3300MFP | User Guide - Page 89
in Adobe Illustrator. The setting in the software application is wrong. Select Download as Bit Image in the TrueType Options window of the graphic properties and print the document again. The printer does not print PDF file correctly. Some parts of graphics, text, or illustrations are missing - Xerox 3300MFP | User Guide - Page 90
appears on the page: • The toner supply is low. You may be able to temporarily extend the print cartridge life. See page 13.4. If this does not improve the print quality, install a new print cartridge. • The paper may not meet paper specifications; for example, the paper is too moist or too rough - Xerox 3300MFP | User Guide - Page 91
See page 13.2. • Check the paper type and quality. See page 5.8. • Remove the print cartridge and install a new one. See page 13.4. • If the problem persists, the machine may require service. Contact a service representative. Character voids are white areas within parts of characters that should be - Xerox 3300MFP | User Guide - Page 92
altitude may affect the print quality such as loose toner or light imaging. You can set this option through Printer Settings Utility or Printer tab in printer driver's properties. Refer to the Software Section for details. Copying problems Condition Suggested solutions Copies are too light or - Xerox 3300MFP | User Guide - Page 93
Send image immediately to the specified folder using an associated default application in the Advanced page in the Network Scan program's Properties screen to open the scanned image immediately after scanning. I forgot my ID and PIN. I cannot view the Help file. I cannot use the Xerox Network Scan - Xerox 3300MFP | User Guide - Page 94
line can cause line errors. • Check your machine by making a copy. • The print cartridge may be empty. Replace the print cartridge, referring to page 13.4. Some of the words on an incoming fax are stretched. The fax machine sending you the fax had a temporary document jam. There are lines on - Xerox 3300MFP | User Guide - Page 95
. Common Linux problems Problem The machine does not print Possible Cause and Solution • Check if the printer driver is installed in your system. Open Unified Driver configurator and switch to the Printers tab in Printers configuration window to look at the list of available printers. Make sure - Xerox 3300MFP | User Guide - Page 96
in your system. Open Unified Driver configurator, switch to Scanners configuration, then press Drivers. Make sure that driver with a name corresponding to your machine's name is listed in the window. Check if the port is not busy. Since functional components of MFP (printer and scanner) share the - Xerox 3300MFP | User Guide - Page 97
a document in Macintosh with Acrobat Reader 6.0 or higher, colors prints incorrectly. The resolution setting in the printer driver may not be matched with that in Acrobat Reader. Make sure that the resolution setting in your printer driver matches that in Acrobat Reader. 14.20 - Xerox 3300MFP | User Guide - Page 98
while the power is being supplied. To avoid the possibility of an electrical shock, always disconnect the power cord when installing or removing ANY internal or external accessories. Discharge static electricity The control board and internal accessories (network interface card or memory DIMM) are - Xerox 3300MFP | User Guide - Page 99
the PS printer driver, see the Software Section. 2 Click the Windows Start menu. 3 For Windows 2000, select Settings and then Printers. For Windows XP/2003, select Printers and Faxes. For Windows Vista, select Control Panel > Hardware and Sound > Printers. 4 Select the PS printer. 5 Click the - Xerox 3300MFP | User Guide - Page 100
• Scanner and copier specifications • Printer specifications • Facsimile specifications General specifications Item ADF ADF document size Paper input capacity Paper output capacity Consumables Power rating Power consumption Noise levela Warm-up time Operating environment Display Print cartridge - Xerox 3300MFP | User Guide - Page 101
x 300 (photo using ADF) Print: up to 600 x 600 (text, text/photo, photo) Zoom rate Scanner glass: 25 to 400% ADF: 25 to 100% Multiple copies 1 to 99 pages Grayscale 256 levels a. Copy Speed is based on Single Document Multiple Copy. Facsimile specifications Item Description Compatibility - Xerox 3300MFP | User Guide - Page 102
, special copy 6.4 error messages 14.7 F fax header, set 9.1 Fax mode, receiving mode 9.4 fax number, set 9.1 faxing default settings, change 10.2 delayed faxes 9.6 fax setup 10.1 forwarding faxes 9.7 Multiple Send faxes 9.6 original settings 9.1 priority faxes 9.7 receiving faxes 9.3 sending faxes - Xerox 3300MFP | User Guide - Page 103
6.3 PostScript problems 14.18 power save mode 2.4 printing reports 13.1 USB memory 11.2 priority fax 9.7 problem, solve copying 14.15 error messages 14.7 faxing 14.16 Linux 14.18 Macintosh 14.20 Network Scan 14.16 paper feeding 14.11 PostScript errors 14.18 printing 14.11 scanning 14.16 Windows 14 - Xerox 3300MFP | User Guide - Page 104
Phaser® 3300MFP Multifunction Printer Phaser® 3300MFP Software Section - Xerox 3300MFP | User Guide - Page 105
SECTION CONTENTS Chapter 1: INSTALLING PRINTER SOFTWARE IN WINDOWS Installing Printer Software ...4 Installing Software for Local Printing 4 Installing Software for Network Printing 6 Reinstalling Printer Software ...9 Removing Printer Software ...10 Chapter 2: USING SETIP Installing SetIP - Xerox 3300MFP | User Guide - Page 106
Settings Utility 26 Using Onscreen Help ...26 Opening the Troubleshooting Guide 26 Changing the Status Monitor Program Settings 26 Chapter 8: SCANNING Scanning Process with TWAIN-enabled Software 27 Scanning Using the WIA Driver 27 Windows XP ...27 Windows Vista ...27 Chapter 9: USING YOUR - Xerox 3300MFP | User Guide - Page 107
the Unified Driver Configurator 31 Opening the Unified Driver Configurator 31 Printers Configuration 31 Scanners Configuration 32 Ports Configuration ...32 Configuring Printer Properties 33 Printing a Document ...33 Printing from Applications 33 Printing Files ...34 Scanning a Document ...34 - Xerox 3300MFP | User Guide - Page 108
Windows user's guide or online help. Installing Printer Software You can install the printer software for local printing and/or network printing. To install the printer software on the computer, perform the appropriate installation procedure depending on the printer in use. A printer driver - Xerox 3300MFP | User Guide - Page 109
→ Run, and type X:\Setup.exe. If the AutoPlay window appears in Windows Vista, click Run Setup.exe in Install or run program field, and click Continue in the User Account Control window. 3 Click Install Software. 4 Select Custom installation. Click Next. 5 Installing Printer Software in Windows - Xerox 3300MFP | User Guide - Page 110
the printer is connected to your network and powered on. For details about connecting to the network, see the supplied printer's User Guide. 2 Insert the supplied CD-ROM into your CD-ROM drive. The CD-ROM should automatically run, and an installation window appears. If the installation window does - Xerox 3300MFP | User Guide - Page 111
Software" on page 9. Custom Installation You can choose individual components to install and set a specific IP address. 1 Make sure that the printer is connected to your network and powered on. For details about connecting to the network, see the supplied printer's User Guide. 2 Insert the supplied - Xerox 3300MFP | User Guide - Page 112
, click Start ->Control Panel and start windows firewall, and set this option unactivated. For other operating system, refer to its on-line guide. TIP: If you want to set a specific IP address on a specific network printer, click the Set IP Address button. The Set IP Address window appears. Do as - Xerox 3300MFP | User Guide - Page 113
Windows. 2 From the Start menu select Programs or All Programs → your printer driver name → Maintenance. 3 Select Repair and click Next. • If you do not see your printer on the list, click Update to refresh the list, or select Add TCP/IP Port to add your printer to the network. To add the printer - Xerox 3300MFP | User Guide - Page 114
b. If the test page prints out correctly, click Yes. If it doesn't, click No to reprint it. 6 When the reinstallation is done, click Finish. Removing Printer Software 1 Start Windows. 2 From the Start menu select Programs or All Programs → your printer driver name → Maintenance. 3 Select Remove and - Xerox 3300MFP | User Guide - Page 115
1 Make sure that the printer is connected to your computer and powered on. 2 Insert the supplied CD-ROM into your CD-ROM drive. The CD-ROM should automatically run, and an installation window appears. If the installation window does not appear, click Start and then Run. Type X:\Setup.exe, replacing - Xerox 3300MFP | User Guide - Page 116
the MAC address, see the NETWORK PRINTER CARD TEST PAGE. The NETWORK PRINTER CARD TEST PAGE will be printed after the Configuration Page. • The refreshed list doesn't show your printer, click enter your network printer card's Mac address, IP address, subnet mask, default gateway, and then click - Xerox 3300MFP | User Guide - Page 117
are selected within the Print window. These settings include the number of copies and print range. Make sure that your printer is selected. 3 Select your printer driver from the Name drop-down list. To take advantage of the printer features provided by your printer driver, click Properties or - Xerox 3300MFP | User Guide - Page 118
, you can review and change the settings needed for your print job. The printer properties window may differ, depending on your operating system. This Software User Guide shows the Properties window for Windows XP. The printer driver Properties window that appears in this User Guide may differ - Xerox 3300MFP | User Guide - Page 119
page 20 Double-sided Printing Double-sided Printing allows you to print on both sides of paper. If this option does not appear, your printer does not have this feature. • For details, see "Printing on Both Sides of Paper" on page 21. 1 Copies Copies allows you to choose the number of copies to be - Xerox 3300MFP | User Guide - Page 120
printers do not support this feature. • Printer Setting: If you select this option, this feature is determined by the setting you've made on the control panel of the printer. • Normal: This setting is for normal documents. • Text Enhancement: Image Mode allows the user to enhance printouts. Toner - Xerox 3300MFP | User Guide - Page 121
. Select the print order from the drop-down list. - Normal: Your printer prints all pages from the first page to the last page. - Reverse All Pages(3,2,1): Your printer prints all pages from the last page to the first page. - Print Odd Pages: Your printer prints only the odd numbered pages of the - Xerox 3300MFP | User Guide - Page 122
the Favorites drop down list. The printer is now set to print according to the Favorites setting you selected. To delete a Favorites item, select it from the list and click Delete. You can also restore the printer driver's default settings by selecting Printer Default from the list. Using Help Your - Xerox 3300MFP | User Guide - Page 123
advanced printing tasks. NOTE: • The printer driver Properties window that appears in this User Guide may differ depending on the printer in use. However the composition of the printer properties window is similar. • If you need to know the exact name of your printer, you can check the supplied CD - Xerox 3300MFP | User Guide - Page 124
to form one poster-size document. 1 To change the print settings from your software application, access printer properties. See "Printing a Document" on page 13. 2 Click the Layout tab, select Poster Printing in the Layout Type drop-down list. 3 Configure the poster option: You can select the page - Xerox 3300MFP | User Guide - Page 125
paper source, size, and type. 5 Click OK and print the document. NOTE: If your printer does not have a duplex unit, you should complete the printing job manually. The printer prints every other page of the document first. After printing the first side of your job, the Printing Tip window appears - Xerox 3300MFP | User Guide - Page 126
the Current Watermarks list and change the watermark message and options. 4 Click Update to save the changes. 5 Click OK until you exit the Print window. Deleting a Watermark 1 To change the print settings from your software application, access printer properties. See "Printing a Document" on page - Xerox 3300MFP | User Guide - Page 127
the file when you access the Load Overlay window. After you select the file, click Open. The file appears in the Overlay List box and is available for printing. Select the overlay from the Overlay List box. 6 If necessary, click Confirm Page Overlay When Printing. If this box is checked, a message - Xerox 3300MFP | User Guide - Page 128
, you can review and change the settings needed for your print job. Your printer properties window may differ, depending on your operating system. This software user guide shows the Properties window for Windows XP. Your printer driver Properties window that appears in this User's Guide may differ - Xerox 3300MFP | User Guide - Page 129
section of Printer Specifications in your Printer User Guide. • If you need to know the exact name of your printer, you can check the supplied CD-ROM. Setting Up a Host Computer 1 Start Windows. 2 From the Start menu select Printers and Faxes. 3 Double-click your printer driver icon. 4 From - Xerox 3300MFP | User Guide - Page 130
Applications If an error occurs while printing, the Status Monitor window appears, showing the error. NOTES: • To use the this program, you need: - To check for Operating System(s) that are compatible with your printer, refer to Printer Specifications in your Printer User Guide. - Internet Explorer - Xerox 3300MFP | User Guide - Page 131
face up into the DADF (or ADF). 2 Click Start → Control Panel → Hardware and Sound → Scanners and Cameras. 3 Click on Scan a document or picture. Then Windows Fax and Scan application is opened automatically. NOTE: • To view scanners, user can click on View scanners and cameras. • If there is not - Xerox 3300MFP | User Guide - Page 132
NOTE: If you want to cancel the scan job, press the Cancel button on the Scanner and Camera Wizard. 28 Scanning - Xerox 3300MFP | User Guide - Page 133
computer. Xerox's Unified Linux Driver package contains printer and scanner drivers, providing the ability to print documents and scan images. The package also delivers powerful applications for configuring your machine and further processing of the scanned documents. After the driver is installed - Xerox 3300MFP | User Guide - Page 134
Linux Driver 1 When the Administrator Login window appears, type in root in the Login field and enter the system password. NOTE: You must log in as a super user (root) to install the printer software. If you are not a super user, ask your system administrator. 2 Insert the printer software CD - Xerox 3300MFP | User Guide - Page 135
left side of the Unified Driver Configurator window. Switches to Printer configuration. Shows all of the installed printer. Shows the status, model name and URI of your printer. You can use the following printer control buttons: • Refresh: renews the available printers list. • Add Printer: allows - Xerox 3300MFP | User Guide - Page 136
class. • Remove Class : Removes the selected printer class. Scanners Configuration In this window, you can monitor the activity of scanner devices, view a list of installed Xerox MFP devices, change device properties, and scan images. Switches to Scanners configuration. Shows all of the installed - Xerox 3300MFP | User Guide - Page 137
for your machine as a printer. 1 Open the Unified Driver Configurator. If necessary, switch to Printers configuration. 2 Select your machine on the available printers list and click Properties. 3 The Printer Properties window opens. Printing a Document Printing from Applications There are a lot - Xerox 3300MFP | User Guide - Page 138
the LPR GUI window, select your printer from the list, and change the printer and print job properties. For details about the properties window, see page 33. 3 Click OK to start printing. Scanning a Document You can scan a document using the Unified Driver Configurator window. 1 Double-click the - Xerox 3300MFP | User Guide - Page 139
job: 1 Select the setting you want to use from the Job Type drop- down list. 2 Click Save. The next time you open the Scanner Properties window, the saved setting is automatically selected for the scan job. To delete a Job Type setting: 1 Select the setting you want to delete from the Job Type drop - Xerox 3300MFP | User Guide - Page 140
Allows you to scale the image size; you can enter the size manually, or set the rate to scale proportionally, vertically, or horizontally. Allows you to rotate the image; you can select the number of degrees from the dropdown list. Allows you to flip the image vertically or horizontally. Allows you - Xerox 3300MFP | User Guide - Page 141
do not support a network interface. Make sure that your printer supports a network interface by referring to Printer Specifications in your Printer User Guide. This chapter includes: • Installing Software for Macintosh • Setting Up the Printer • Printing • Scanning Installing Software for Macintosh - Xerox 3300MFP | User Guide - Page 142
your printer, make sure that your printer supports a network interface by referring to Printer Specifications in your Printer User Guide. 1 Follow the instructions on "Installing Software for Macintosh" on page 37 to install the PPD file on your computer. 2 Open Print Center or Printer Setup Utility - Xerox 3300MFP | User Guide - Page 143
the Applications folder, and click Print & Fax. 2 Select your printer model name. 3 Click Show Info. •For MAC OS 10.5, click Options & Supplies... 4 Select Installable Options tab. •For MAC OS 10.5, Select Driver tab. 5 Configure each items in Installable Options window. •Tray n: If the machine have - Xerox 3300MFP | User Guide - Page 144
in this User's Guide may differ depending on the printer in use. However the composition of the printer properties window is similar. • You can check your printer name in the supplied CDROM. Printing a Document When you print with a Macintosh, you need to check the printer software setting in - Xerox 3300MFP | User Guide - Page 145
of paper on the Pages per Sheet drop-down list. 4 Select the page order from the Layout Direction option. To print a border around each page on the sheet, select the option you want from the Border drop-down list. 5 Click Print, and the printer prints the selected number of pages on one side of - Xerox 3300MFP | User Guide - Page 146
OS 10.4 3 Select a binding orientation from Two Sided Printing option. 4 Click Print and the printer prints on both sides of the paper. CAUTION: If you have selected duplex printing and then try to print multiple copies of a document, the printer may not print the document in the way you want. In - Xerox 3300MFP | User Guide - Page 147
printer driver Windows 4 installing Linux software 29 printer software Macintosh 37 L Layout properties, set Macintosh 40 Windows 15 Linux driver, install 29 printer properties 33 printing 33 scanning 34 M Macintosh driver install 37 printing 40 scanning 42 setting up the printer 38 MFP driver - Xerox 3300MFP | User Guide - Page 148
install Macintosh 37 Windows 4 reinstall Windows 9 system requirements Macintosh 37 uninstall Windows 10 status monitor 26 T toner save, set 16, 41 TWAIN, scan 27 U uninstall, software Windows 10 uninstalling MFP driver Linux 30 W watermark create 22 delete 22 edit 22 print 22 WIA, scan 27 44 Rev
-
 1
1 -
 2
2 -
 3
3 -
 4
4 -
 5
5 -
 6
6 -
 7
7 -
8
-
9
-
10
-
11
-
12
-
13
-
14
-
15
-
16
-
17
-
18
-
19
-
20
-
21
-
22
-
23
-
24
-
25
-
26
-
27
-
28
-
29
-
30
-
31
-
32
-
33
-
34
-
35
-
36
-
37
-
38
-
39
-
40
-
41
-
42
-
43
-
44
-
45
-
46
-
47
-
48
-
49
-
50
-
51
-
52
-
53
-
54
-
55
-
56
-
57
-
58
-
59
-
60
-
61
-
62
-
63
-
64
-
65
-
66
-
67
-
68
-
69
-
70
-
71
-
72
-
73
-
74
-
75
-
76
-
77
-
78
-
79
-
80
-
81
-
82
-
83
-
84
-
85
-
86
-
87
-
88
-
89
-
90
-
91
-
92
-
93
-
94
-
95
-
96
-
97
-
98
-
99
-
100
-
101
-
102
-
103
-
104
-
105
-
106
-
107
-
108
-
109
-
110
-
111
-
112
-
113
-
114
-
115
-
116
-
117
-
118
-
119
-
120
-
121
-
122
-
123
-
124
-
125
-
126
-
127
-
128
-
129
-
130
-
131
-
132
-
133
-
134
-
135
-
136
-
137
-
138
-
139
-
140
-
141
-
142
-
143
-
144
-
145
-
146
-
147
-
148
 |
 |

Phaser
®
3300MFP
User Guide
Phaser
®
3300MFP
Multifunction Printer