Xerox 3300MFP User Guide - Page 72
Cleaning the scan unit, Maintaining the print cartridge - warranty
 |
UPC - 095205744415
View all Xerox 3300MFP manuals
Add to My Manuals
Save this manual to your list of manuals |
Page 72 highlights
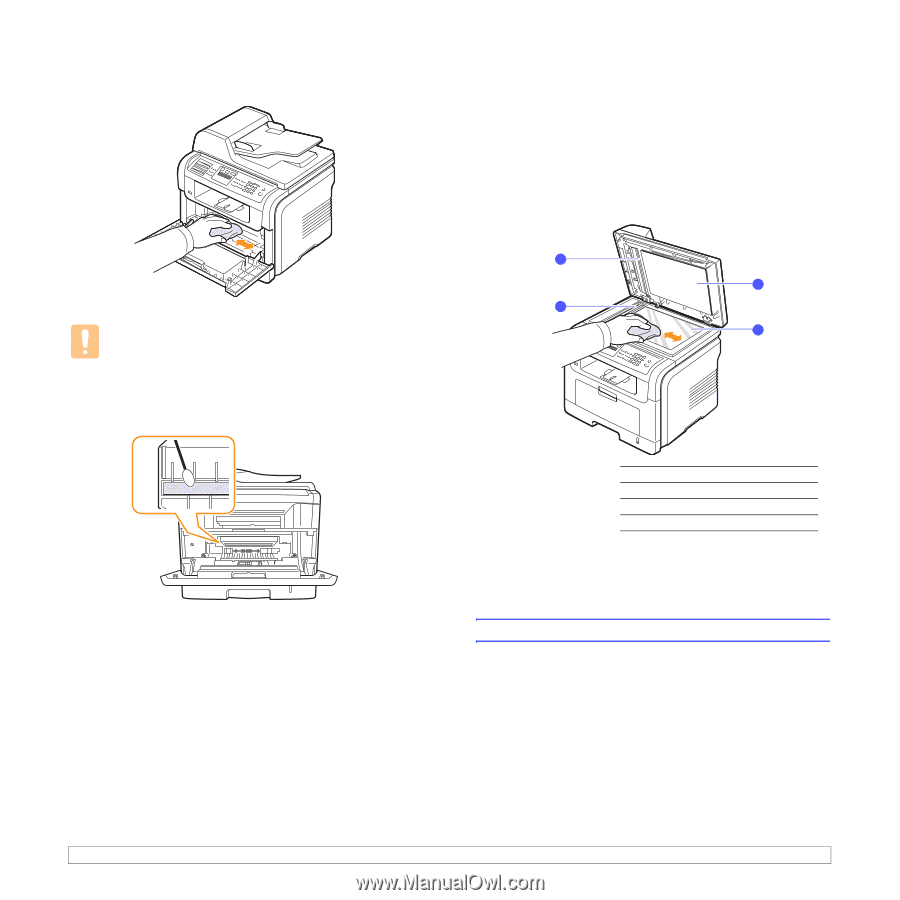
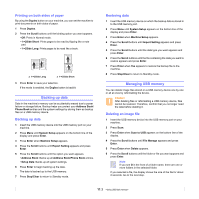
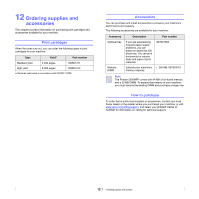
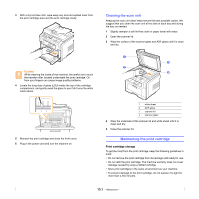
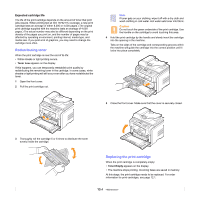
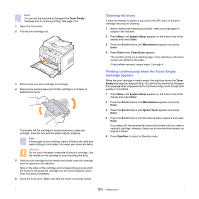
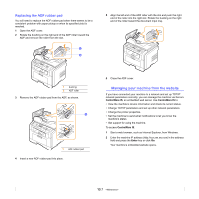
3 With a dry lint-free cloth, wipe away any dust and spilled toner from the print cartridge area and the print cartridge cavity. Caution While cleaning the inside of the machine, be careful not to touch the transfer roller, located underneath the print cartridge. Oil from your fingers can cause image quality problems. 4 Locate the long strip of glass (LSU) inside the top of the cartridge compartment, and gently swab the glass to see if dirt turns the white cotton black. Cleaning the scan unit Keeping the scan unit clean helps ensure the best possible copies. We suggest that you clean the scan unit at the start of each day and during the day, as needed. 1 Slightly dampen a soft lint-free cloth or paper towel with water. 2 Open the scanner lid. 3 Wipe the surface of the scanner glass and ADF glass until it is clean and dry. 1 3 2 4 5 Reinsert the print cartridge and close the front cover. 6 Plug in the power cord and turn the machine on. 1 white sheet 2 ADF glass 3 scanner lid 4 scanner glass 4 Wipe the underside of the scanner lid and white sheet until it is clean and dry. 5 Close the scanner lid. Maintaining the print cartridge Print cartridge storage To get the most from the print cartridge, keep the following guidelines in mind: • Do not remove the print cartridge from its package until ready for use. • Do not refill the print cartridge. The machine warranty does not cover damage caused by using a refilled cartridge. • Store print cartridges in the same environment as your machine. • To prevent damage to the print cartridge, do not expose it to light for more than a few minutes. 13.3
-
 1
1 -
2
-
3
-
4
-
5
-
6
-
7
-
8
-
9
-
10
-
11
-
12
-
13
-
14
-
15
-
16
-
17
-
18
-
19
-
20
-
21
-
22
-
23
-
24
-
25
-
26
-
27
-
28
-
29
-
30
-
31
-
32
-
33
-
34
-
35
-
36
-
37
-
38
-
39
-
40
-
41
-
42
-
43
-
44
-
45
-
46
-
47
-
48
-
49
-
50
-
51
-
52
-
53
-
54
-
55
-
56
-
57
-
58
-
59
-
60
-
61
-
62
-
63
-
64
-
65
-
66
-
 67
67 -
 68
68 -
 69
69 -
 70
70 -
 71
71 -
 72
72 -
 73
73 -
 74
74 -
 75
75 -
 76
76 -
 77
77 -
78
-
79
-
80
-
81
-
82
-
83
-
84
-
85
-
86
-
87
-
88
-
89
-
90
-
91
-
92
-
93
-
94
-
95
-
96
-
97
-
98
-
99
-
100
-
101
-
102
-
103
-
104
-
105
-
106
-
107
-
108
-
109
-
110
-
111
-
112
-
113
-
114
-
115
-
116
-
117
-
118
-
119
-
120
-
121
-
122
-
123
-
124
-
125
-
126
-
127
-
128
-
129
-
130
-
131
-
132
-
133
-
134
-
135
-
136
-
137
-
138
-
139
-
140
-
141
-
142
-
143
-
144
-
145
-
146
-
147
-
148
 |
 |