Xerox 3300MFP User Guide - Page 76
Replacing the ADF rubber pad, Managing your machine from the website - rollers
 |
UPC - 095205744415
View all Xerox 3300MFP manuals
Add to My Manuals
Save this manual to your list of manuals |
Page 76 highlights
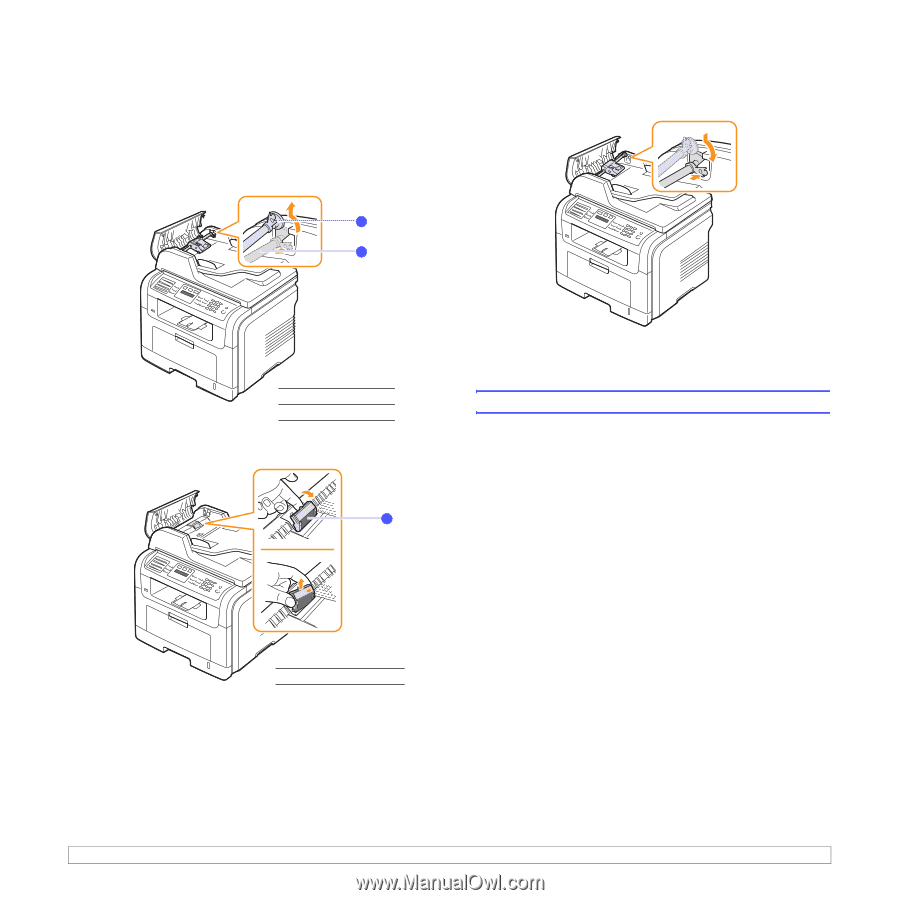
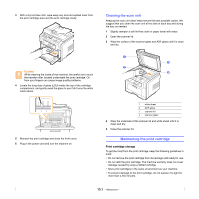
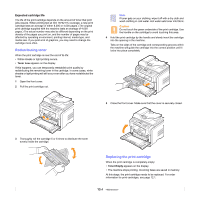
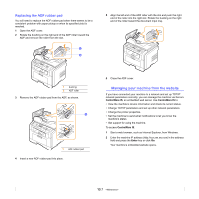
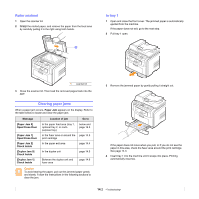
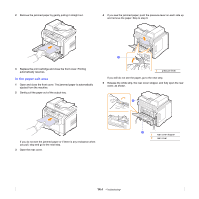
Replacing the ADF rubber pad You will need to replace the ADF rubber pad when there seems to be a consistent problem with paper pickup or when its specified yield is reached. 1 Open the ADF cover. 2 Rotate the bushing on the right end of the ADF roller toward the ADF and remove the roller from the slot. 1 2 5 Align the left end of the ADF roller with the slot and push the right end of the roller into the right slot. Rotate the bushing on the right end of the roller toward the document input tray. 1 bushing 2 ADF roller 3 Remove the ADF rubber pad from the ADF, as shown. 1 1 ADF rubber pad 4 Insert a new ADF rubber pad into place. 6 Close the ADF cover. Managing your machine from the website If you have connected your machine to a network and set up TCP/IP network parameters correctly, you can manage the machine via Xerox's CentreWare IS, an embedded web server. Use CentreWare IS to: • View the machine's device information and check its current status. • Change TCP/IP parameters and set up other network parameters. • Change the printer properties. • Set the machine to send email notifications to let you know the machine's status. • Get support for using the machine. To access CentreWare IS: 1 Start a web browser, such as Internet Explorer, from Windows. 2 Enter the machine IP address (http://xxx.xxx.xxx.xxx) in the address field and press the Enter key or click Go. Your machine's embedded website opens. 13.7
-
 1
1 -
2
-
3
-
4
-
5
-
6
-
7
-
8
-
9
-
10
-
11
-
12
-
13
-
14
-
15
-
16
-
17
-
18
-
19
-
20
-
21
-
22
-
23
-
24
-
25
-
26
-
27
-
28
-
29
-
30
-
31
-
32
-
33
-
34
-
35
-
36
-
37
-
38
-
39
-
40
-
41
-
42
-
43
-
44
-
45
-
46
-
47
-
48
-
49
-
50
-
51
-
52
-
53
-
54
-
55
-
56
-
57
-
58
-
59
-
60
-
61
-
62
-
63
-
64
-
65
-
66
-
67
-
68
-
69
-
70
-
 71
71 -
 72
72 -
 73
73 -
 74
74 -
 75
75 -
 76
76 -
 77
77 -
 78
78 -
 79
79 -
 80
80 -
 81
81 -
82
-
83
-
84
-
85
-
86
-
87
-
88
-
89
-
90
-
91
-
92
-
93
-
94
-
95
-
96
-
97
-
98
-
99
-
100
-
101
-
102
-
103
-
104
-
105
-
106
-
107
-
108
-
109
-
110
-
111
-
112
-
113
-
114
-
115
-
116
-
117
-
118
-
119
-
120
-
121
-
122
-
123
-
124
-
125
-
126
-
127
-
128
-
129
-
130
-
131
-
132
-
133
-
134
-
135
-
136
-
137
-
138
-
139
-
140
-
141
-
142
-
143
-
144
-
145
-
146
-
147
-
148
 |
 |