Xerox 3300MFP User Guide - Page 64
Searching Phone Book for an entry, Deleting a Phone Book entry, Printing Phone Book, Scroll
 |
UPC - 095205744415
View all Xerox 3300MFP manuals
Add to My Manuals
Save this manual to your list of manuals |
Page 64 highlights
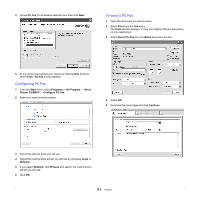
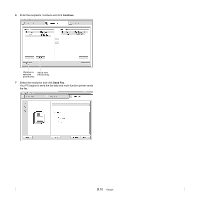
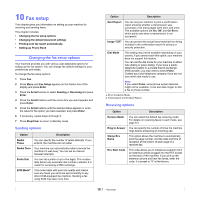
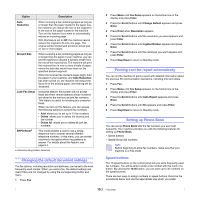
8 When you have finished, press the Scroll buttons to select No at the Another No.? prompt and press Enter. 9 Press Stop/Clear to return to Standby mode. Editing a group dial number You can delete a specific entry from a group or add a new number to the selected group. 1 Press Address Book until New&Edit appears on the bottom line of the display and press Enter. 2 Press the Scroll buttons until Group Dial appears and press Enter. 3 Enter the group dial number you want to edit and press Enter. 4 Enter the speed dial number you want to add or delete and press Enter. If you entered a new speed dial number, Add? appears. If you enter a speed dial number stored in the group, Delete? appears. 5 Press Enter to add or delete the number. 6 Press Enter when Yes appears to add or delete more numbers and repeat from step 4. 7 When you have finished, press the Scroll buttons to select No at the Another No.? prompt and press Enter. 8 Press Stop/Clear to return to Standby mode. Using group dial numbers To use a group dial entry, you need to search for and select it from memory. When you are prompted to enter a fax number while sending a fax, press Address Book. See below. Searching Phone Book for an entry There are two ways to search for a number in memory. You can either scan from A to Z sequentially, or you can search by entering the first letters of the name associated with the number. Searching sequentially through the memory 1 If necessary, press Fax. 2 Press Address Book until Search&Dial appears on the bottom line of the display and press Enter. 3 Press the Scroll buttons until the number category you want appears and press Enter. 4 Press Enter when All appears. 5 Press the Scroll buttons until the name and number you want appears. You can search upwards or downwards through the entire memory in alphabetical order. Searching with a particular first letter 1 If necessary, press Fax. 2 Press Address Book until Search&Dial appears on the bottom line of the display and press Enter. 3 Press the Scroll buttons until the number category you want appears and press Enter. 4 Press the Scroll buttons until ID appears and press Enter. 5 Enter the first few letters of the name you want and press Enter. 6 Press the Scroll buttons until the name you want appears and press Enter. Deleting a Phone Book entry You can delete entries in Phone Book one by one. 1 Press Address Book until Delete appears on the bottom line of the display and press Enter. 2 Press the Scroll buttons until the number category you want appears and press Enter. 3 Press the Scroll buttons until the searching method you want appears and press Enter. Select Search All to search for an entry by scanning through all entries in Phone Book. Select Search ID to search for an entry by the first few letters of the name. 4 Press the Scroll buttons until the name you want appears and press Enter. Or, enter the first letters and press Enter. Press the Scroll buttons until the name you want appears and press Enter. 5 Press Enter. 6 Press Enter when Yes appears to confirm the deletion. 7 Press Stop/Clear to return to Standby mode. Printing Phone Book You can check your Phone Book settings by printing a list. 1 Press Address Book until Print appears on the bottom line of the display. 2 Press Enter. A list showing your speed button settings, and speed dial and group dial entries prints out. 10.4
-
 1
1 -
2
-
3
-
4
-
5
-
6
-
7
-
8
-
9
-
10
-
11
-
12
-
13
-
14
-
15
-
16
-
17
-
18
-
19
-
20
-
21
-
22
-
23
-
24
-
25
-
26
-
27
-
28
-
29
-
30
-
31
-
32
-
33
-
34
-
35
-
36
-
37
-
38
-
39
-
40
-
41
-
42
-
43
-
44
-
45
-
46
-
47
-
48
-
49
-
50
-
51
-
52
-
53
-
54
-
55
-
56
-
57
-
58
-
 59
59 -
 60
60 -
 61
61 -
 62
62 -
 63
63 -
 64
64 -
 65
65 -
 66
66 -
 67
67 -
 68
68 -
 69
69 -
70
-
71
-
72
-
73
-
74
-
75
-
76
-
77
-
78
-
79
-
80
-
81
-
82
-
83
-
84
-
85
-
86
-
87
-
88
-
89
-
90
-
91
-
92
-
93
-
94
-
95
-
96
-
97
-
98
-
99
-
100
-
101
-
102
-
103
-
104
-
105
-
106
-
107
-
108
-
109
-
110
-
111
-
112
-
113
-
114
-
115
-
116
-
117
-
118
-
119
-
120
-
121
-
122
-
123
-
124
-
125
-
126
-
127
-
128
-
129
-
130
-
131
-
132
-
133
-
134
-
135
-
136
-
137
-
138
-
139
-
140
-
141
-
142
-
143
-
144
-
145
-
146
-
147
-
148
 |
 |