Xerox 3300MFP User Guide - Page 75
Clearing the Toner Empty Replace Toner message, Maintenance Parts, Checking replaceables - roller
 |
UPC - 095205744415
View all Xerox 3300MFP manuals
Add to My Manuals
Save this manual to your list of manuals |
Page 75 highlights
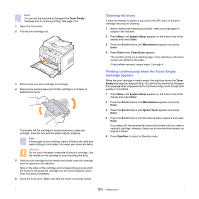
Clearing the Toner Empty Replace Toner message When the Toner Empty Replace Toner message appears you can configure not to see this message again not to disturb you. 1 Press Menu until System Setup appears on the bottom line of the display and press Enter. 2 Press the Scroll buttons until Maintenance appears and press Enter. 3 Press the Scroll buttons until CLR Empty Msg. appears and press Enter. 4 Select On and press Enter. 5 Now the Toner Empty Replace Toner message does not appear but the Replace Toner message will remain for reminding you that the new cartridge needs to be installed for quality. Caution Once you have selected On, this setting will be permanently written to the memory of the print cartridge, and this menu will be removed from the Maintenance menu. Maintenance Parts To avoid print quality and paper feed problems resulting from worn parts and to maintain your printer in top working condition the following items will need to be replaced at the specified number of pages or when the life span of each item has expired. Items ADF rubber pad Transfer roller Fuser unit Tray rubber pad Pickup roller Yield (Average) Approx. 20,000 pages Approx. 70,000 pages Approx. 80,000 pages Approx. 250,000 pages Approx. 150,000 pages Xerox highly recommends that an authorized service provider, dealer or the retailer where you bought printer performs this maintenance activity. Checking replaceables If you experience frequent paper jams or printing problems, check the number of pages the machine has printed or scanned. Replace the corresponding parts, if necessary. The following information is available for checking the replaceable elements of your machine: • Total: displays the total number of pages printed. • Toner: displays how much toner remains in the cartridge. • Drum: displays the number of pages printed. • Platen Scan: displays the number of pages scanned using the scanner glass. Note While the following messages are appearing on the display, the sub-menu(s) under Supplies Life can be changed: - Invalid Toner - NonGenuine Toner - Replace Toner - Toner Exhausted To check the replaceables: 1 Press Menu until System Setup appears on the bottom line of the display and press Enter. 2 Press the Scroll buttons until Maintenance appears and press Enter. 3 Press the Scroll buttons until Supplies Life appears and press Enter. 4 Press the Scroll buttons until the item you want appears and press Enter. 5 If you selected to print a supply information page, press Enter to confirm. 6 Press Stop/Clear to return to Standby mode. 13.6
-
 1
1 -
2
-
3
-
4
-
5
-
6
-
7
-
8
-
9
-
10
-
11
-
12
-
13
-
14
-
15
-
16
-
17
-
18
-
19
-
20
-
21
-
22
-
23
-
24
-
25
-
26
-
27
-
28
-
29
-
30
-
31
-
32
-
33
-
34
-
35
-
36
-
37
-
38
-
39
-
40
-
41
-
42
-
43
-
44
-
45
-
46
-
47
-
48
-
49
-
50
-
51
-
52
-
53
-
54
-
55
-
56
-
57
-
58
-
59
-
60
-
61
-
62
-
63
-
64
-
65
-
66
-
67
-
68
-
69
-
 70
70 -
 71
71 -
 72
72 -
 73
73 -
 74
74 -
 75
75 -
 76
76 -
 77
77 -
 78
78 -
 79
79 -
 80
80 -
81
-
82
-
83
-
84
-
85
-
86
-
87
-
88
-
89
-
90
-
91
-
92
-
93
-
94
-
95
-
96
-
97
-
98
-
99
-
100
-
101
-
102
-
103
-
104
-
105
-
106
-
107
-
108
-
109
-
110
-
111
-
112
-
113
-
114
-
115
-
116
-
117
-
118
-
119
-
120
-
121
-
122
-
123
-
124
-
125
-
126
-
127
-
128
-
129
-
130
-
131
-
132
-
133
-
134
-
135
-
136
-
137
-
138
-
139
-
140
-
141
-
142
-
143
-
144
-
145
-
146
-
147
-
148
 |
 |