Xerox 8560MFP Advanced Features Guide - Page 43
Printer Name or IP Address, Windows XP or Windows Server 2003 - windows 7 driver
 |
UPC - 095205428841
View all Xerox 8560MFP manuals
Add to My Manuals
Save this manual to your list of manuals |
Page 43 highlights
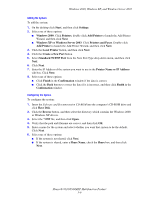
Windows 2000, Windows XP, and Windows Server 2003 Adding the System To add the system: 1. On the desktop click Start, and then click Settings. 2. Select one of these options: ■ Windows 2000: Click Printers, double-click Add Printer to launch the Add Printer Wizard, and then click Next. ■ Windows XP or Windows Server 2003: Click Printers and Faxes. Double-click Add Printer to launch the Add Printer Wizard, and then click Next. 3. Click the Local Printer button, and then click Next. 4. Click the Create a New Port button. 5. Select Standard TCP/IP Port from the New Port Type drop-down menu, and then click Next. 6. Click Next. 7. Enter the IP Address of the system you want to use in the Printer Name or IP Address edit box. Click Next. 8. Select one of these options: ■ Click Finish in the Confirmation window if the data is correct. ■ Click the Back button to correct the data if it is incorrect, and then click Finish in the Confirmation window. Configuring the System To configure the system: 1. Insert the Software and Documentation CD-ROM into the computer's CD-ROM drive and click Have Disk. 2. Click the Browse button, and then select the directory which contains the Windows 2000 or Windows XP drivers. 3. Select the *.INF file, and then click Open. 4. Verify that the path and filename are correct, and then click OK. 5. Enter a name for the system and select whether you want that system to be the default. Click Next. 6. Select one of these options: ■ If the system is not shared, click Next. ■ If the system is shared, enter a Share Name, check the Share box, and then click Next. Phaser® 8510/8560MFP Multifunction Product 3-6
-
 1
1 -
2
-
3
-
4
-
5
-
6
-
7
-
8
-
9
-
10
-
11
-
12
-
13
-
14
-
15
-
16
-
17
-
18
-
19
-
20
-
21
-
22
-
23
-
24
-
25
-
26
-
27
-
28
-
29
-
30
-
31
-
32
-
33
-
34
-
35
-
36
-
37
-
 38
38 -
 39
39 -
 40
40 -
 41
41 -
 42
42 -
 43
43 -
 44
44 -
 45
45 -
 46
46 -
 47
47 -
 48
48 -
49
-
50
-
51
-
52
-
53
-
54
-
55
-
56
-
57
-
58
-
59
-
60
-
61
-
62
-
63
-
64
-
65
-
66
-
67
-
68
-
69
-
70
-
71
-
72
-
73
-
74
-
75
-
76
-
77
-
78
-
79
-
80
-
81
-
82
-
83
-
84
-
85
-
86
-
87
-
88
-
89
-
90
-
91
-
92
-
93
-
94
-
95
-
96
-
97
-
98
-
99
-
100
 |
 |
