Xerox 8560MFP Advanced Features Guide - Page 44
Microsoft IPP Port, Completing the Add Printer Wizard, Finish, Address, Properties, Protocols, Start - test
 |
UPC - 095205428841
View all Xerox 8560MFP manuals
Add to My Manuals
Save this manual to your list of manuals |
Page 44 highlights
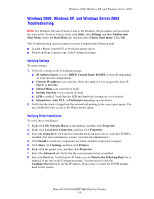
Windows 2000, Windows XP, and Windows Server 2003 Printing a Test Page You are prompted to print a test page. 1. Select one of these options: ■ Click Yes to print a test page, and then click Next. ■ Click No if you do not want to print a test page, and then click Next. 2. Select one of these options in the Completing the Add Printer Wizard screen: ■ Click the Finish button if the data presented is correct. Proceed to Step 3. ■ Click the Back button to correct the data if incorrect, and then click Finish in the Add Printer Wizard when the data is correct. Proceed to Step 3. 3. If you printed a test page, you are prompted to confirm that the test page printed: ■ Click Yes if the test page printed successfully. ■ Click No if the test page did not print or printed incorrectly. See also: Windows 2000, Windows XP, and Windows Server 2003 Troubleshooting on page 3-9 Microsoft IPP Port Follow these steps to obtain the system's URL and create an Internet Printing Protocol (IPP) system. Obtaining the System's URL (Network Path) To obtain the system's URL: 1. Launch your web browser. 2. Enter your system's IP address in the browser's Address field (http://xxx.xxx.xxx.xxx). 3. Select Properties. 4. Select the Protocols folder on the left sidebar. 5. Select IPP. The Network Path field on the IPP Settings page displays the system's URL. Creating an IPP System To create an IPP system: 1. On the desktop, click Start, click Settings, and then click Printers. 2. Double-click Add Printer to launch the Microsoft Add Printer Wizard. 3. Select Network Printer, and then click Next. 4. When prompted for Network Path (Windows 9x) or URL (Windows NT, Windows 2000, Windows XP), enter the system's URL in the following format: http://printer-ip-address/ipp Note: Substitute your system's IP address or DNS name for printer-ip-address. 5. Click Next. Phaser® 8510/8560MFP Multifunction Product 3-7
-
 1
1 -
2
-
3
-
4
-
5
-
6
-
7
-
8
-
9
-
10
-
11
-
12
-
13
-
14
-
15
-
16
-
17
-
18
-
19
-
20
-
21
-
22
-
23
-
24
-
25
-
26
-
27
-
28
-
29
-
30
-
31
-
32
-
33
-
34
-
35
-
36
-
37
-
38
-
 39
39 -
 40
40 -
 41
41 -
 42
42 -
 43
43 -
 44
44 -
 45
45 -
 46
46 -
 47
47 -
 48
48 -
 49
49 -
50
-
51
-
52
-
53
-
54
-
55
-
56
-
57
-
58
-
59
-
60
-
61
-
62
-
63
-
64
-
65
-
66
-
67
-
68
-
69
-
70
-
71
-
72
-
73
-
74
-
75
-
76
-
77
-
78
-
79
-
80
-
81
-
82
-
83
-
84
-
85
-
86
-
87
-
88
-
89
-
90
-
91
-
92
-
93
-
94
-
95
-
96
-
97
-
98
-
99
-
100
 |
 |
