Alesis iO Mix Reference Manual - Page 34
Adjust latency by changing the buffer, Choose a Buffer Mode
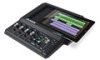 |
View all Alesis iO Mix manuals
Add to My Manuals
Save this manual to your list of manuals |
Page 34 highlights
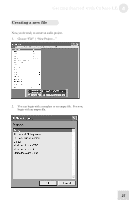
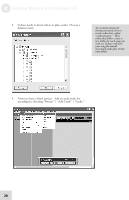
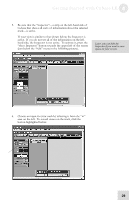
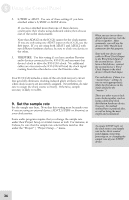
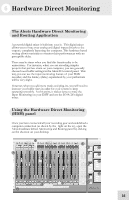
5 Using the Control Panel 3. Adjust latency by changing the buffer size "Latency" refers to the amount of time it takes for audio to get into and out of the computer. In the best of all possible worlds, there would be no such thing as latency-we would hear audio the moment it was created. However, computers have limited processing power, and they can "choke"-cutting off recording or crashing programs-if they are asked to handle too much data all at once. To minimize this risk, audio can be stored in a buffer for a certain amount of time. This buffering helps smooth out the stream of data that the computer needs to handle. In the end, all of the audio is sorted out and played correctly, but with a delay. Here are the basic considerations to consider when adjusting buffer sizes: Lower buffer size = less latency but higher risk of audio problems Higher buffer size = more latency but lower risk of audio problems Very high buffer size = possible system instability For most systems, there is a "sweet spot" where latency is not too high and system performance is stable. Experiment with raising or lowering buffer sizes to hit this sweet spot. As you begin adding plug-in EQ, compression, and so forth to your project, your computer will need to work harder. Consider increasing your buffer size at this time. 4. Choose a Buffer Mode Three different modes allow you to customize the way that your computer organizes and uses buffers. - If you use your computer for all sorts of applications besides music (Word Processing, email, etc.), choose "Norma"l Buffer Mode. - If your computer is relatively new and is used almost exclusively for music applications and has very few other processes running, choose "Fast" mode. - Choose "High Performance" mode if you have an extremely well specified computer, use few background tasks, and are not shuttling very large amounts of data through the Firewire bus. Experiment with each of these settings in your first few weeks using the IO14/26. Depending upon your computer To counteract the delays you hear when you are monitoring incoming audio through the computer and your latency settings are high, turn off your DAW's input monitoring feature. Use the included Alesis Hardware Direct Monitoring application instead. Many people use two latency settings-a lower one when recording tracks and a higher one when mixing. 32
-
 1
1 -
2
-
3
-
4
-
5
-
6
-
7
-
8
-
9
-
10
-
11
-
12
-
13
-
14
-
15
-
16
-
17
-
18
-
19
-
20
-
21
-
22
-
23
-
24
-
25
-
26
-
27
-
28
-
 29
29 -
 30
30 -
 31
31 -
 32
32 -
 33
33 -
 34
34 -
 35
35 -
 36
36 -
 37
37 -
 38
38 -
 39
39 -
40
-
41
-
42
-
43
-
44
-
45
-
46
-
47
-
48
-
49
-
50
-
51
-
52
-
53
-
54
-
55
-
56
-
57
-
58
-
59
-
60
-
61
-
62
-
63
-
64
-
65
-
66
-
67
-
68
-
69
-
70
 |
 |
