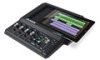
Alesis iO Mix Reference Manual - Page 47
Getting In Deeper, Recording
 |
View all Alesis iO Mix manuals
Add to My Manuals
Save this manual to your list of manuals |
Page 47 highlights
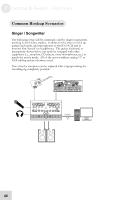
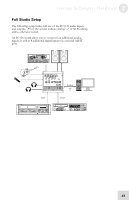
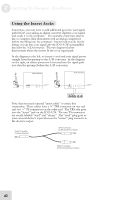
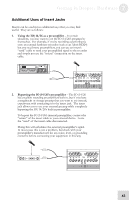
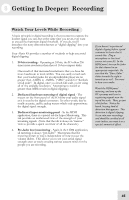
8 Getting In Deeper: Recording Watch Your Levels While Recording A basic principle in digital recording is that you want to capture the loudest signal you can, but at the same time you never, ever want to exceed the maximum digital threshold. If you do, you'll introduce the nasty distortion known as "digital clipping" into your recording. Your Alesis IO provides a number of methods to help you avoid digital clipping: 1. 24-bit recording - Operating at 24 bits, the IO offers 256 times more resolution than that of 16-bit compact disks. One result of that increased resolution is that you have far more headroom to work within. You can easily record such that your loudest peaks for an unpredictable player are no greater than -12dBfs to -18dBfs. ("dBfs" stands for "decibels at full scale". In digital, once you reach full scale, you're using all of the available resolution. Attempting to record at greater than 0dBfs results in digital clipping.) 2. Dedicated hardware metering of digital signal - The meters on the front panel of the IO show your audio signal as it is seen by the digital converters. In other words, they're totally accurate, unlike analog meters which only approximate the digital signal strength. 3. Dedicated input monitoring panel - In the HDM application, there is a special tab for Input Monitoring. This tab provides an uncluttered view of the strength of your incoming signals. (Note that the tab is always in "narrow" view to provide a quick overview of all the channels.) 4. Pre-fader level monitoring - Again in the HDM application, all metering is always "pre-fader." That means that the metering shown to you is independent of how you set the volume sliders. This allows you to see your actual signal strength even as you're creating various custom mixes for the people you are recording. If you haven't experienced digital clipping before, spend a moment to learn what it sounds like. Plug a microphone or line level source into your IO. In the HDM panel, turn up the fader for that channel in an appropriate output tab. Be sure that the "Direct Mon" slider towards the right is turned up as well. You want to hear your audio. Watch the HDM panel metering, and turn up the IO's preamp until you're registering signals near the top of the scale. Then, go just a bit further. Notice the harsh, buzzing kind of distortion that appears. This distortion is digital clipping. It can ruin your recordings and should be avoided at all costs (unless you want it as a special, unmusical effect). 45
-
 1
1 -
2
-
3
-
4
-
5
-
6
-
7
-
8
-
9
-
10
-
11
-
12
-
13
-
14
-
15
-
16
-
17
-
18
-
19
-
20
-
21
-
22
-
23
-
24
-
25
-
26
-
27
-
28
-
29
-
30
-
31
-
32
-
33
-
34
-
35
-
36
-
37
-
38
-
39
-
40
-
41
-
 42
42 -
 43
43 -
 44
44 -
 45
45 -
 46
46 -
 47
47 -
 48
48 -
 49
49 -
 50
50 -
 51
51 -
 52
52 -
53
-
54
-
55
-
56
-
57
-
58
-
59
-
60
-
61
-
62
-
63
-
64
-
65
-
66
-
67
-
68
-
69
-
70
 |
 |