Alpine 1004 Owners Manual - Page 31
Illumination Control, Adjusting Brightness of Picture
 |
View all Alpine 1004 manuals
Add to My Manuals
Save this manual to your list of manuals |
Page 31 highlights
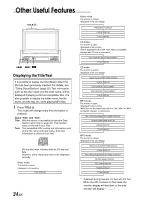
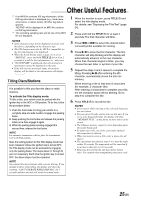
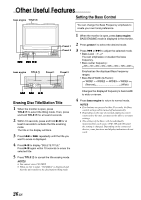
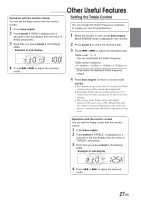
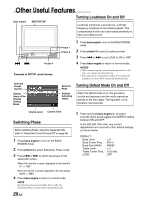
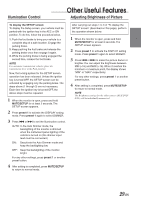
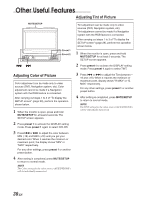
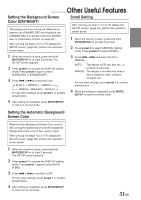
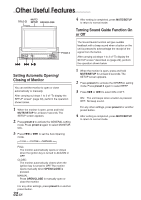
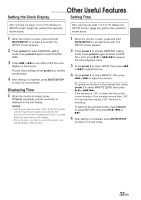
Illumination Control Other Useful Features Adjusting Brightness of Picture To display the SETUP screen: To display the Setup screen, your vehicle must be parked with the ignition key in the ACC or ON position. To do this, follow the procedure below. 1. Push the foot brake to bring your vehicle to a complete stop at a safe location. Engage the parking brake. 2. Keep pushing the foot brake and release the parking brake once then engage it again. 3. While the parking brake is being engaged the second time, release the foot brake. NOTE For automatic transmission vehicles, place the transmission lever in the Park position. Now, the locking system for the SETUP screen operation has been released. Unless the ignition key is turned OFF, the SETUP screen can be activated by engaging only the parking brake. The steps above (1 through 3) are not necessary. Each time the ignition key is turned OFF, the above steps must be repeated. 1 When the monitor is open, press and hold MUTE/SETUP for at least 2 seconds. The SETUP screen appears. 2 Press preset 1 to activate the DISPLAY setting mode. Press preset 1 again to select DIMMER. 3 Press g or f to set the Illumination control. AUTO: In the Auto Dimmer mode, the backlighting of the monitor is dimmed when the instrument panel lighting of the vehicle is turned on (the dimmer input lead must be connected.) ON: Deactivate the Auto Dimmer mode and keep the backlighting low. OFF: Keep the backlighting of the monitor bright. For any other settings, press preset 1 or another preset button. 4 After setting is completed, press MUTE/SETUP to return to normal mode. After carrying out steps 1 to 3 of "To display the SETUP screen" (described on this page), perform the operation shown below. 1 When the monitor is open, press and hold MUTE/SETUP for at least 2 seconds. The SETUP screen appears. 2 Press preset 1 to activate the DISPLAY setting mode. Press preset 1 again to select BRIGHT. 3 Press g or f to make the picture darker or brighter. You can adjust the brightness between MIN (-16) and MAX (+16). When it reaches the minimum or maximum point, the display shows "MIN" or "MAX" respectively. For any other settings, press preset 1 or another preset button. 4 After setting is completed, press MUTE/SETUP to return to normal mode. NOTE The Brightness settings for the video sources (AUX/DVD/ NAV.) will be individually memorized. 29-EN
-
 1
1 -
2
-
3
-
4
-
5
-
6
-
7
-
8
-
9
-
10
-
11
-
12
-
13
-
14
-
15
-
16
-
17
-
18
-
19
-
20
-
21
-
22
-
23
-
24
-
25
-
 26
26 -
 27
27 -
 28
28 -
 29
29 -
 30
30 -
 31
31 -
 32
32 -
 33
33 -
 34
34 -
 35
35 -
 36
36 -
37
-
38
-
39
-
40
-
41
-
42
-
43
-
44
-
45
-
46
-
47
-
48
-
49
-
50
-
51
-
52
-
53
-
54
-
55
-
56
-
57
 |
 |
