Alpine 1004 Owners Manual - Page 39
Setting Front/Rear/Subwoofer Preout, of the External Expansion Box, Setting the External Input - cva aux input
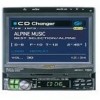 |
View all Alpine 1004 manuals
Add to My Manuals
Save this manual to your list of manuals |
Page 39 highlights
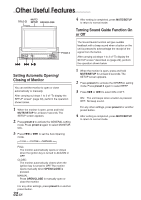
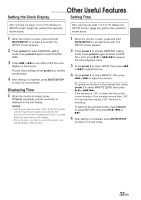
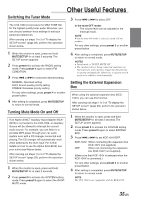
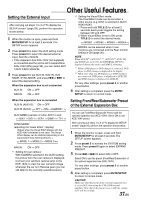
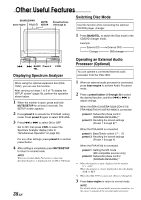
Other Useful Features Setting the External Input After carrying out steps 1 to 3 of "To display the SETUP screen" (page 29), perform the operation shown below. 1 When the monitor is open, press and hold MUTE/SETUP for at least 2 seconds. The SETUP screen appears. 2 Press preset 3 to select the AUX setting mode. Press preset 3 to select the desired external input, AUX IN or NAV.IN. • If the expansion box KCE-104V (not supplied) is connected and the unit is set to Expand Box KCE-104V (ON) (page 35), you can select AUX 1/AUX 2/AUX 3/NAV.IN. 3 Press preset 3 to set AUX IN, NAV. IN, AUX NAME, SYNC MODE, and press g or f to select the desired setting. When the expansion box is not connected AUX IN: ON ↔ OFF NAV.IN: ON ↔ OFF ∗2 Setting the Visual Effect mode: The Viual Effect mode can be set when a video source (e.g. DVD) is selected in AUX1/ AUX2/AUX3. 1 Press and hold TITLE for at least 2 seconds. Each press toggles the setting between ON and OFF. 2 When Visual Effect is set to ON, press TITLE to select the desired mode. → MODE1 → MODE2 → MODE3 → MODE4 MODE3 can be selected when 2 rear monitors are connected and the Rear monitor setting is ON (page 36). NOTE When AUX IN∗3 (AUX1 IN∗3, ∗4, AUX2 IN∗4, AUX3 IN) and NAV.IN are set to ON, the EXTERNAL INPUT is displayed during the source and SIMUL switching. ∗3 When a DVD player or DVD changer is connected, DVD player or DVD changer is displayed in the display. ∗4 When more than two DVD players or DVD changers are connected, DVD player is displayed in AUX1 IN, and DVD changer is displayed in AUX2 IN. For any other settings, press preset 3 or another preset button. 4 After setting is completed, press the MUTE/ SETUP to return to normal mode. When the expansion box is connected AUX IN (AUX1/2): ON ↔ OFF AUX IN (AUX3): → OFF ↔ ON ↔ CAMERA∗1 ← AUX NAME (example of when AUX1 is set): → AUX-1 ↔ DVD-1 ↔ VCR-1 ↔ GAME-1 ↔ TV-1 ← SYNC MODE: (adjusting the Visual Effect∗2 display) (Adjust when the Visual Effect display with the KCE-104V connected is not clear. The Visual Effect display can be distorted depending on the input picture from external devices. ) → MODE 1 ↔ MODE 2 ↔ MODE 3 ← NAV.IN: ON ↔ OFF ∗1 Setting for rear camera: With CAMERA selected in the AUX3 setting, the picture from the rear camera is displayed. Connect your vehicle's reverse lamp to the KCE-104V, to view the rear camera's image whenever the car is in Reverse gear (you can still listen to the currently selected source). Setting Front/Rear/Subwoofer Preout of the External Expansion Box You can use Front/Rear/Subwoofer Preout with the optional expansion box (KCE-104V). Set to ON to use KCE-104V preout. After carrying out steps 1 to 3 of "To display the SETUP screen" (page 29), perform the operation shown below. 1 When the monitor is open, press and hold MUTE/SETUP for at least 2 seconds. The SETUP screen appears. 2 Press preset 5 to activate the SYSTEM setting mode. Press preset 5 again to select EXPAND PREOUT. 3 Press g or f to select ON or OFF. Select ON to use the preout (Front/Rear/Subwoofer) of the optional expansion box (KCE-104V). For any other settings, press preset 5 or another preset button. 4 After setting is completed, press MUTE/SETUP to return to normal mode. CAUTION Make sure that the preout of the external expansion box is set to OFF when using the CVA-1004 internal amplifier. Note that if the preout is set to ON, the volume level will be too high. 37-EN
-
 1
1 -
2
-
3
-
4
-
5
-
6
-
7
-
8
-
9
-
10
-
11
-
12
-
13
-
14
-
15
-
16
-
17
-
18
-
19
-
20
-
21
-
22
-
23
-
24
-
25
-
26
-
27
-
28
-
29
-
30
-
31
-
32
-
33
-
 34
34 -
 35
35 -
 36
36 -
 37
37 -
 38
38 -
 39
39 -
 40
40 -
 41
41 -
 42
42 -
 43
43 -
 44
44 -
45
-
46
-
47
-
48
-
49
-
50
-
51
-
52
-
53
-
54
-
55
-
56
-
57
 |
 |
