Alpine 1004 Owners Manual - Page 8
Basic Operation - cva monitor
 |
View all Alpine 1004 manuals
Add to My Manuals
Save this manual to your list of manuals |
Page 8 highlights
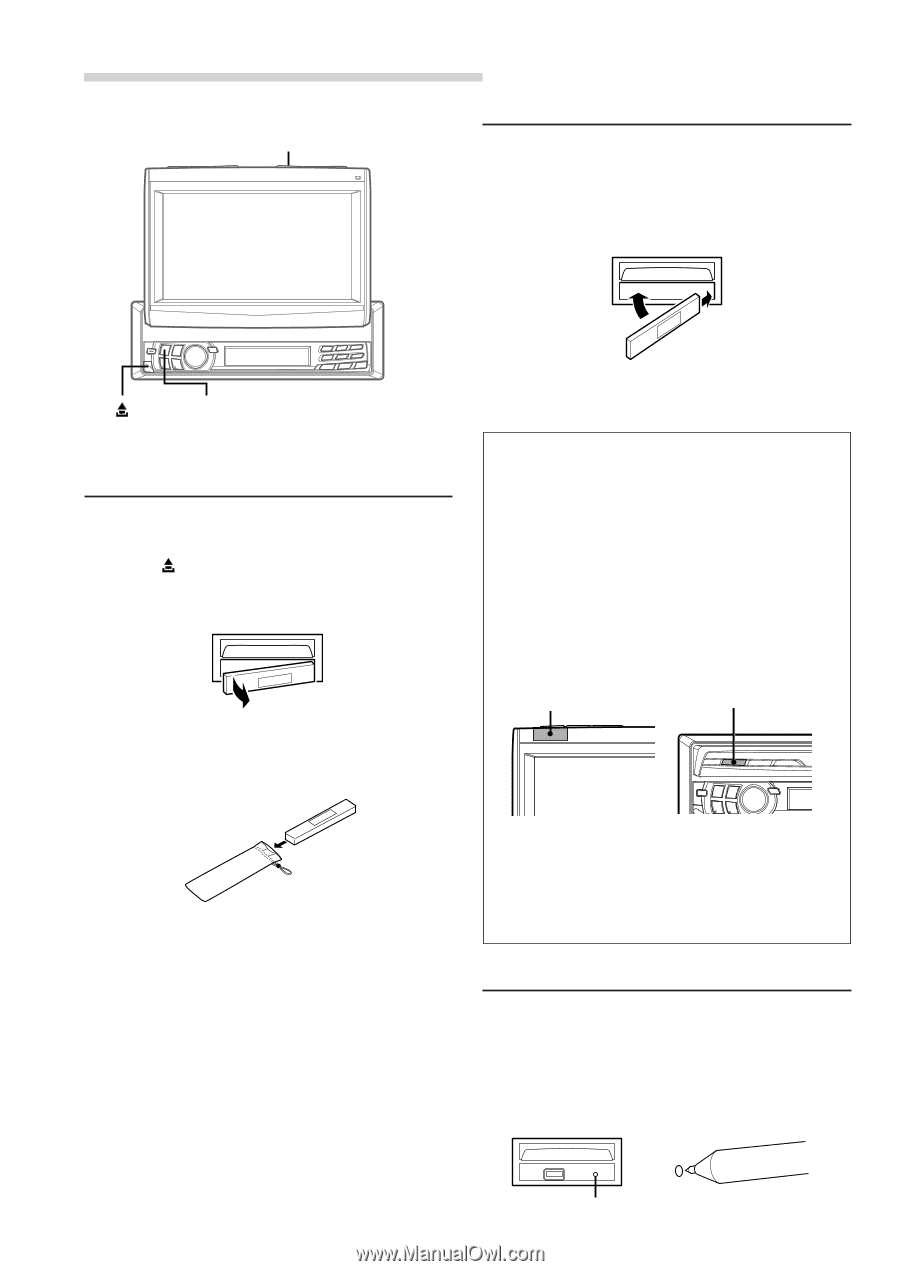
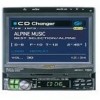
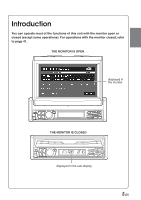
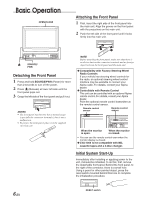
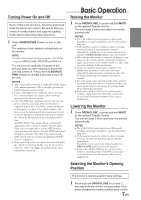
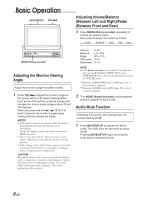
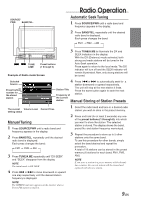
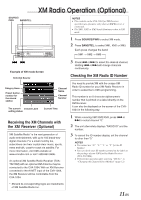
Basic Operation OPEN/CLOSE Attaching the Front Panel 1 First, insert the right side of the front panel into the main unit. Align the groove on the front panel with the projections on the main unit. 2 Push the left side of the front panel until it locks firmly into the main unit. 2 1 SOURCE/ PWR Detaching the Front Panel 1 Press and hold SOURCE/PWR (Power) for more than 2 seconds to turn off the power. 2 Press (Release) at lower left side until the front panel pops out. 3 Grasp the left side of the front panel and pull it out. NOTES • The front panel may become hot in normal usage (especially the connector terminals), this is not a malfunction. • To protect the front panel, place it in the supplied carrying case. NOTE Before attaching the front panel, make sure that there is no dirt or dust on the connector terminals and no foreign object between the front panel and the main unit. [Compatibility with Factory Steering Wheel Radio Controls If your vehicle has steering wheel controls for the radio, an optional steering wheel control interface may be available to connect your Alpine radio. For details, contact your Alpine dealer. [Controllable with Remote Control This unit can be controlled with an optional Alpine remote control. For details, consult your Alpine dealer. Point the optional remote control transmitter at the remote control sensor. Remote control sensor Remote control sensor When the monitor is open. When the monitor is closed. • You can use the remote control even when the monitor display is closed. [CVA-1004 is not compatible with MD, cassette tapes and a 3-disc changer. Initial System Start-Up Immediately after installing or applying power to the unit, it should be initialized. To do this, first, remove the detachable front panel. Behind the front panel, to the right of the connector, there is a small hole. Using a pencil or other pointed object, press the reset switch mounted behind this hole to complete the initialization procedure. 6-EN RESET switch
-
 1
1 -
2
-
 3
3 -
 4
4 -
 5
5 -
 6
6 -
 7
7 -
 8
8 -
 9
9 -
 10
10 -
 11
11 -
 12
12 -
 13
13 -
14
-
15
-
16
-
17
-
18
-
19
-
20
-
21
-
22
-
23
-
24
-
25
-
26
-
27
-
28
-
29
-
30
-
31
-
32
-
33
-
34
-
35
-
36
-
37
-
38
-
39
-
40
-
41
-
42
-
43
-
44
-
45
-
46
-
47
-
48
-
49
-
50
-
51
-
52
-
53
-
54
-
55
-
56
-
57
 |
 |