Apple MC408LL Apple Technician Guide - Page 55
Go to Optical Drive Noisy, original Mac mini Install DVD
 |
UPC - 885909370924
View all Apple MC408LL manuals
Add to My Manuals
Save this manual to your list of manuals |
Page 55 highlights
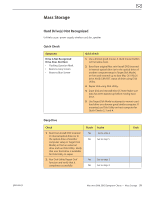
Deep Dive Check 1. Disconnect hard drive and optical drive (or second hard drive) cables from logic board, and startup computer to determine if noise is caused by the computer fan. 2. If an optical drive is present, reconnect optical drive cable to logic board, insert the Mac mini Install DVD in optical drive and startup computer to verify if noise is caused by optical drive. 3. Reconnect hard drive cable on logic board and boot from original Mac mini Install DVD inserted in internal optical drive (or in the optical drive of another computer setup in Target Disk Mode) or from an external drive with Mac OS 10.6.3 and run Disk Utility. Verify that user hard drive is available for Disk Utility to repair. 4. Run Disk Utility 'Repair Disk' function and verify that it completes successfully. 5. Re-start the computer. Verify whether the noise is still present. 6. Erase disk and reinstall Mac OS using original Mac mini Install DVD. Verify whether the noise is still present. Note: Make sure data has been backed up before erasing hard drive. Result Yes No Yes No Yes No Yes No Yes No Yes No Action Go to Fan Failures/Thermal issues symptom flow. Go to step 2 Go to Optical Drive Noisy symptom flow. Go to step 3 Go to step 4 Go to Drive not recognized/ mount symptom flow. Go to step 5 Go to step 6 Go to step 6 Data error issue resolved by Disk Utility. Return system to user. Replace hard drive. Go to step 7. Data error issue resolved by Disk Utility. Return system to user. Code 2010-08-03 Mac mini (Mid 2010) Symptom Charts - Mass Storage 55
-
 1
1 -
2
-
3
-
4
-
5
-
6
-
7
-
8
-
9
-
10
-
11
-
12
-
13
-
14
-
15
-
16
-
17
-
18
-
19
-
20
-
21
-
22
-
23
-
24
-
25
-
26
-
27
-
28
-
29
-
30
-
31
-
32
-
33
-
34
-
35
-
36
-
37
-
38
-
39
-
40
-
41
-
42
-
43
-
44
-
45
-
46
-
47
-
48
-
49
-
 50
50 -
 51
51 -
 52
52 -
 53
53 -
 54
54 -
 55
55 -
 56
56 -
 57
57 -
 58
58 -
 59
59 -
 60
60 -
61
-
62
-
63
-
64
-
65
-
66
-
67
-
68
-
69
-
70
-
71
-
72
-
73
-
74
-
75
-
76
-
77
-
78
-
79
-
80
-
81
-
82
-
83
-
84
-
85
-
86
-
87
-
88
-
89
-
90
-
91
-
92
-
93
-
94
-
95
-
96
-
97
-
98
-
99
-
100
-
101
-
102
-
103
-
104
-
105
-
106
-
107
-
108
-
109
-
110
-
111
-
112
-
113
-
114
-
115
-
116
-
117
-
118
-
119
-
120
-
121
-
122
-
123
-
124
-
125
-
126
-
127
-
128
-
129
-
130
-
131
-
132
-
133
-
134
-
135
-
136
-
137
-
138
-
139
-
140
-
141
-
142
-
143
-
144
-
145
-
146
-
147
-
148
-
149
-
150
 |
 |
