Brother International HL-1870n Network Users Manual - English - Page 79
Username>, Local>, SET SERVICE service TREE tree, SET SERVICE service CONTEXT Context
 |
View all Brother International HL-1870n manuals
Add to My Manuals
Save this manual to your list of manuals |
Page 79 highlights
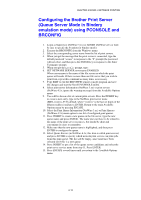
CHAPTER 6 NOVELL NETWARE PRINTING 15. Highlight the Printers option in the print server Information menu. 16. Press INSERT and select the name of the printers you entered in Step 12. 17. Press ESCAPE several times to return to DOS. 18. Execute the BRCONFIG from the Windows menu. Select the print server from the list of print servers. When you get the message that the print server is connected, press the ENTER key and type the default password of "access" in response to the "#" prompt (the password will not echo), and then press the ENTER key again in response to the ENTER Username> prompt. When you get the Local> prompt, type: SET SERVICE service TREE tree SET SERVICE service CONTEXT Context Where tree is the NDS tree name. • Where context is the name of context where the print server resides. • Service is the name of the service assigned by NetWare print server name (where the default services are BRN_xxxxxx_P1 for the Brother printer, where "xxxxxx" is the last six digits of the Ethernet address (MAC address)). • You can also enter the TREE and CONTEXT name using your web browser by connecting to the Brother print server using the TCP/IP protocol and selecting the NetWare protocol configuration. 19. Use the BRCONFIG command or TELNET command: SET NETWARE RESCAN to force the print server to rescan for file servers, or power cycle the printer. The same services assigned by NetWare print server names cannot be used for both queue server mode and remote printer mode. The same service assigned by NetWare print server cannot be used for both queue server mode and remote printer mode. If you want to enable remote printer capabilities on a service other than the default NetWare service, you must define new services that are enabled for NetWare and for the desired port. Refer to Appendix B in this manual for information on how to do this. 6-15
-
 1
1 -
2
-
3
-
4
-
5
-
6
-
7
-
8
-
9
-
10
-
11
-
12
-
13
-
14
-
15
-
16
-
17
-
18
-
19
-
20
-
21
-
22
-
23
-
24
-
25
-
26
-
27
-
28
-
29
-
30
-
31
-
32
-
33
-
34
-
35
-
36
-
37
-
38
-
39
-
40
-
41
-
42
-
43
-
44
-
45
-
46
-
47
-
48
-
49
-
50
-
51
-
52
-
53
-
54
-
55
-
56
-
57
-
58
-
59
-
60
-
61
-
62
-
63
-
64
-
65
-
66
-
67
-
68
-
69
-
70
-
71
-
72
-
73
-
 74
74 -
 75
75 -
 76
76 -
 77
77 -
 78
78 -
 79
79 -
 80
80 -
 81
81 -
 82
82 -
 83
83 -
 84
84 -
85
-
86
-
87
-
88
-
89
-
90
-
91
-
92
-
93
-
94
-
95
-
96
-
97
-
98
-
99
-
100
-
101
-
102
-
103
-
104
-
105
-
106
-
107
-
108
-
109
-
110
-
111
-
112
-
113
-
114
-
115
-
116
-
117
-
118
-
119
-
120
-
121
-
122
-
123
-
124
-
125
-
126
-
127
-
128
-
129
-
130
-
131
-
132
-
133
-
134
-
135
-
136
-
137
-
138
-
139
-
140
-
141
-
142
-
143
-
144
-
145
-
146
-
147
-
148
-
149
 |
 |