Brother International HL-6050DN Users Manual - English - Page 150
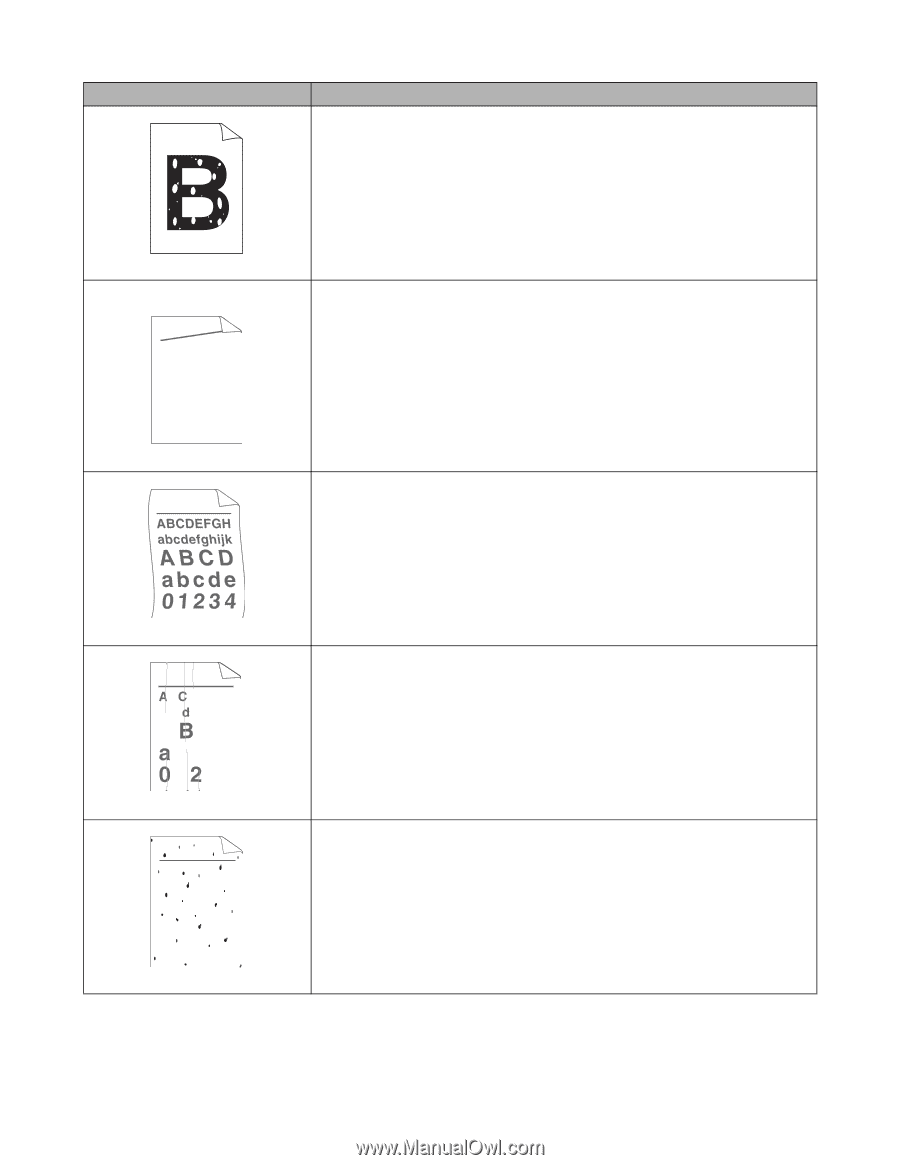
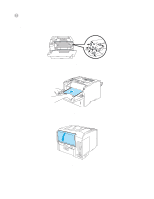
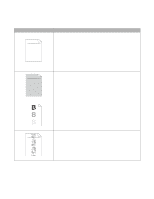
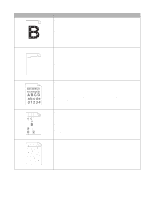
abcde, Hollow print, Thick paper, skewed, Curl or wave, Wrinkles or creases, Poor fixing
 |
UPC - 012502609568
View all Brother International HL-6050DN manuals
Add to My Manuals
Save this manual to your list of manuals |
Page 150 highlights
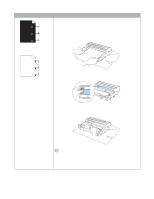
Examples of poor print quality Recommendation ■ Make sure that you use paper that meets our specifications. See What kind of paper can I use? on page 1-5. ■ Choose Thick paper mode in the printer driver, or use thinner paper than you are currently using. ■ Check the printer's environment because conditions such as high humidity can cause hollow print. See Positioning the printer on page 1-4. Hollow print AaAa0bBbc1CBdDec2EfCgdF3hGDie4jHk Page skewed Curl or wave B DEFGH abc efghijk A CD bcde 1 34 Wrinkles or creases ABCDEFGH abcdefghijk ABCD abcde 01234 Poor fixing ■ Make sure the paper or other print media is loaded properly in the paper tray and that the guides are not too tight or too loose against the paper stack. ■ Set the paper guides correctly. Make sure that the tips of the paper guides fit firmly into the slots. ■ If you are using the multi-purpose tray, See Printing on plain paper from the multi-purpose tray (MP tray) on page 1-13. ■ The paper tray may be too full. See Printing on plain paper from the paper tray on page 1-10. ■ Check the paper type and quality. See What kind of paper can I use? on page 1-5. ■ Check the paper type and quality. High temperatures and high humidity will cause paper to curl. See What kind of paper can I use? on page 1-5. ■ If you don't use the printer very often, the paper may have been in the paper tray too long. Turn over the stack of paper in the paper tray. Also, fan the paper stack and then rotate the paper 180° in the paper tray. ■ Print using the straight-through output path. See Printing on plain paper from the multi-purpose tray (MP tray) on page 1-13. ■ Make sure the paper is loaded properly. See Printing on plain paper from the paper tray on page 1-10. ■ Check the paper type and quality. See What kind of paper can I use? on page 1-5. ■ Turn over the stack of paper in the tray or try rotating the paper 180° in the input tray. ■ Print using the straight-through output path. See Printing on plain paper from the multi-purpose tray (MP tray) on page 1-13. ■ Make sure that the blue tabs in the back cover are re-set by either closing the back cover or pushing the blue tabs to their original position. See Printing on envelopes from the MP tray on page 1-23. TROUBLESHOOTING 6 - 18
-
 1
1 -
2
-
3
-
4
-
5
-
6
-
7
-
8
-
9
-
10
-
11
-
12
-
13
-
14
-
15
-
16
-
17
-
18
-
19
-
20
-
21
-
22
-
23
-
24
-
25
-
26
-
27
-
28
-
29
-
30
-
31
-
32
-
33
-
34
-
35
-
36
-
37
-
38
-
39
-
40
-
41
-
42
-
43
-
44
-
45
-
46
-
47
-
48
-
49
-
50
-
51
-
52
-
53
-
54
-
55
-
56
-
57
-
58
-
59
-
60
-
61
-
62
-
63
-
64
-
65
-
66
-
67
-
68
-
69
-
70
-
71
-
72
-
73
-
74
-
75
-
76
-
77
-
78
-
79
-
80
-
81
-
82
-
83
-
84
-
85
-
86
-
87
-
88
-
89
-
90
-
91
-
92
-
93
-
94
-
95
-
96
-
97
-
98
-
99
-
100
-
101
-
102
-
103
-
104
-
105
-
106
-
107
-
108
-
109
-
110
-
111
-
112
-
113
-
114
-
115
-
116
-
117
-
118
-
119
-
120
-
121
-
122
-
123
-
124
-
125
-
126
-
127
-
128
-
129
-
130
-
131
-
132
-
133
-
134
-
135
-
136
-
137
-
138
-
139
-
140
-
141
-
142
-
143
-
144
-
 145
145 -
 146
146 -
 147
147 -
 148
148 -
 149
149 -
 150
150 -
 151
151 -
 152
152 -
 153
153 -
 154
154 -
 155
155 -
156
-
157
-
158
-
159
-
160
-
161
-
162
-
163
-
164
-
165
-
166
-
167
-
168
-
169
-
170
-
171
-
172
-
173
-
174
-
175
-
176
-
177
-
178
-
179
 |
 |