Brother International MFC-6650MC Users Manual - English - Page 58
Setting the Print Density, Toner Save, Advanced Receiving Operations, Operation from Extension
 |
View all Brother International MFC-6650MC manuals
Add to My Manuals
Save this manual to your list of manuals |
Page 58 highlights
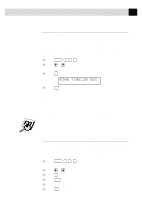
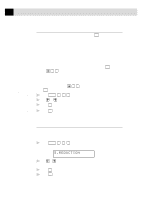
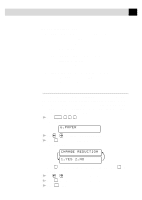
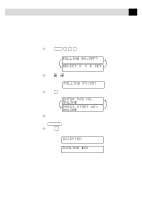
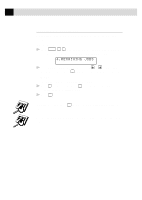
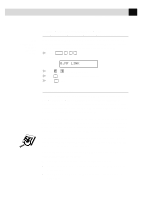
44 CHAPTER FIVE Setting the Print Density You can adjust print density, making your printed documents darker or lighter. 1 Press Function , 1 , 2 , 7 . 2 Press to make print lighter, or 3 Press Set . 4 Press Stop to exit. to make print darker. Toner Save You can conserve toner using this feature. When you set Toner Save to ON, print appears somewhat lighter. The default setting is OFF. 1 Press Function , 1 , 2 , 9 . 2 Press or to turn ON (or OFF). 3 Press Set . 4 Press Stop to exit. Advanced Receiving Operations See F/T Ring Time p. 41 See Easy Receive p. 42 Operation from Extension Telephone (For MFC 4350, MFC 4650 and MFC 6650MC only) or External Telephone If you answer a fax call on an extension phone or on an external phone in the EXT. jack, you can make your MFC take over by using the Fax Receive Code. When you press the Fax Receive Code 5 1 , the MFC starts to receive a fax. If the MFC answers a voice call and double-rings for you to take over, use the Telephone Answer Code 5 1 to take the call at an extension phone. If you answer a call, and no one is on the line, assume you're receiving a fax. At the MFC phone, press Start , then hang up. At an extension phone, press 5 1 , wait for fax receiving tones (chirps), then hang up. At an external phone, press 5 1 and wait for the phone to be disconnected (the screen displays RECEIVING) before you hang up. (Your caller will have to press Start to send the fax.)
-
 1
1 -
2
-
3
-
4
-
5
-
6
-
7
-
8
-
9
-
10
-
11
-
12
-
13
-
14
-
15
-
16
-
17
-
18
-
19
-
20
-
21
-
22
-
23
-
24
-
25
-
26
-
27
-
28
-
29
-
30
-
31
-
32
-
33
-
34
-
35
-
36
-
37
-
38
-
39
-
40
-
41
-
42
-
43
-
44
-
45
-
46
-
47
-
48
-
49
-
50
-
51
-
52
-
 53
53 -
 54
54 -
 55
55 -
 56
56 -
 57
57 -
 58
58 -
 59
59 -
 60
60 -
 61
61 -
 62
62 -
 63
63 -
64
-
65
-
66
-
67
-
68
-
69
-
70
-
71
-
72
-
73
-
74
-
75
-
76
-
77
-
78
-
79
-
80
-
81
-
82
-
83
-
84
-
85
-
86
-
87
-
88
-
89
-
90
-
91
-
92
-
93
-
94
-
95
-
96
-
97
-
98
-
99
-
100
-
101
-
102
-
103
-
104
-
105
-
106
-
107
-
108
-
109
-
110
-
111
-
112
-
113
-
114
-
115
-
116
-
117
-
118
-
119
-
120
-
121
-
122
-
123
-
124
-
125
-
126
-
127
-
128
-
129
-
130
-
131
-
132
-
133
-
134
-
135
-
136
-
137
-
138
-
139
-
140
-
141
-
142
-
143
-
144
-
145
-
146
-
147
-
148
-
149
-
150
-
151
-
152
-
153
-
154
-
155
-
156
-
157
-
158
-
159
-
160
-
161
-
162
-
163
-
164
-
165
-
166
-
167
-
168
-
169
-
170
-
171
-
172
-
173
-
174
-
175
-
176
-
177
-
178
-
179
-
180
-
181
-
182
-
183
-
184
-
185
-
186
-
187
-
188
-
189
-
190
-
191
-
192
-
193
-
194
-
195
-
196
-
197
-
198
-
199
-
200
-
201
-
202
-
203
-
204
-
205
-
206
-
207
-
208
-
209
-
210
-
211
-
212
-
213
-
214
-
215
-
216
-
217
-
218
-
219
-
220
-
221
-
222
-
223
-
224
-
225
-
226
-
227
-
228
-
229
-
230
-
231
-
232
-
233
-
234
-
235
-
236
-
237
-
238
-
239
-
240
-
241
-
242
-
243
-
244
-
245
-
246
-
247
-
248
-
249
-
250
-
251
-
252
-
253
-
254
-
255
-
256
-
257
 |
 |