Brother International MFC 9880 Owners Manual - Page 32
Sending a Fax, Scanning Adjustment, Contrast, Fax Resolution
 |
View all Brother International MFC 9880 manuals
Add to My Manuals
Save this manual to your list of manuals |
Page 32 highlights
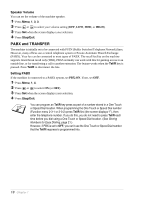
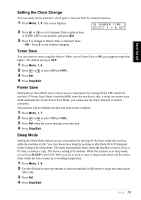
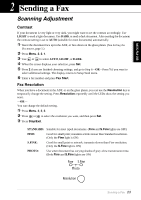
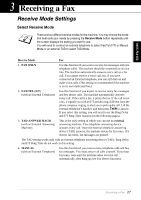
BASIC FAX USE 2 Sending a Fax Scanning Adjustment Contrast If your document is very light or very dark, you might want to set the contrast accordingly. Use LIGHT to send a light document. Use DARK to send a dark document. After sending the document the contrast setting is set to AUTO (suitable for most documents) automatically. 1 Insert the document face up in the ADF, or face down on the glass platen. (See Setting the Document, page 1.) 2 Press Menu, 2, 2, 1. 3 Use or to select AUTO, LIGHT, or DARK. 4 When the screen displays your selection, press Set. 5 Press 2 if you are finished choosing settings, and go to Step 6-OR-Press 1 if you want to select additional settings. The display returns to Setup Send menu. 6 Enter a fax number and press Fax Start. Fax Resolution When you have a document in the ADF, or on the glass platen, you can use the Resolution key to temporarily change the setting. Press Resolution repeatedly until the LEDs show the setting you want. -OR- You can change the default setting. 1 Press Menu, 2, 2, 2. 2 Press or to select the resolution you want, and then press Set. 3 Press Stop/Exit. STANDARD: Suitable for most typed documents. (Fine and S.Fine lights are OFF) FINE: Good for small print; transmits a little slower than Standard resolution. (Only the Fine light is ON) S.FINE: Good for small print or artwork; transmits slower than Fine resolution. (Only the S.Fine light is ON) PHOTO: Use when document has varying shades of grey; slow transmission time. (Both Fine and S.Fine lights are ON) Sending a Fax 23
-
 1
1 -
2
-
3
-
4
-
5
-
6
-
7
-
8
-
9
-
10
-
11
-
12
-
13
-
14
-
15
-
16
-
17
-
18
-
19
-
20
-
21
-
22
-
23
-
24
-
25
-
26
-
 27
27 -
 28
28 -
 29
29 -
 30
30 -
 31
31 -
 32
32 -
 33
33 -
 34
34 -
 35
35 -
 36
36 -
 37
37 -
38
-
39
-
40
-
41
-
42
-
43
-
44
-
45
-
46
-
47
-
48
-
49
-
50
-
51
-
52
-
53
-
54
-
55
-
56
-
57
-
58
-
59
-
60
-
61
-
62
-
63
-
64
-
65
-
66
-
67
-
68
-
69
-
70
-
71
-
72
-
73
-
74
-
75
-
76
-
77
-
78
-
79
-
80
-
81
-
82
-
83
-
84
-
85
-
86
-
87
-
88
-
89
-
90
-
91
-
92
-
93
-
94
-
95
-
96
-
97
-
98
-
99
-
100
-
101
-
102
-
103
-
104
-
105
-
106
-
107
-
108
-
109
-
110
-
111
-
112
-
113
-
114
-
115
-
116
-
117
-
118
-
119
-
120
-
121
-
122
-
123
-
124
-
125
-
126
-
127
-
128
-
129
-
130
-
131
-
132
-
133
-
134
-
135
-
136
-
137
-
138
-
139
-
140
-
141
-
142
-
143
-
144
-
145
-
146
-
147
-
148
-
149
-
150
-
151
-
152
-
153
-
154
-
155
-
156
-
157
-
158
-
159
-
160
-
161
-
162
-
163
-
164
-
165
-
166
-
167
-
168
-
169
-
170
-
171
-
172
-
173
-
174
-
175
-
176
-
177
-
178
-
179
-
180
-
181
-
182
 |
 |