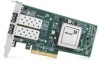
Dell Brocade 1020 Brocade Adapters Installation and Reference Manual - Page 143
Backing up configuration data, Restoring configuration data
 |
View all Dell Brocade 1020 manuals
Add to My Manuals
Save this manual to your list of manuals |
Page 143 highlights
Setting IP address and subnet mask on CNAs 3 • Alias data • Setup discovery data • Syslog data • HCM logging data • Support save data Backing up configuration data Use the HCM Backup Data dialog box to back up configuration data before removing HCM. Also, be sure to back up data when the backup message displays when removing software with the Adapter Software Uninstaller. Following are default locations for HCM configuration data: • Versions 1.1.0.8 and above - \HCM\data • Versions 1.1.0.6 and below - \FC HBA\data Restoring configuration data Follow these guidelines when restoring configuration data backed up during software removal or with the HCM Backup Data dialog box: • For HCM 2.0 and earlier, you can only restore data that you backed up during software removal when you are prompted to restore data during software installation. • For HCM 2.0 and later, you can restore data when prompted to do so during software installation or by using the HCM Restore Data dialog box. Setting IP address and subnet mask on CNAs After installing a CNA or Fabric Adapter with ports configured in CNA or NIC mode, you must assign an IP address and subnet mask to function on a DCB network. Work with your network administrator to obtain the correct address and mask for your network. Windows 1. From Control Panel, select Network Connections. 2. Right-click the installed "Brocade Ethernet XX" Network Adapter Interface instance and click Properties. 3. In the This connection uses the following items box, click Internet Protocol (TCP/IP), then click Properties. 4. Select Use following IP address radio button, and configure the IP address and subnet mask. 5. Click OK to apply the configuration. Brocade Adapters Installation and Reference Manual 115 53-1002144-01
-
 1
1 -
2
-
3
-
4
-
5
-
6
-
7
-
8
-
9
-
10
-
11
-
12
-
13
-
14
-
15
-
16
-
17
-
18
-
19
-
20
-
21
-
22
-
23
-
24
-
25
-
26
-
27
-
28
-
29
-
30
-
31
-
32
-
33
-
34
-
35
-
36
-
37
-
38
-
39
-
40
-
41
-
42
-
43
-
44
-
45
-
46
-
47
-
48
-
49
-
50
-
51
-
52
-
53
-
54
-
55
-
56
-
57
-
58
-
59
-
60
-
61
-
62
-
63
-
64
-
65
-
66
-
67
-
68
-
69
-
70
-
71
-
72
-
73
-
74
-
75
-
76
-
77
-
78
-
79
-
80
-
81
-
82
-
83
-
84
-
85
-
86
-
87
-
88
-
89
-
90
-
91
-
92
-
93
-
94
-
95
-
96
-
97
-
98
-
99
-
100
-
101
-
102
-
103
-
104
-
105
-
106
-
107
-
108
-
109
-
110
-
111
-
112
-
113
-
114
-
115
-
116
-
117
-
118
-
119
-
120
-
121
-
122
-
123
-
124
-
125
-
126
-
127
-
128
-
129
-
130
-
131
-
132
-
133
-
134
-
135
-
136
-
137
-
 138
138 -
 139
139 -
 140
140 -
 141
141 -
 142
142 -
 143
143 -
 144
144 -
 145
145 -
 146
146 -
 147
147 -
 148
148 -
149
-
150
-
151
-
152
-
153
-
154
-
155
-
156
-
157
-
158
-
159
-
160
-
161
-
162
-
163
-
164
-
165
-
166
-
167
-
168
-
169
-
170
-
171
-
172
-
173
-
174
-
175
-
176
-
177
-
178
-
179
-
180
-
181
-
182
-
183
-
184
-
185
-
186
-
187
-
188
-
189
-
190
-
191
-
192
-
193
-
194
-
195
-
196
-
197
-
198
-
199
-
200
-
201
-
202
-
203
-
204
-
205
-
206
-
207
-
208
-
209
-
210
-
211
-
212
-
213
-
214
-
215
-
216
-
217
-
218
-
219
-
220
-
221
-
222
-
223
-
224
-
225
-
226
-
227
-
228
-
229
-
230
-
231
-
232
-
233
-
234
-
235
-
236
-
237
-
238
-
239
-
240
-
241
-
242
-
243
-
244
-
245
-
246
-
247
-
248
-
249
-
250
-
251
-
252
-
253
-
254
-
255
-
256
-
257
-
258
-
259
-
260
-
261
-
262
-
263
-
264
-
265
-
266
-
267
-
268
-
269
-
270
-
271
-
272
 |
 |
