Dell Brocade 1020 Brocade Adapters Installation and Reference Manual - Page 194
zone name, member, boot --blunZone, Adapter Settings > Boot LUN > Fabric Discovered
 |
View all Dell Brocade 1020 manuals
Add to My Manuals
Save this manual to your list of manuals |
Page 194 highlights
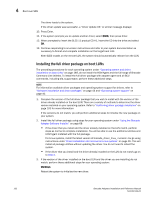
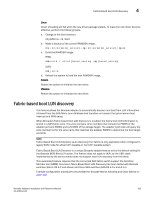
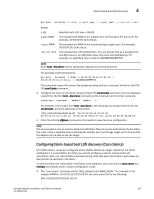
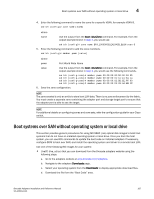
4 Fabric-based boot LUN discovery • The "member" command must be specially coded values for the target PWWN and LUN identification (for example, 06:00:00:02:DD:EE:FF:00). To obtain the zone name and member values, you will run the BCU boot --blunZone command from your host system's command line. Use the following steps to configure fabric-based boot LUN discovery. 1. Set the adapter's BIOS configuration to automatic discovery of the boot LUN from the fabric using one of the following interfaces: • Brocade BIOS Configuration Utility Adapter Settings > Boot LUN > Fabric Discovered • HCM Basic Port Configuration > Boot-over-SAN > Fabric Discovered • BCU bios --enable -o auto The command output will contain the proper encoding and be in the exact format for the zone name and member commands. 2. Enter the following BCU command to provide the zone name and member for the switch commands. bcu boot --blunZone -c -p -r -l where: c cfg p port_WWN r rport_WWN l lun_id | lun# Specifies boot LUN (use -c BLUN). The hexadecimal WWN of the adapter port connecting to the boot LUN. For example, 10:00:00:05:1e:41:9a:cb. The hexadecimal WWN of the remote storage target's port. For example, 50:00:00:05:1e:41:9a:ca. The hexadecimal LUN identification. You can provide this as a hexadecimal one-Byte value or an eight-Byte value (four-level LUN addressing). For example, an eight-Byte value could be 09AABBCCDDEEFF00. NOTE Enter boot --blunZone without operands to display the command format. For example, enter the following: bcu boot --blunZone -c BLUN -p 10:00:00:05:1e:41:9a:cb -r 50:00:00:05:1e:41:9a:ca -l 09AABBCCDDEEFF00 The command output will contain the proper encoding for the zone name and member commands. As an example, refer to the following output. "BFA_100000051E419ACB_BLUN","00:00:00:00:50:00:00:05; 00:00:00:01:1e:41:9a:ca; 00:00:00:02:DD:EE:FF:00; 00:00:00:03:09:AA:BB:CC" 3. Enter the following command to launch configuration mode. switch# config t 166 Brocade Adapters Installation and Reference Manual 53-1002144-01
-
 1
1 -
2
-
3
-
4
-
5
-
6
-
7
-
8
-
9
-
10
-
11
-
12
-
13
-
14
-
15
-
16
-
17
-
18
-
19
-
20
-
21
-
22
-
23
-
24
-
25
-
26
-
27
-
28
-
29
-
30
-
31
-
32
-
33
-
34
-
35
-
36
-
37
-
38
-
39
-
40
-
41
-
42
-
43
-
44
-
45
-
46
-
47
-
48
-
49
-
50
-
51
-
52
-
53
-
54
-
55
-
56
-
57
-
58
-
59
-
60
-
61
-
62
-
63
-
64
-
65
-
66
-
67
-
68
-
69
-
70
-
71
-
72
-
73
-
74
-
75
-
76
-
77
-
78
-
79
-
80
-
81
-
82
-
83
-
84
-
85
-
86
-
87
-
88
-
89
-
90
-
91
-
92
-
93
-
94
-
95
-
96
-
97
-
98
-
99
-
100
-
101
-
102
-
103
-
104
-
105
-
106
-
107
-
108
-
109
-
110
-
111
-
112
-
113
-
114
-
115
-
116
-
117
-
118
-
119
-
120
-
121
-
122
-
123
-
124
-
125
-
126
-
127
-
128
-
129
-
130
-
131
-
132
-
133
-
134
-
135
-
136
-
137
-
138
-
139
-
140
-
141
-
142
-
143
-
144
-
145
-
146
-
147
-
148
-
149
-
150
-
151
-
152
-
153
-
154
-
155
-
156
-
157
-
158
-
159
-
160
-
161
-
162
-
163
-
164
-
165
-
166
-
167
-
168
-
169
-
170
-
171
-
172
-
173
-
174
-
175
-
176
-
177
-
178
-
179
-
180
-
181
-
182
-
183
-
184
-
185
-
186
-
187
-
188
-
 189
189 -
 190
190 -
 191
191 -
 192
192 -
 193
193 -
 194
194 -
 195
195 -
 196
196 -
 197
197 -
 198
198 -
 199
199 -
200
-
201
-
202
-
203
-
204
-
205
-
206
-
207
-
208
-
209
-
210
-
211
-
212
-
213
-
214
-
215
-
216
-
217
-
218
-
219
-
220
-
221
-
222
-
223
-
224
-
225
-
226
-
227
-
228
-
229
-
230
-
231
-
232
-
233
-
234
-
235
-
236
-
237
-
238
-
239
-
240
-
241
-
242
-
243
-
244
-
245
-
246
-
247
-
248
-
249
-
250
-
251
-
252
-
253
-
254
-
255
-
256
-
257
-
258
-
259
-
260
-
261
-
262
-
263
-
264
-
265
-
266
-
267
-
268
-
269
-
270
-
271
-
272
 |
 |