Dell Inspiron 531S Owner's Manual - Page 133
Reinstall the FlexBay drive insert see Replacing the FlexBay Drive Insert
 |
View all Dell Inspiron 531S manuals
Add to My Manuals
Save this manual to your list of manuals |
Page 133 highlights
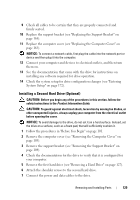
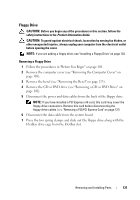
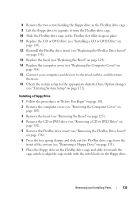
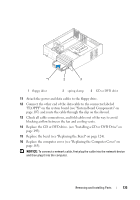
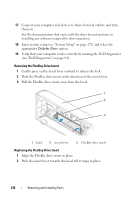
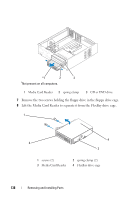
8 Remove the two screws holding the floppy drive in the FlexBay drive cage. 9 Lift the floppy drive to separate it from the FlexBay drive cage. 10 Slide the FlexBay drive cage in the FlexBay slot till it snaps in place. 11 Replace the CD or DVD drive (see "Installing a CD or DVD Drive" on page 143). 12 Reinstall the FlexBay drive insert (see "Replacing the FlexBay Drive Insert" on page 136). 13 Replace the bezel (see "Replacing the Bezel" on page 124). 14 Replace the computer cover (see "Replacing the Computer Cover" on page 165). 15 Connect your computer and devices to electrical outlets, and then turn them on. 16 Check the system setup for the appropriate diskette Drive Option changes (see "Entering System Setup" on page 172). Installing a Floppy Drive 1 Follow the procedures in "Before You Begin" on page 101. 2 Remove the computer cover (see "Removing the Computer Cover" on page 103). 3 Remove the bezel (see "Removing the Bezel" on page 123). 4 Remove the CD or DVD drive (see "Removing a CD or DVD Drive" on page 142). 5 Remove the FlexBay drive insert (see "Removing the FlexBay Drive Insert" on page 136). 6 Press the two spring clamps and slide out the FlexBay drive cage from the front of the system (see "Removing a Floppy Drive" on page 131). 7 Place the floppy drive in the FlexBay drive cage and slide it towards the cage notch to align the cage notch with the notch holes in the floppy drive. Removing and Installing Parts 133
-
 1
1 -
2
-
3
-
4
-
5
-
6
-
7
-
8
-
9
-
10
-
11
-
12
-
13
-
14
-
15
-
16
-
17
-
18
-
19
-
20
-
21
-
22
-
23
-
24
-
25
-
26
-
27
-
28
-
29
-
30
-
31
-
32
-
33
-
34
-
35
-
36
-
37
-
38
-
39
-
40
-
41
-
42
-
43
-
44
-
45
-
46
-
47
-
48
-
49
-
50
-
51
-
52
-
53
-
54
-
55
-
56
-
57
-
58
-
59
-
60
-
61
-
62
-
63
-
64
-
65
-
66
-
67
-
68
-
69
-
70
-
71
-
72
-
73
-
74
-
75
-
76
-
77
-
78
-
79
-
80
-
81
-
82
-
83
-
84
-
85
-
86
-
87
-
88
-
89
-
90
-
91
-
92
-
93
-
94
-
95
-
96
-
97
-
98
-
99
-
100
-
101
-
102
-
103
-
104
-
105
-
106
-
107
-
108
-
109
-
110
-
111
-
112
-
113
-
114
-
115
-
116
-
117
-
118
-
119
-
120
-
121
-
122
-
123
-
124
-
125
-
126
-
127
-
 128
128 -
 129
129 -
 130
130 -
 131
131 -
 132
132 -
 133
133 -
 134
134 -
 135
135 -
 136
136 -
 137
137 -
 138
138 -
139
-
140
-
141
-
142
-
143
-
144
-
145
-
146
-
147
-
148
-
149
-
150
-
151
-
152
-
153
-
154
-
155
-
156
-
157
-
158
-
159
-
160
-
161
-
162
-
163
-
164
-
165
-
166
-
167
-
168
-
169
-
170
-
171
-
172
-
173
-
174
-
175
-
176
-
177
-
178
-
179
-
180
-
181
-
182
-
183
-
184
-
185
-
186
-
187
-
188
-
189
-
190
-
191
-
192
-
193
-
194
-
195
-
196
-
197
-
198
-
199
-
200
-
201
-
202
-
203
-
204
-
205
-
206
-
207
-
208
-
209
-
210
-
211
-
212
 |
 |