Dell Inspiron 531S Owner's Manual - Page 94
and Restore Center, Back Up and Restore Center - driver
 |
View all Dell Inspiron 531S manuals
Add to My Manuals
Save this manual to your list of manuals |
Page 94 highlights
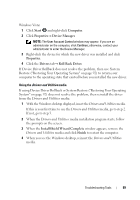
You can also manually create a restore point from the Windows Vista Back Up and Restore Center. There are two ways to get to the Windows Vista Backup and Restore Center: 1 Click Show all 14 items below the Connect to the Internet icon in the Welcome Center. Click Back Up and Restore Center icon. 2 Click Start Center. → All Programs→ Maintenance→ Back Up and Restore In the Back Up and Restore Center, under the tasks, click create a restore point or change settings. For more information, use Help and Support and search for restore. Restoring the Computer to an Earlier Operating State If problems occur after you install a device driver, use Device Driver Rollback (see "Using Windows Device Driver Rollback" on page 88) to resolve the problem. If that is unsuccessful, then use System Restore. NOTICE: Before you restore the computer to an earlier operating state, save and close any open files and exit any open programs. Do not alter, open, or delete any files or programs until the system restoration is complete. NOTE: You must be logged in with Administrator privileges to perform this procedure. Windows XP: 1 Click Start, point to All Programs→ Accessories→ System Tools, and then click System Restore. 2 Ensure that Restore my computer to an earlier time is selected, then click Next. 3 Click a calendar date to which you want to restore your computer. The Select a Restore Point screen provides a calendar that allows you to see and select restore points. All calendar dates with available restore points appear in boldface type. 4 Select a restore point, then click Next. If a calendar date has only one restore point, that restore point is automatically selected. If two or more restore points are available, click the restore point that you prefer. 94 Troubleshooting Tools
-
 1
1 -
2
-
3
-
4
-
5
-
6
-
7
-
8
-
9
-
10
-
11
-
12
-
13
-
14
-
15
-
16
-
17
-
18
-
19
-
20
-
21
-
22
-
23
-
24
-
25
-
26
-
27
-
28
-
29
-
30
-
31
-
32
-
33
-
34
-
35
-
36
-
37
-
38
-
39
-
40
-
41
-
42
-
43
-
44
-
45
-
46
-
47
-
48
-
49
-
50
-
51
-
52
-
53
-
54
-
55
-
56
-
57
-
58
-
59
-
60
-
61
-
62
-
63
-
64
-
65
-
66
-
67
-
68
-
69
-
70
-
71
-
72
-
73
-
74
-
75
-
76
-
77
-
78
-
79
-
80
-
81
-
82
-
83
-
84
-
85
-
86
-
87
-
88
-
 89
89 -
 90
90 -
 91
91 -
 92
92 -
 93
93 -
 94
94 -
 95
95 -
 96
96 -
 97
97 -
 98
98 -
 99
99 -
100
-
101
-
102
-
103
-
104
-
105
-
106
-
107
-
108
-
109
-
110
-
111
-
112
-
113
-
114
-
115
-
116
-
117
-
118
-
119
-
120
-
121
-
122
-
123
-
124
-
125
-
126
-
127
-
128
-
129
-
130
-
131
-
132
-
133
-
134
-
135
-
136
-
137
-
138
-
139
-
140
-
141
-
142
-
143
-
144
-
145
-
146
-
147
-
148
-
149
-
150
-
151
-
152
-
153
-
154
-
155
-
156
-
157
-
158
-
159
-
160
-
161
-
162
-
163
-
164
-
165
-
166
-
167
-
168
-
169
-
170
-
171
-
172
-
173
-
174
-
175
-
176
-
177
-
178
-
179
-
180
-
181
-
182
-
183
-
184
-
185
-
186
-
187
-
188
-
189
-
190
-
191
-
192
-
193
-
194
-
195
-
196
-
197
-
198
-
199
-
200
-
201
-
202
-
203
-
204
-
205
-
206
-
207
-
208
-
209
-
210
-
211
-
212
 |
 |
