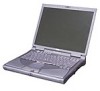
Dell Inspiron 8200 Owner's Manual - Page 34
Setting Up a Printer, Printer Cable, Connecting a Parallel Printer - driver
 |
View all Dell Inspiron 8200 manuals
Add to My Manuals
Save this manual to your list of manuals |
Page 34 highlights
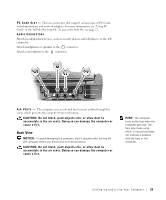
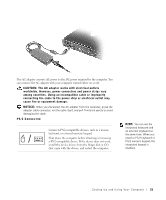
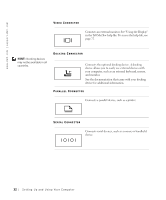
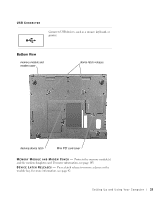
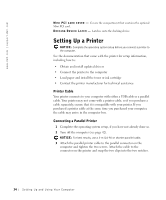
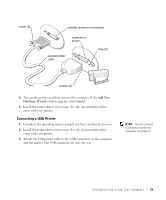
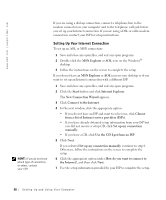
www.dell.com | support.dell.com M I N I PCI C AR D C OV ER - Covers the compartment that contains the optional Mini PCI card. DO C K I N G D E V IC E L A T C H - Latches onto the docking device. Setting Up a Printer NOTICE: Complete the operating system setup before you connect a printer to the computer. See the documentation that came with the printer for setup information, including how to: • Obtain and install updated drivers • Connect the printer to the computer • Load paper and install the toner or ink cartridge • Contact the printer manufacturer for technical assistance Printer Cable Your printer connects to your computer with either a USB cable or a parallel cable. Your printer may not come with a printer cable, so if you purchase a cable separately, ensure that it is compatible with your printer. If you purchased a printer cable at the same time you purchased your computer, the cable may arrive in the computer box. Connecting a Parallel Printer 1 Complete the operating system setup, if you have not already done so. 2 Turn off the computer (see page 42). NOTICE: For best results, use a 3-m (10-ft) or shorter parallel cable. 3 Attach the parallel printer cable to the parallel connector on the computer and tighten the two screws. Attach the cable to the connector on the printer and snap the two clips into the two notches. 34 S e tt i n g U p a n d U si n g Yo u r C o m pu t e r
-
 1
1 -
2
-
3
-
4
-
5
-
6
-
7
-
8
-
9
-
10
-
11
-
12
-
13
-
14
-
15
-
16
-
17
-
18
-
19
-
20
-
21
-
22
-
23
-
24
-
25
-
26
-
27
-
28
-
 29
29 -
 30
30 -
 31
31 -
 32
32 -
 33
33 -
 34
34 -
 35
35 -
 36
36 -
 37
37 -
 38
38 -
 39
39 -
40
-
41
-
42
-
43
-
44
-
45
-
46
-
47
-
48
-
49
-
50
-
51
-
52
-
53
-
54
-
55
-
56
-
57
-
58
-
59
-
60
-
61
-
62
-
63
-
64
-
65
-
66
-
67
-
68
-
69
-
70
-
71
-
72
-
73
-
74
-
75
-
76
-
77
-
78
-
79
-
80
-
81
-
82
-
83
-
84
-
85
-
86
-
87
-
88
-
89
-
90
-
91
-
92
-
93
-
94
-
95
-
96
-
97
-
98
-
99
-
100
-
101
-
102
-
103
-
104
-
105
-
106
-
107
-
108
-
109
-
110
-
111
-
112
-
113
-
114
-
115
-
116
-
117
-
118
-
119
-
120
-
121
-
122
-
123
-
124
-
125
-
126
-
127
-
128
-
129
-
130
-
131
-
132
-
133
-
134
-
135
-
136
-
137
-
138
-
139
-
140
-
141
-
142
-
143
-
144
-
145
-
146
-
147
-
148
-
149
-
150
-
151
-
152
-
153
-
154
-
155
-
156
-
157
-
158
-
159
-
160
-
161
-
162
 |
 |