Dell PowerEdge 2900 Hardware Owner's Manual (PDF) - Page 52
Removing the Peripheral Bay Panel (Tower Only), the bezel and insert the panel, tab-end first
 |
View all Dell PowerEdge 2900 manuals
Add to My Manuals
Save this manual to your list of manuals |
Page 52 highlights
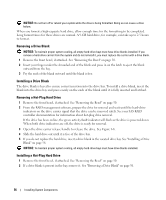
Removing the Peripheral Bay Panel (Tower Only) NOTE: The peripheral bay panel can be removed only from inside the bezel. 1 With the bezel removed from the system, place the bezel face-down on a flat working surface. 2 Locate the release tabs inside the bezel at the bottom of the peripheral bay panel and press in on the tabs and push forward to slide the panel outward from the bezel. See Figure 3-3. 3 Remove the panel from the front side of the bezel. 4 Reinstall the bezel on the system. See "Installing the Bezel" on page 53. Figure 3-3. Installing and Removing the Peripheral Bay Panel (Tower) 2 1 3 4 5 1 tower bezel with peripheral bay panel 4 bezel (inside view) 2 peripheral bay panel 5 tab slot (2) 3 tab (2) Installing the Peripheral Bay Panel (Tower Only) 1 With the bezel installed on the system, align the peripheral bay panel with the panel opening on the bezel and insert the panel, tab-end first, into the opening. 2 Slide the panel downward so that the tabs enter the slots in the bezel and lock into position. 52 Installing System Components
-
 1
1 -
2
-
3
-
4
-
5
-
6
-
7
-
8
-
9
-
10
-
11
-
12
-
13
-
14
-
15
-
16
-
17
-
18
-
19
-
20
-
21
-
22
-
23
-
24
-
25
-
26
-
27
-
28
-
29
-
30
-
31
-
32
-
33
-
34
-
35
-
36
-
37
-
38
-
39
-
40
-
41
-
42
-
43
-
44
-
45
-
46
-
 47
47 -
 48
48 -
 49
49 -
 50
50 -
 51
51 -
 52
52 -
 53
53 -
 54
54 -
 55
55 -
 56
56 -
 57
57 -
58
-
59
-
60
-
61
-
62
-
63
-
64
-
65
-
66
-
67
-
68
-
69
-
70
-
71
-
72
-
73
-
74
-
75
-
76
-
77
-
78
-
79
-
80
-
81
-
82
-
83
-
84
-
85
-
86
-
87
-
88
-
89
-
90
-
91
-
92
-
93
-
94
-
95
-
96
-
97
-
98
-
99
-
100
-
101
-
102
-
103
-
104
-
105
-
106
-
107
-
108
-
109
-
110
-
111
-
112
-
113
-
114
-
115
-
116
-
117
-
118
-
119
-
120
-
121
-
122
-
123
-
124
-
125
-
126
-
127
-
128
-
129
-
130
-
131
-
132
-
133
-
134
-
135
-
136
-
137
-
138
-
139
-
140
-
141
-
142
-
143
-
144
-
145
-
146
-
147
-
148
-
149
-
150
-
151
-
152
-
153
-
154
-
155
-
156
-
157
-
158
-
159
-
160
-
161
-
162
-
163
-
164
-
165
-
166
-
167
-
168
-
169
-
170
-
171
-
172
-
173
-
174
-
175
-
176
-
177
-
178
-
179
-
180
-
181
-
182
 |
 |
