Dell PowerEdge 2900 Hardware Owner's Manual (PDF) - Page 63
Installing a Power Supply, Getting Started Guide - power supplies
 |
View all Dell PowerEdge 2900 manuals
Add to My Manuals
Save this manual to your list of manuals |
Page 63 highlights
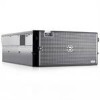
Figure 3-10. Installing and Removing a Power Supply 1 3 2 4 6 5 1 power supply 4 power supply blank 2 handle 5 screw 3 tab 6 locking tab Installing a Power Supply 1 If you are adding a second power supply, remove the power supply blank. See "Removing the Power Supply Blank" on page 64. 2 Holding the handle in the open position, slide the new power supply into the chassis until the release lever contacts the system chassis. See Figure 3-10. NOTICE: On a rack system, you may need to temporarily unlatch and lift the cable management arm. For information about the cable management arm, see the system's Rack Installation Guide. 3 Close the handle until the power supply is fully seated and the locking tab snaps into place. 4 Connect the power cable to the power supply and the power outlet. Create a strain-relief loop in the cable at the back of the power supply and attach the cable to the cable retention bracket just past the loop. See the Getting Started Guide. After installing a new power supply in a system with two power supplies, allow several seconds for the system to recognize the power supply and determine its status. The power-supply status indicator turns green to signify that the power supply is functioning properly (see Figure 1-5). Installing System Components 63
-
 1
1 -
2
-
3
-
4
-
5
-
6
-
7
-
8
-
9
-
10
-
11
-
12
-
13
-
14
-
15
-
16
-
17
-
18
-
19
-
20
-
21
-
22
-
23
-
24
-
25
-
26
-
27
-
28
-
29
-
30
-
31
-
32
-
33
-
34
-
35
-
36
-
37
-
38
-
39
-
40
-
41
-
42
-
43
-
44
-
45
-
46
-
47
-
48
-
49
-
50
-
51
-
52
-
53
-
54
-
55
-
56
-
57
-
 58
58 -
 59
59 -
 60
60 -
 61
61 -
 62
62 -
 63
63 -
 64
64 -
 65
65 -
 66
66 -
 67
67 -
 68
68 -
69
-
70
-
71
-
72
-
73
-
74
-
75
-
76
-
77
-
78
-
79
-
80
-
81
-
82
-
83
-
84
-
85
-
86
-
87
-
88
-
89
-
90
-
91
-
92
-
93
-
94
-
95
-
96
-
97
-
98
-
99
-
100
-
101
-
102
-
103
-
104
-
105
-
106
-
107
-
108
-
109
-
110
-
111
-
112
-
113
-
114
-
115
-
116
-
117
-
118
-
119
-
120
-
121
-
122
-
123
-
124
-
125
-
126
-
127
-
128
-
129
-
130
-
131
-
132
-
133
-
134
-
135
-
136
-
137
-
138
-
139
-
140
-
141
-
142
-
143
-
144
-
145
-
146
-
147
-
148
-
149
-
150
-
151
-
152
-
153
-
154
-
155
-
156
-
157
-
158
-
159
-
160
-
161
-
162
-
163
-
164
-
165
-
166
-
167
-
168
-
169
-
170
-
171
-
172
-
173
-
174
-
175
-
176
-
177
-
178
-
179
-
180
-
181
-
182
 |
 |
