Dell PowerEdge R7525 EMC Installation and Service Manual - Page 63
Drives, Removing a drive blank
 |
View all Dell PowerEdge R7525 manuals
Add to My Manuals
Save this manual to your list of manuals |
Page 63 highlights
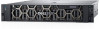
Figure 39. Installing the side wall bracket Next steps 1. Replace the cooling fan assembly. 2. If removed, install the air shroud. 3. Install the backplane cover. 4. If installed, install the front bezel. 5. Follow the procedure listed in the After working inside your system on page 41. Drives Removing a drive blank Prerequisites 1. Follow the safety guidelines listed in the Safety instructions on page 40. 2. If installed, remove the front bezel. CAUTION: To maintain proper system cooling, drive blanks must be installed in all empty drive slots. Steps Press the release button, and slide the drive blank out of the drive slot. Installing and removing system components 63
-
 1
1 -
2
-
3
-
4
-
5
-
6
-
7
-
8
-
9
-
10
-
11
-
12
-
13
-
14
-
15
-
16
-
17
-
18
-
19
-
20
-
21
-
22
-
23
-
24
-
25
-
26
-
27
-
28
-
29
-
30
-
31
-
32
-
33
-
34
-
35
-
36
-
37
-
38
-
39
-
40
-
41
-
42
-
43
-
44
-
45
-
46
-
47
-
48
-
49
-
50
-
51
-
52
-
53
-
54
-
55
-
56
-
57
-
 58
58 -
 59
59 -
 60
60 -
 61
61 -
 62
62 -
 63
63 -
 64
64 -
 65
65 -
 66
66 -
 67
67 -
 68
68 -
69
-
70
-
71
-
72
-
73
-
74
-
75
-
76
-
77
-
78
-
79
-
80
-
81
-
82
-
83
-
84
-
85
-
86
-
87
-
88
-
89
-
90
-
91
-
92
-
93
-
94
-
95
-
96
-
97
-
98
-
99
-
100
-
101
-
102
-
103
-
104
-
105
-
106
-
107
-
108
-
109
-
110
-
111
-
112
-
113
-
114
-
115
-
116
-
117
-
118
-
119
-
120
-
121
-
122
-
123
-
124
-
125
-
126
-
127
-
128
-
129
-
130
-
131
-
132
-
133
-
134
-
135
-
136
-
137
-
138
-
139
-
140
-
141
-
142
-
143
-
144
-
145
-
146
-
147
-
148
-
149
-
150
-
151
-
152
-
153
-
154
-
155
-
156
-
157
-
158
-
159
-
160
-
161
-
162
-
163
-
164
-
165
-
166
-
167
-
168
-
169
-
170
-
171
-
172
-
173
-
174
-
175
-
176
-
177
-
178
-
179
-
180
-
181
-
182
-
183
-
184
-
185
-
186
-
187
-
188
-
189
-
190
-
191
-
192
-
193
-
194
-
195
-
196
-
197
-
198
-
199
-
200
-
201
-
202
-
203
 |
 |

Figure 39. Installing the side wall bracket
Next steps
1.
Replace the cooling fan assembly
.
2.
If removed,
install the air shroud
.
3.
Install the backplane cover
.
4.
If installed,
install the front bezel
.
5.
Follow the procedure listed in the
After working inside your system
on page 41.
Drives
Removing a drive blank
Prerequisites
1.
Follow the safety guidelines listed in the
Safety instructions
on page 40.
2.
If installed,
remove the front bezel
.
CAUTION:
To maintain proper system cooling, drive blanks must be installed in all empty drive slots.
Steps
Press the release button, and slide the drive blank out of the drive slot.
Installing and removing system components
63