Denon DRW840 Operating Instructions - Page 4
Names, Functions, Parts
 |
UPC - 081577500643
View all Denon DRW840 manuals
Add to My Manuals
Save this manual to your list of manuals |
Page 4 highlights
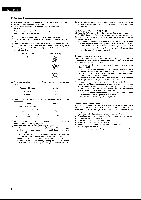
ENGLISH NAMES AND FUNCTIONS OF PARTS O Power Switch (POWER) Press once to turn the power to deck on, and once more to turn the power off. The deck remains in a stand-by (non-operative) mode for approximately 2 seconds after it is switched on. Eject Button (EJECT ) Press this button to open the cassette compartment cover. When the tape is running, press the STOP ( • ) button first to stop tape transport, then press the Eject button. Counter Reset Button (COUNTER RESET) Press this button to reset the tape counter to zero. O Counter Display Deck A/B Selector (COUNTER A/B) Press this button to switch the tape counter display between deck A and deck B. Counter Memory Button (MEMO) When this button is pressed during forward tape travel (D), fast rewinding ( 41 ) will stop automatically at the tape counter position "0000". When this button is pressed during reverse tape travel (.1), fast forwarding ( Ilollo• ) will stop automatically at the tape counter position "0000". See page 12. O Dolby NR Switch (DOLBY NR) To record or playback tapes with Dolby B- or C-type noise reduction, set this switch to "B" or "C". Turn it off when not using the Dolby NR system. O Reverse Mode Button (REV. MODE) Select the type of tape transport. The reverse mode canbe set to (one side), C:3 (continuous playback), RELAY (relay playback). If you further press the button during the display, the reverse mode will change in the following cycle. C:3 RELAY Dubbing Speed Buttons (DUBBING SPEED) Pressing the NORMAL button starts regular speed dubbing from deck A to deck B. Press the HIGH button to perform dubbing at double speed. See page 10. O Bias Fine Control (BIAS FINE) (For Normal, CrO2 and Metal tape) Use this control to fine-adjust the bias. Standard bias is obtained at the center click-stop position. See page 9. Input Level Control (INPUT LEVEL) This knob adjusts the recording input level. It affects the level in both channels. See page 8. Cassette Compartment Cover If the cover is not closed completely, the tape transport buttons will remain inoperative. Headphone Jack (PHONES) For private music enjoyment without disturbing others, or for monitoring a recording, a headphone set may be connected to this jack. Use a headphone with an impedance rating of 8 to 1200 ohms. Remote Sensor (REMOTE SENSOR) With the cassette deck the remote control unit is not included Each of "PLAY, FF, REW, STOP, REC PAUSE and REC/REC MUTE functions can be remote controlled with wireless handset of the receiver (DRA Series receivers). For details refer to the DRA Series operating instructions. NOTE: Note that only the A deck can be operated with remote control units which have no A/B selector button. When operating the B deck with remote control units equipped with an A/B selector button, press A/B selector button before pressing the operation button. Twin Recording Button (TWIN REC) Pressing this button will set both deck A and B to the recording pause mode. See page 10. Tape Transport Buttons PLAY • 44 III+ • REC/REC MUTE II REC PAUSE Q Play Button Stop Button Fast Rewind Button Fast Forward Button Rec/Rec Mute Button Rec Pause Button Direction Button Press to playback tape. Press to stop the tape in any mode. Press for fast rewind. Press for fast forwarding. Press the REC/REC MUTE (fa) button and PLAY button simultaneously to start recording. If only the REC/REC MUTE ( • ) button is pressed, the deck enters the Recording Pause mode. Pressing this button in the Recording Pause mode will start Auto Rec Mute, and a 5-second silent space is recorded onto the tape. See page 9. Press this button to enter the recording pause mode from the recording or recording mute mode. This button can only be used during recording. See page 9. Changes the tape transport direction from forward "►" to reverse "1", and vice versa. 6
-
 1
1 -
 2
2 -
 3
3 -
 4
4 -
 5
5 -
 6
6 -
 7
7 -
 8
8 -
 9
9 -
 10
10 -
11
-
12
-
13
-
14
-
15
-
16
-
17
-
18
-
19
-
20
-
21
-
22
-
23
-
24
-
25
-
26
-
27
-
28
-
29
-
30
-
31
-
32
-
33
-
34
-
35
-
36
-
37
-
38
-
39
-
40
-
41
-
42
-
43
-
44
-
45
-
46
-
47
-
48
-
49
-
50
-
51
-
52
-
53
-
54
-
55
-
56
-
57
-
58
-
59
-
60
-
61
-
62
-
63
-
64
-
65
-
66
-
67
-
68
-
69
-
70
-
71
-
72
-
73
-
74
-
75
-
76
 |
 |
