Epson 12000XL Users Guide - Page 16
Important, cover in the reverse order that you removed it.
 |
View all Epson 12000XL manuals
Add to My Manuals
Save this manual to your list of manuals |
Page 16 highlights
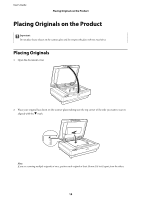
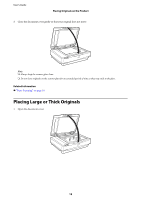
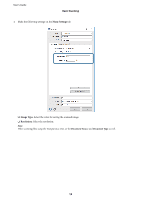
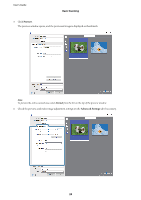
User's Guide Placing Originals on the Product If the size of the original exceeds the size of the document cover, you can lift the document cover straight up and remove it to make it easier to align the original. When you have finished scanning, replace the document cover in the reverse order that you removed it. c Important: ❏ Before removing the document cover, make sure you raise it to the upright position to prevent the hinges from snapping back on the springs. ❏ Do not force the cover off the scanner; otherwise, the cover may be damaged. 2. Place a large or thick original face-down on the scanner glass. Make sure the top corner of the original is aligned with the d mark. 16
-
 1
1 -
2
-
3
-
4
-
5
-
6
-
7
-
8
-
9
-
10
-
 11
11 -
 12
12 -
 13
13 -
 14
14 -
 15
15 -
 16
16 -
 17
17 -
 18
18 -
 19
19 -
 20
20 -
 21
21 -
22
-
23
-
24
-
25
-
26
-
27
-
28
-
29
-
30
-
31
-
32
-
33
-
34
-
35
-
36
-
37
-
38
-
39
-
40
-
41
-
42
-
43
-
44
-
45
-
46
-
47
-
48
-
49
-
50
-
51
-
52
-
53
-
54
-
55
-
56
-
57
-
58
-
59
-
60
-
61
-
62
-
63
-
64
-
65
-
66
-
67
-
68
 |
 |
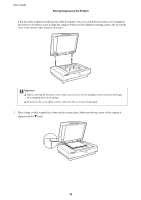
If the size of the original exceeds the size of the document cover, you can liſt the document cover straight up
and remove it to make it easier to align the original. When you have finished scanning, replace the document
cover in the reverse order that you removed it.
c
Important:
❏
Before removing the document cover, make sure you raise it to the upright position to prevent the hinges
from snapping back on the springs.
❏
Do not force the cover off the scanner; otherwise, the cover
may be damaged.
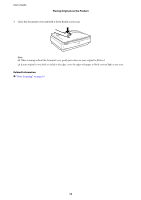
2.
Place a large or thick original face-down on the scanner glass. Make sure the top corner of the original is
aligned with the
d
mark.
User's Guide
Placing Originals on the Product
16