Epson 12000XL Users Guide - Page 22
Scanning Documents (Document Mode), Folder, Select, Document Mode, All apps, EPSON, Epson Scan 2
 |
View all Epson 12000XL manuals
Add to My Manuals
Save this manual to your list of manuals |
Page 22 highlights
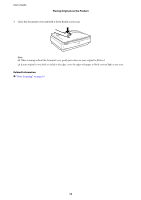
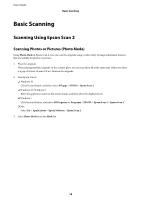
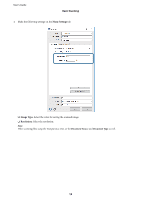
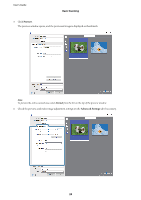
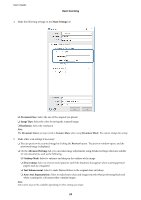
User's Guide Basic Scanning ❏ Folder: Select the save folder for the scanned image from the list. You can select another folder or create a new folder by selecting Select from the list. 8. Click Scan. Related Information & "Placing Originals on the Product" on page 14 & "Epson Scan 2" on page 13 & "Setting a Resolution That Suits the Scanning Purpose" on page 25 & "Image Adjustment Features for Photo Mode" on page 27 Scanning Documents (Document Mode) Using Document Mode in Epson Scan 2, you can scan the originals using detailed settings that are suitable for text documents. Note: You cannot scan negatives with the Transparency Unit when using Document Mode. 1. Place the originals. 2. Start Epson Scan 2. ❏ Windows 10 Click the start button, and then select All apps > EPSON > Epson Scan 2. ❏ Windows 8.1/Windows 8 Enter the application name in the search charm, and then select the displayed icon. ❏ Windows 7 Click the start button, and select All Programs or Programs > EPSON > Epson Scan 2 > Epson Scan 2. ❏ Mac Select Go > Applications > Epson Software > Epson Scan 2. 3. Select Document Mode from the Mode list. 22
-
 1
1 -
2
-
3
-
4
-
5
-
6
-
7
-
8
-
9
-
10
-
11
-
12
-
13
-
14
-
15
-
16
-
 17
17 -
 18
18 -
 19
19 -
 20
20 -
 21
21 -
 22
22 -
 23
23 -
 24
24 -
 25
25 -
 26
26 -
 27
27 -
28
-
29
-
30
-
31
-
32
-
33
-
34
-
35
-
36
-
37
-
38
-
39
-
40
-
41
-
42
-
43
-
44
-
45
-
46
-
47
-
48
-
49
-
50
-
51
-
52
-
53
-
54
-
55
-
56
-
57
-
58
-
59
-
60
-
61
-
62
-
63
-
64
-
65
-
66
-
67
-
68
 |
 |