Epson 12000XL Users Guide - Page 21
Brightness, Contrast, Saturation, Unsharp Mask, Color Restoration, Backlight Correction, Descreening
 |
View all Epson 12000XL manuals
Add to My Manuals
Save this manual to your list of manuals |
Page 21 highlights
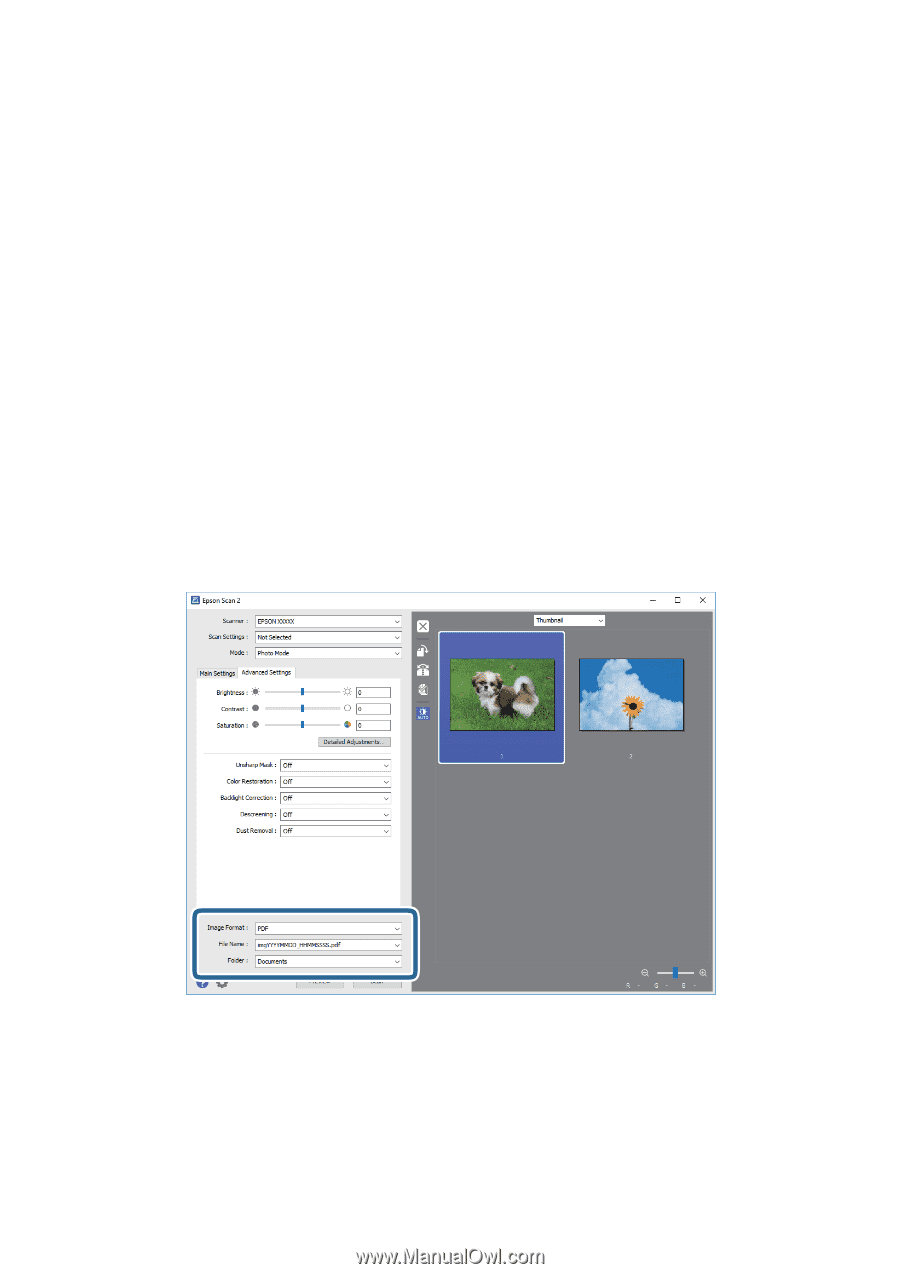
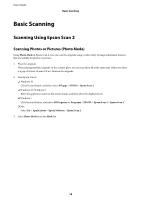
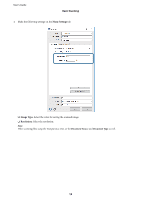
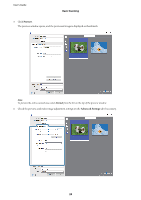
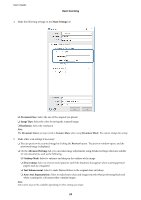
User's Guide Basic Scanning You can adjust the scanned image using detailed settings which are suitable for photos or pictures, such as the following. ❏ Brightness: Select to adjust the brightness for the scanned image. ❏ Contrast: Select to adjust the contrast for the scanned image. ❏ Saturation: Select to adjust the saturation (color vividness) for the scanned image. ❏ Unsharp Mask: Select to enhance and sharpen the outlines for the scanned image. ❏ Color Restoration: Select to correct images that have faded to return them to their original colors. ❏ Backlight Correction: Select to lighten scanned images that are dark due to backlight. ❏ Descreening: Select to remove moiré patterns (web-like shadows) that appear when scanning printed papers such as a magazine. ❏ Dust Removal: Select to remove dust on the scanned image. Note: ❏ Some items may not be available depending on other settings you made. ❏ Depending on the original, the scanned image may not be adjusted correctly. ❏ When multiple thumbnails are created, you can adjust the image quality for each thumbnail. Depending on the adjustment items, you can adjust the quality of scanned images at the same time by selecting multiple thumbnails. 7. Set the file saving settings. ❏ Image Format: Select the save format from the list. You can make detailed settings for each save format except BITMAP and PNG. After selecting the save format, select Options from the list. ❏ File Name: Check the save file name displayed. You can change settings for the file name by selecting Settings from the list. 21
-
 1
1 -
2
-
3
-
4
-
5
-
6
-
7
-
8
-
9
-
10
-
11
-
12
-
13
-
14
-
15
-
 16
16 -
 17
17 -
 18
18 -
 19
19 -
 20
20 -
 21
21 -
 22
22 -
 23
23 -
 24
24 -
 25
25 -
 26
26 -
27
-
28
-
29
-
30
-
31
-
32
-
33
-
34
-
35
-
36
-
37
-
38
-
39
-
40
-
41
-
42
-
43
-
44
-
45
-
46
-
47
-
48
-
49
-
50
-
51
-
52
-
53
-
54
-
55
-
56
-
57
-
58
-
59
-
60
-
61
-
62
-
63
-
64
-
65
-
66
-
67
-
68
 |
 |