Epson 755c User's Guide - Page 128
Using E-Mail Alerts
 |
UPC - 010343855366
View all Epson 755c manuals
Add to My Manuals
Save this manual to your list of manuals |
Page 128 highlights
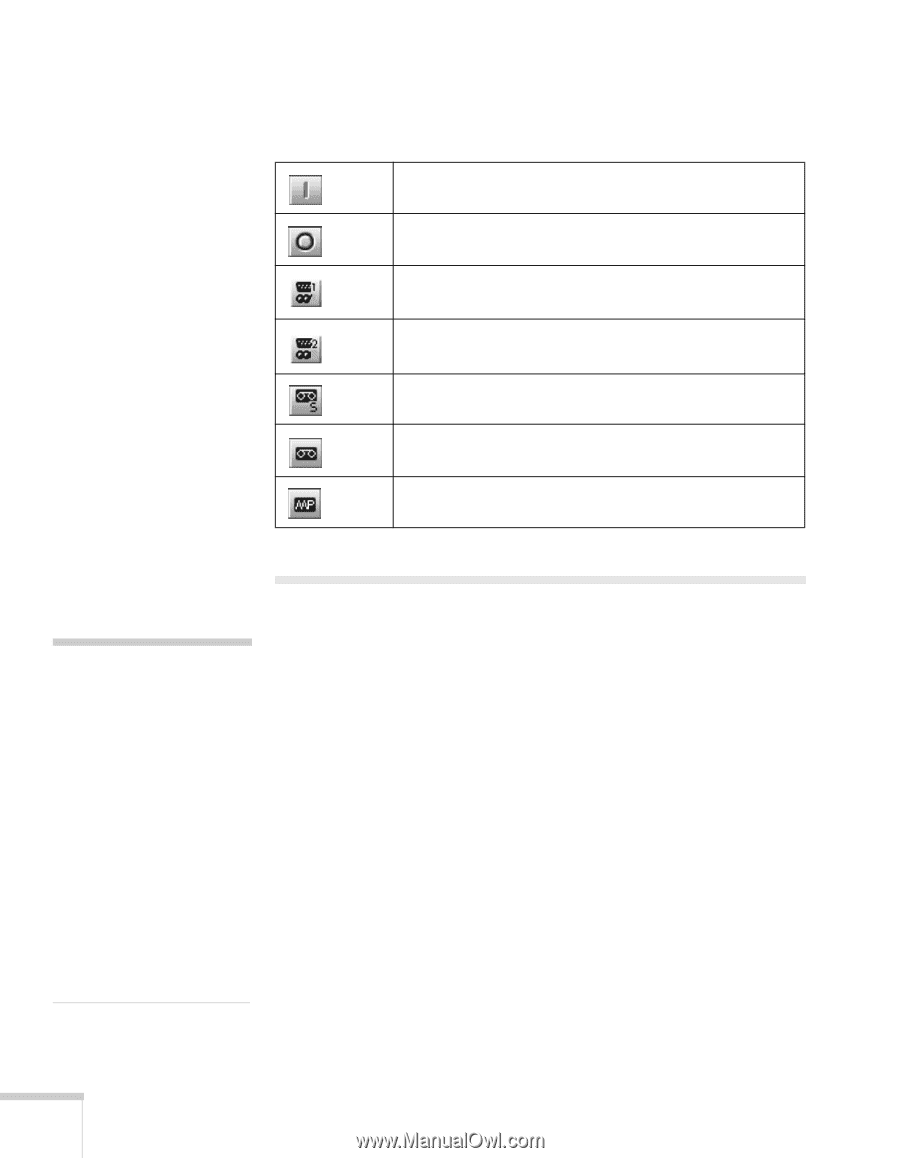
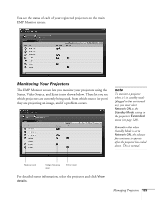
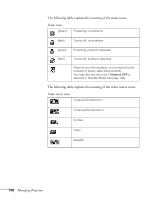
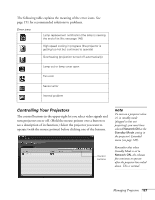
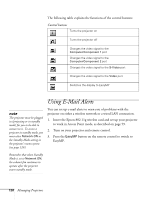
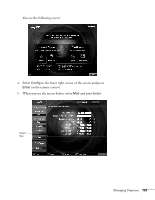
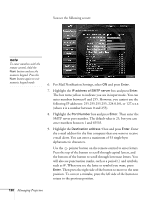
The following table explains the functions of the control buttons: Control buttons Turns the projector on Turns the projector off Changes the video signal to the Computer/Component 1 port Changes the video signal to the Computer/Component 2 port Changes the video signal to the S-Video port Changes the video signal to the Video port Switches the display to EasyMP Using E-Mail Alerts note The projector must be plugged in (projecting or in standby mode) for you to be able to connect to it. To access a projector in standby mode, you must select Network ON as the Standby Mode setting in the projector's menu system (see page 120.) You can set up e-mail alerts to warn you of problems with the projector on either a wireless network or a wired LAN connection. 1. Insert the Epson 802.11g wireless card and set up your projector to work in Access Point mode, as described on page 59. 2. Turn on your projector and remote control. 3. Press the EasyMP button on the remote control to switch to EasyMP. Remember that when Standby Mode is set to Network ON, the exhaust fan continues to operate after the projector enters standby mode. 128 Managing Projectors
-
 1
1 -
2
-
3
-
4
-
5
-
6
-
7
-
8
-
9
-
10
-
11
-
12
-
13
-
14
-
15
-
16
-
17
-
18
-
19
-
20
-
21
-
22
-
23
-
24
-
25
-
26
-
27
-
28
-
29
-
30
-
31
-
32
-
33
-
34
-
35
-
36
-
37
-
38
-
39
-
40
-
41
-
42
-
43
-
44
-
45
-
46
-
47
-
48
-
49
-
50
-
51
-
52
-
53
-
54
-
55
-
56
-
57
-
58
-
59
-
60
-
61
-
62
-
63
-
64
-
65
-
66
-
67
-
68
-
69
-
70
-
71
-
72
-
73
-
74
-
75
-
76
-
77
-
78
-
79
-
80
-
81
-
82
-
83
-
84
-
85
-
86
-
87
-
88
-
89
-
90
-
91
-
92
-
93
-
94
-
95
-
96
-
97
-
98
-
99
-
100
-
101
-
102
-
103
-
104
-
105
-
106
-
107
-
108
-
109
-
110
-
111
-
112
-
113
-
114
-
115
-
116
-
117
-
118
-
119
-
120
-
121
-
122
-
 123
123 -
 124
124 -
 125
125 -
 126
126 -
 127
127 -
 128
128 -
 129
129 -
 130
130 -
 131
131 -
 132
132 -
 133
133 -
134
-
135
-
136
-
137
-
138
-
139
-
140
-
141
-
142
-
143
-
144
-
145
-
146
-
147
-
148
-
149
-
150
-
151
-
152
-
153
-
154
-
155
-
156
-
157
-
158
-
159
-
160
-
161
-
162
-
163
-
164
-
165
-
166
-
167
-
168
-
169
-
170
-
171
-
172
-
173
-
174
-
175
-
176
-
177
-
178
-
179
-
180
-
181
-
182
-
183
-
184
-
185
-
186
-
187
-
188
-
189
-
190
-
191
-
192
-
193
-
194
-
195
-
196
-
197
-
198
 |
 |