Epson 755c User's Guide - Page 136
NS Connection., to save the projectors as a group. When you see
 |
UPC - 010343855366
View all Epson 755c manuals
Add to My Manuals
Save this manual to your list of manuals |
Page 136 highlights
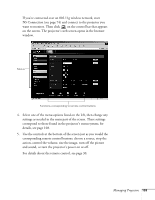
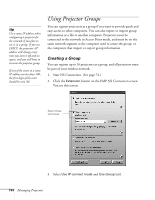
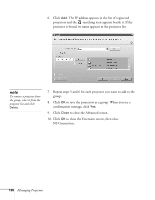
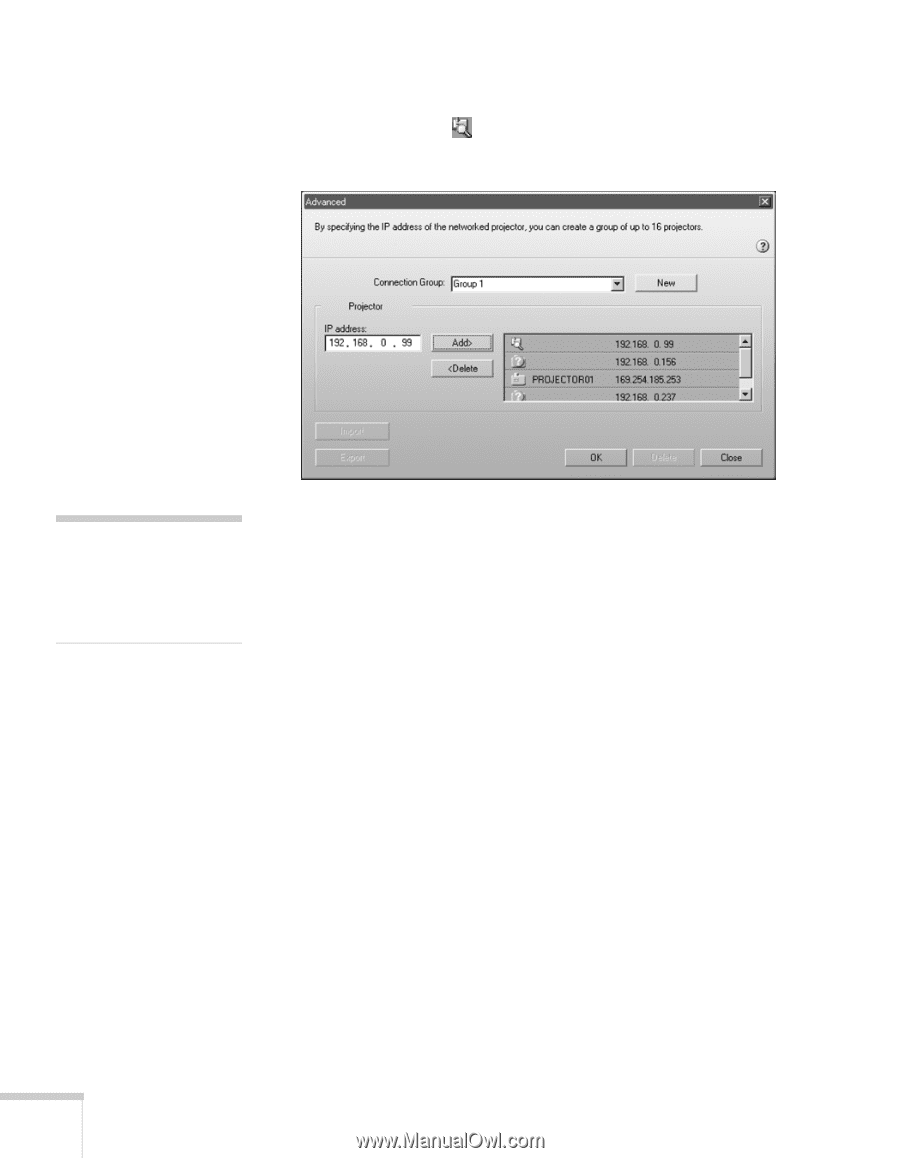
6. Click Add. The IP address appears in the list of registered projectors and the searching icon appears beside it. If the projector is found, its name appears in the projector list. note To remove a projector from the group, select it from the projector list and click Delete. 7. Repeat steps 5 and 6 for each projector you want to add to the group. 8. Click OK to save the projectors as a group. When you see a confirmation message, click Yes. 9. Click Close to close the Advanced screen. 10. Click OK to close the Extension screen, then close NS Connection. 136 Managing Projectors
-
 1
1 -
2
-
3
-
4
-
5
-
6
-
7
-
8
-
9
-
10
-
11
-
12
-
13
-
14
-
15
-
16
-
17
-
18
-
19
-
20
-
21
-
22
-
23
-
24
-
25
-
26
-
27
-
28
-
29
-
30
-
31
-
32
-
33
-
34
-
35
-
36
-
37
-
38
-
39
-
40
-
41
-
42
-
43
-
44
-
45
-
46
-
47
-
48
-
49
-
50
-
51
-
52
-
53
-
54
-
55
-
56
-
57
-
58
-
59
-
60
-
61
-
62
-
63
-
64
-
65
-
66
-
67
-
68
-
69
-
70
-
71
-
72
-
73
-
74
-
75
-
76
-
77
-
78
-
79
-
80
-
81
-
82
-
83
-
84
-
85
-
86
-
87
-
88
-
89
-
90
-
91
-
92
-
93
-
94
-
95
-
96
-
97
-
98
-
99
-
100
-
101
-
102
-
103
-
104
-
105
-
106
-
107
-
108
-
109
-
110
-
111
-
112
-
113
-
114
-
115
-
116
-
117
-
118
-
119
-
120
-
121
-
122
-
123
-
124
-
125
-
126
-
127
-
128
-
129
-
130
-
 131
131 -
 132
132 -
 133
133 -
 134
134 -
 135
135 -
 136
136 -
 137
137 -
 138
138 -
 139
139 -
 140
140 -
 141
141 -
142
-
143
-
144
-
145
-
146
-
147
-
148
-
149
-
150
-
151
-
152
-
153
-
154
-
155
-
156
-
157
-
158
-
159
-
160
-
161
-
162
-
163
-
164
-
165
-
166
-
167
-
168
-
169
-
170
-
171
-
172
-
173
-
174
-
175
-
176
-
177
-
178
-
179
-
180
-
181
-
182
-
183
-
184
-
185
-
186
-
187
-
188
-
189
-
190
-
191
-
192
-
193
-
194
-
195
-
196
-
197
-
198
 |
 |
136
Managing Projectors
6.
Click
Add
. The IP address appears in the list of registered
projectors and the
searching icon appears beside it. If the
projector is found, its name appears in the projector list.
7.
Repeat steps 5 and 6 for each projector you want to add to the
group.
8.
Click
OK
to save the projectors as a group. When you see a
confirmation message, click
Yes
.
9.
Click
Close
to close the Advanced screen.
10. Click
OK
to close the Extension screen, then close
NS Connection.
note
To remove a projector from
the group, select it from the
projector list and click
Delete
.