Epson 755c User's Guide - Page 53
pointer button on the remote control to, If not, use
 |
UPC - 010343855366
View all Epson 755c manuals
Add to My Manuals
Save this manual to your list of manuals |
Page 53 highlights
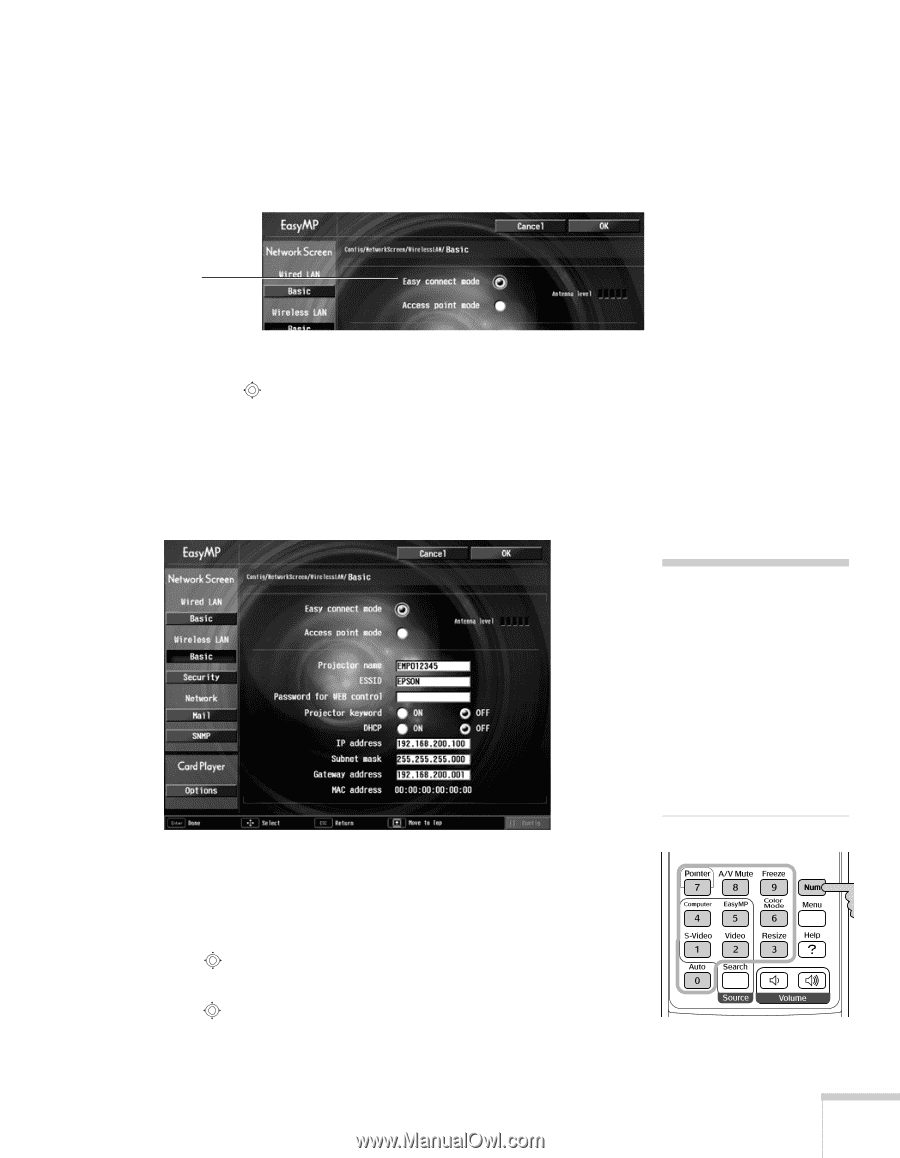
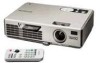
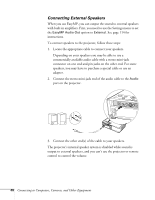
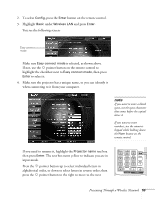
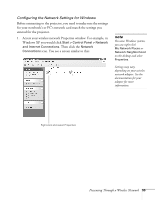
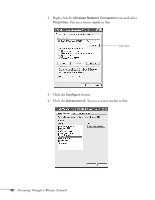
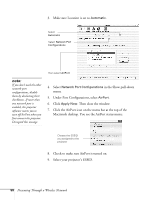
2. To select Config, press the Enter button on the remote control. 3. Highlight Basic under Wireless LAN and press Enter. You see the following screen: Easy connect mode Make sure Easy connect mode is selected, as shown above. If not, use the pointer button on the remote control to highlight the checkbox next to Easy connect mode, then press Enter to select it. 4. Make sure the projector has a unique name, so you can identify it when connecting to it from your computer. note If you want to enter a blank space, use the space character that comes before the capital letter A. If you want to enter numbers, use the numeric keypad while holding down the Num button on the remote control. If you need to rename it, highlight the Projector name text box then press Enter. The text box turns yellow to indicate you are in input mode. Press the pointer button up to select individual letters in alphabetical order, or down to select letters in reverse order; then press the pointer button to the right to move to the next Presenting Through a Wireless Network 53
-
 1
1 -
2
-
3
-
4
-
5
-
6
-
7
-
8
-
9
-
10
-
11
-
12
-
13
-
14
-
15
-
16
-
17
-
18
-
19
-
20
-
21
-
22
-
23
-
24
-
25
-
26
-
27
-
28
-
29
-
30
-
31
-
32
-
33
-
34
-
35
-
36
-
37
-
38
-
39
-
40
-
41
-
42
-
43
-
44
-
45
-
46
-
47
-
 48
48 -
 49
49 -
 50
50 -
 51
51 -
 52
52 -
 53
53 -
 54
54 -
 55
55 -
 56
56 -
 57
57 -
 58
58 -
59
-
60
-
61
-
62
-
63
-
64
-
65
-
66
-
67
-
68
-
69
-
70
-
71
-
72
-
73
-
74
-
75
-
76
-
77
-
78
-
79
-
80
-
81
-
82
-
83
-
84
-
85
-
86
-
87
-
88
-
89
-
90
-
91
-
92
-
93
-
94
-
95
-
96
-
97
-
98
-
99
-
100
-
101
-
102
-
103
-
104
-
105
-
106
-
107
-
108
-
109
-
110
-
111
-
112
-
113
-
114
-
115
-
116
-
117
-
118
-
119
-
120
-
121
-
122
-
123
-
124
-
125
-
126
-
127
-
128
-
129
-
130
-
131
-
132
-
133
-
134
-
135
-
136
-
137
-
138
-
139
-
140
-
141
-
142
-
143
-
144
-
145
-
146
-
147
-
148
-
149
-
150
-
151
-
152
-
153
-
154
-
155
-
156
-
157
-
158
-
159
-
160
-
161
-
162
-
163
-
164
-
165
-
166
-
167
-
168
-
169
-
170
-
171
-
172
-
173
-
174
-
175
-
176
-
177
-
178
-
179
-
180
-
181
-
182
-
183
-
184
-
185
-
186
-
187
-
188
-
189
-
190
-
191
-
192
-
193
-
194
-
195
-
196
-
197
-
198
 |
 |