Epson LQ-300 User Manual - Page 46
to adjust the loading position., where printing begins on the follow the steps - font settings
 |
View all Epson LQ-300 manuals
Add to My Manuals
Save this manual to your list of manuals |
Page 46 highlights
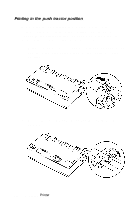
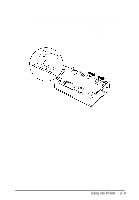
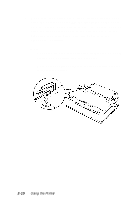
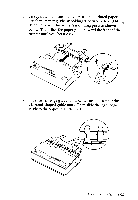
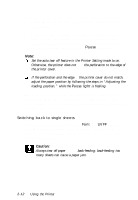
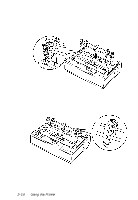
7. Make sure the printer cover is closed. Then turn on the printer. When the printer receives data, it begins printing automatically. 8. When you finish printing (the printer receives no data for three seconds) the printer feeds the perforation of the continuous paper to the edge of the printer cover so that you can tear off the last sheet. The Pause light flashes. Note: Set the auto tear off feature in the Printer Setting mode to on. Otherwise, the printer does not feed the perforation to the edge of the printcr cover. If the perforation and the edge of the printer cover do not match, adjust the paper position by following the steps in "Adjusting the loading position, " while the Pause light is flashing. When you send more data, the paper automatically feeds back to the loading position. If you want to change the position where printing begins on the page, follow the steps on page 2-5 to adjust the loading position. Switching back to single sheets To switch to single sheets, press the Font and LF/FF buttons at the same time; the printer feeds the paper backward into the paper-park position. Then follow the steps in "Loading single sheets" on page 2-5. Caution: Always tear off paper before back-feeding; back-feeding too many sheets can cause a paper jam. 2-12 Using the Printer
-
 1
1 -
2
-
3
-
4
-
5
-
6
-
7
-
8
-
9
-
10
-
11
-
12
-
13
-
14
-
15
-
16
-
17
-
18
-
19
-
20
-
21
-
22
-
23
-
24
-
25
-
26
-
27
-
28
-
29
-
30
-
31
-
32
-
33
-
34
-
35
-
36
-
37
-
38
-
39
-
40
-
 41
41 -
 42
42 -
 43
43 -
 44
44 -
 45
45 -
 46
46 -
 47
47 -
 48
48 -
 49
49 -
 50
50 -
 51
51 -
52
-
53
-
54
-
55
-
56
-
57
-
58
-
59
-
60
-
61
-
62
-
63
-
64
-
65
-
66
-
67
-
68
-
69
-
70
-
71
-
72
-
73
-
74
-
75
-
76
-
77
-
78
-
79
-
80
-
81
-
82
-
83
-
84
-
85
-
86
-
87
-
88
-
89
-
90
-
91
-
92
-
93
-
94
-
95
-
96
-
97
-
98
-
99
-
100
-
101
-
102
-
103
-
104
-
105
-
106
-
107
-
108
-
109
-
110
-
111
-
112
-
113
-
114
-
115
-
116
-
117
 |
 |
