Epson LQ-300 User Manual - Page 51
Printing on Special Paper, Adjusting the Paper-thickness Lever
 |
View all Epson LQ-300 manuals
Add to My Manuals
Save this manual to your list of manuals |
Page 51 highlights
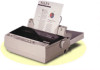
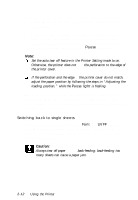
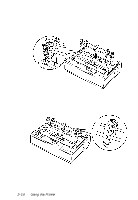
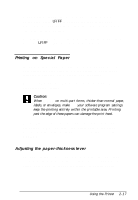
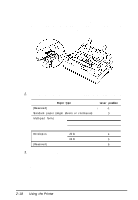
If you want to change the position where printing begins on the page, press LF/FF to advance the page to the next top-of-form position, and then follow the steps on page 2-5 to adjust the loading position. To eject the paper, tear off the paper entering the printer; then press the LF/FF button to feed the paper forward. Printing on Special Paper In addition to printing on single sheets and continuous forms, your printer can also print on a wide variety of paper types, including multi-part forms, labels, and envelopes. Before printing on special paper, you need to change the paper-thickness setting. Caution: When printing on multi-part forms, thicker-than-normal paper, labels, or envelopes, make sure your software program settings keep the printing entirely within the printable area. Printing past the edge of these papers can damage the print head. For multi-part forms and labels, you should not print any closer than 13 mm (0.5 inch) from either edge of the paper. For information on the printable area of envelopes, see the Appendix. Adjusting the paper-thickness lever The paper-thickness lever lets you specify the correct setting for your printing material. It is factory-set for standard office paper. Here's how to change the setting for special papers: Using the Printer 2-17
-
 1
1 -
2
-
3
-
4
-
5
-
6
-
7
-
8
-
9
-
10
-
11
-
12
-
13
-
14
-
15
-
16
-
17
-
18
-
19
-
20
-
21
-
22
-
23
-
24
-
25
-
26
-
27
-
28
-
29
-
30
-
31
-
32
-
33
-
34
-
35
-
36
-
37
-
38
-
39
-
40
-
41
-
42
-
43
-
44
-
45
-
 46
46 -
 47
47 -
 48
48 -
 49
49 -
 50
50 -
 51
51 -
 52
52 -
 53
53 -
 54
54 -
 55
55 -
 56
56 -
57
-
58
-
59
-
60
-
61
-
62
-
63
-
64
-
65
-
66
-
67
-
68
-
69
-
70
-
71
-
72
-
73
-
74
-
75
-
76
-
77
-
78
-
79
-
80
-
81
-
82
-
83
-
84
-
85
-
86
-
87
-
88
-
89
-
90
-
91
-
92
-
93
-
94
-
95
-
96
-
97
-
98
-
99
-
100
-
101
-
102
-
103
-
104
-
105
-
106
-
107
-
108
-
109
-
110
-
111
-
112
-
113
-
114
-
115
-
116
-
117
 |
 |