Epson PowerLite 9000NL User Manual - Page 68
Turning the Projector On and Off, Warning
 |
View all Epson PowerLite 9000NL manuals
Add to My Manuals
Save this manual to your list of manuals |
Page 68 highlights
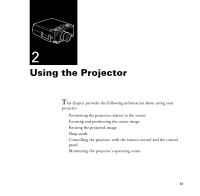
Turning the Projector On and Off Follow these steps to turn on the projector: 1. Connect one end of the power cord to the projector's power inlet. 2. Connect the other end to a grounded electrical outlet. The power light on the projector's control panel turns orange, indicating that the projector is in sleep mode. (The projector is not turned on yet.) 3. Remove the projector lens cap. 4. Press the Power button on the remote control or control panel to turn on the projector. The power light flashes green as the projector warms up. If computer or video equipment is attached, the computer or video signal is projected. Allow about 30 seconds for full illumination. Warning: Never look into the lens when the lamp is on. This can damage your eyes. It is especially important that children not look into the lens. When you want to stop projecting images, press the Power button. A confirmation message appears. Press the Power button again. The fan remains on and the projection lamp light flashes orange for about 60 seconds as the projector cools down.When the projector has cooled down, flashing stops. The power light remains orange. Note: If you press the Power button to turn the projector back on while the power light is orange, there may be a delay before a projected image appears. 58 1 • Setting Up the Projector
-
 1
1 -
2
-
3
-
4
-
5
-
6
-
7
-
8
-
9
-
10
-
11
-
12
-
13
-
14
-
15
-
16
-
17
-
18
-
19
-
20
-
21
-
22
-
23
-
24
-
25
-
26
-
27
-
28
-
29
-
30
-
31
-
32
-
33
-
34
-
35
-
36
-
37
-
38
-
39
-
40
-
41
-
42
-
43
-
44
-
45
-
46
-
47
-
48
-
49
-
50
-
51
-
52
-
53
-
54
-
55
-
56
-
57
-
58
-
59
-
60
-
61
-
62
-
 63
63 -
 64
64 -
 65
65 -
 66
66 -
 67
67 -
 68
68 -
 69
69 -
 70
70 -
 71
71 -
 72
72 -
 73
73 -
74
-
75
-
76
-
77
-
78
-
79
-
80
-
81
-
82
-
83
-
84
-
85
-
86
-
87
-
88
-
89
-
90
-
91
-
92
-
93
-
94
-
95
-
96
-
97
-
98
-
99
-
100
-
101
-
102
-
103
-
104
-
105
-
106
-
107
-
108
-
109
-
110
-
111
-
112
-
113
-
114
-
115
-
116
-
117
-
118
-
119
-
120
-
121
-
122
-
123
-
124
-
125
-
126
-
127
-
128
-
129
-
130
-
131
-
132
-
133
-
134
-
135
-
136
-
137
-
138
-
139
-
140
-
141
-
142
-
143
-
144
-
145
-
146
-
147
-
148
-
149
-
150
-
151
-
152
-
153
-
154
-
155
-
156
-
157
-
158
-
159
-
160
-
161
-
162
-
163
-
164
-
165
-
166
-
167
-
168
-
169
-
170
-
171
-
172
-
173
-
174
-
175
-
176
-
177
-
178
 |
 |