Epson PowerLite 9000NL User Manual - Page 74
Using the Keystone Feature, button on the control panel to increase or decrease the image
 |
View all Epson PowerLite 9000NL manuals
Add to My Manuals
Save this manual to your list of manuals |
Page 74 highlights
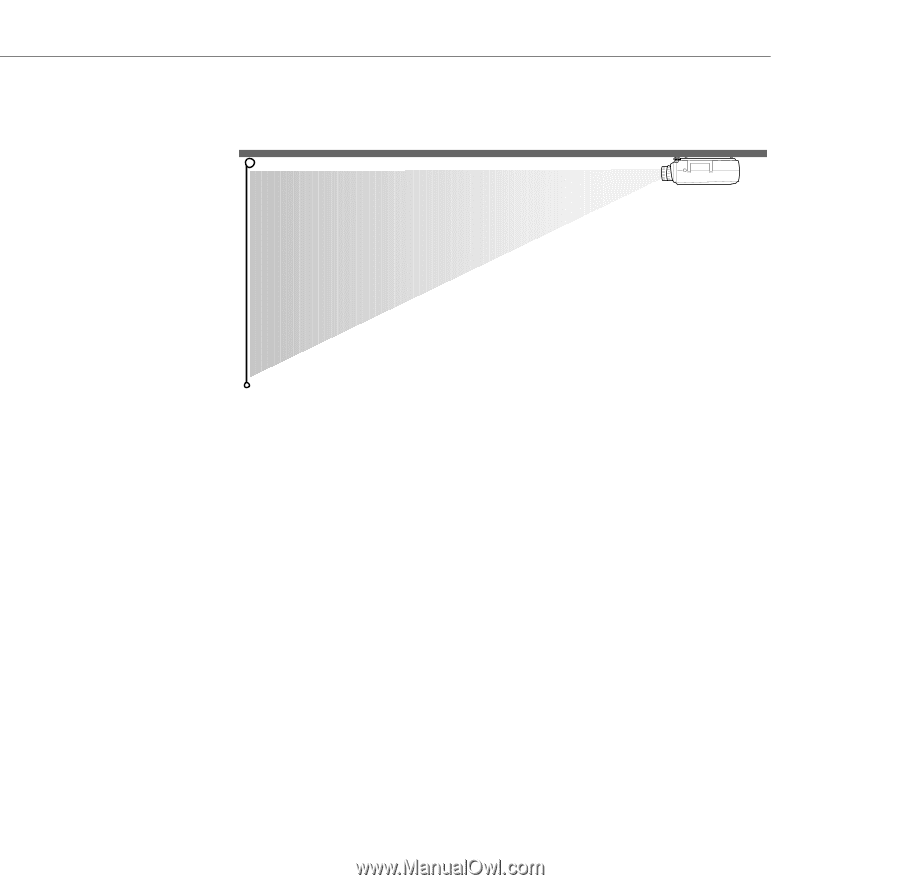
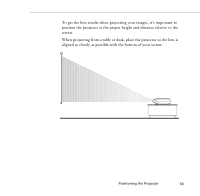
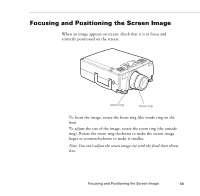
When projecting from the ceiling, align the lens as closely as possible with the top of your screen: Using the Keystone Feature In circumstances where the lens cannot be properly aligned, use the projector's Keystone function to help maintain optimum screen geometry. Ë Press the Optical Keystone Adjustment knob on the side of the projector (next to the handle). When the knob pops out, turn it clockwise or counterclockwise to move the lens up or down. When you're finished, press the knob back in. Ë Adjust keystone correction digitally by pressing the Keystone button on the control panel to increase or decrease the image adjustment. This feature allows you to correct up to a ± 20° tilt, maintaining an aspect ratio of 4:3. Using the ELP Link IV software, you can correct up to a ± 30° tilt. 64 2 • Using the Projector
-
 1
1 -
2
-
3
-
4
-
5
-
6
-
7
-
8
-
9
-
10
-
11
-
12
-
13
-
14
-
15
-
16
-
17
-
18
-
19
-
20
-
21
-
22
-
23
-
24
-
25
-
26
-
27
-
28
-
29
-
30
-
31
-
32
-
33
-
34
-
35
-
36
-
37
-
38
-
39
-
40
-
41
-
42
-
43
-
44
-
45
-
46
-
47
-
48
-
49
-
50
-
51
-
52
-
53
-
54
-
55
-
56
-
57
-
58
-
59
-
60
-
61
-
62
-
63
-
64
-
65
-
66
-
67
-
68
-
 69
69 -
 70
70 -
 71
71 -
 72
72 -
 73
73 -
 74
74 -
 75
75 -
 76
76 -
 77
77 -
 78
78 -
 79
79 -
80
-
81
-
82
-
83
-
84
-
85
-
86
-
87
-
88
-
89
-
90
-
91
-
92
-
93
-
94
-
95
-
96
-
97
-
98
-
99
-
100
-
101
-
102
-
103
-
104
-
105
-
106
-
107
-
108
-
109
-
110
-
111
-
112
-
113
-
114
-
115
-
116
-
117
-
118
-
119
-
120
-
121
-
122
-
123
-
124
-
125
-
126
-
127
-
128
-
129
-
130
-
131
-
132
-
133
-
134
-
135
-
136
-
137
-
138
-
139
-
140
-
141
-
142
-
143
-
144
-
145
-
146
-
147
-
148
-
149
-
150
-
151
-
152
-
153
-
154
-
155
-
156
-
157
-
158
-
159
-
160
-
161
-
162
-
163
-
164
-
165
-
166
-
167
-
168
-
169
-
170
-
171
-
172
-
173
-
174
-
175
-
176
-
177
-
178
 |
 |