HP LH4r Microsoft Windows 2000 Installation Guide for HP Servers - Page 6
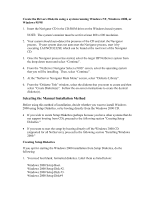
Selecting the Manual Installation Method
 |
View all HP LH4r manuals
Add to My Manuals
Save this manual to your list of manuals |
Page 6 highlights
Create the Drivers Diskette using a system running Windows NT, Windows 2000, or Windows 95/98 1. Insert the Navigator CD in the CD-ROM drive on the Windows-based system. NOTE: The system's monitor must be set for at least 800 x 600 resolution. 2. Your system should auto-detect the presence of the CD and start the Navigator process. If your system does not auto-start the Navigator process, start it by executing LAUNCH32.EXE which can be found at the root level of the Navigator CD. 3. Once the Navigator process has started, select the target HP NetServer system from the drop-down menu and select "Continue". 4. From the "NetServer Navigator Select a NOS" screen, select the operating system that you will be installing. Then, select "Continue". 5. At the "NetServer Navigator Main Menu" screen, select "Diskette Library". 6. From the "Diskette Title" window, select the diskette that you want to create and then select "Create Diskette(s)". Follow the on-screen instructions to create the desired diskette(s). Selecting the Manual Installation Method Before using this method of installation, decide whether you want to install Windows 2000 using Setup Diskettes, or by booting directly from the Windows 2000 CD. · If you wish to create Setup Diskettes (perhaps because you have other systems that do not support booting from CD), proceed to the following section "Creating Setup Diskettes." · If you want to start the setup by booting directly off the Windows 2000 CD (supported for all NetServers), proceed to the following section "Installing Windows 2000." Creating Setup Diskettes If you opt for starting the Windows 2000 installation from Setup Diskettes, do the following: 1. You need four blank, formatted diskettes. Label them as listed below: Windows 2000 Setup Boot. Windows 2000 Setup Disk #2. Windows 2000 Setup Disk #3. Windows 2000 Setup Disk#4
-
 1
1 -
 2
2 -
 3
3 -
 4
4 -
 5
5 -
 6
6 -
 7
7 -
 8
8 -
 9
9 -
 10
10 -
 11
11 -
 12
12 -
13
-
14
-
15
-
16
-
17
-
18
-
19
-
20
-
21
-
22
-
23
-
24
-
25
-
26
-
27
-
28
-
29
-
30
-
31
-
32
-
33
-
34
-
35
-
36
-
37
-
38
-
39
-
40
-
41
-
42
-
43
-
44
-
45
-
46
-
47
-
48
-
49
-
50
-
51
-
52
-
53
-
54
-
55
-
56
 |
 |
