HP LaserJet Pro 200 HP LaserJet Pro 200 Color M251 - Software Technical Refere - Page 109
Perform a custom installation with HP Smart Install or the CD, Finish
 |
View all HP LaserJet Pro 200 manuals
Add to My Manuals
Save this manual to your list of manuals |
Page 109 highlights
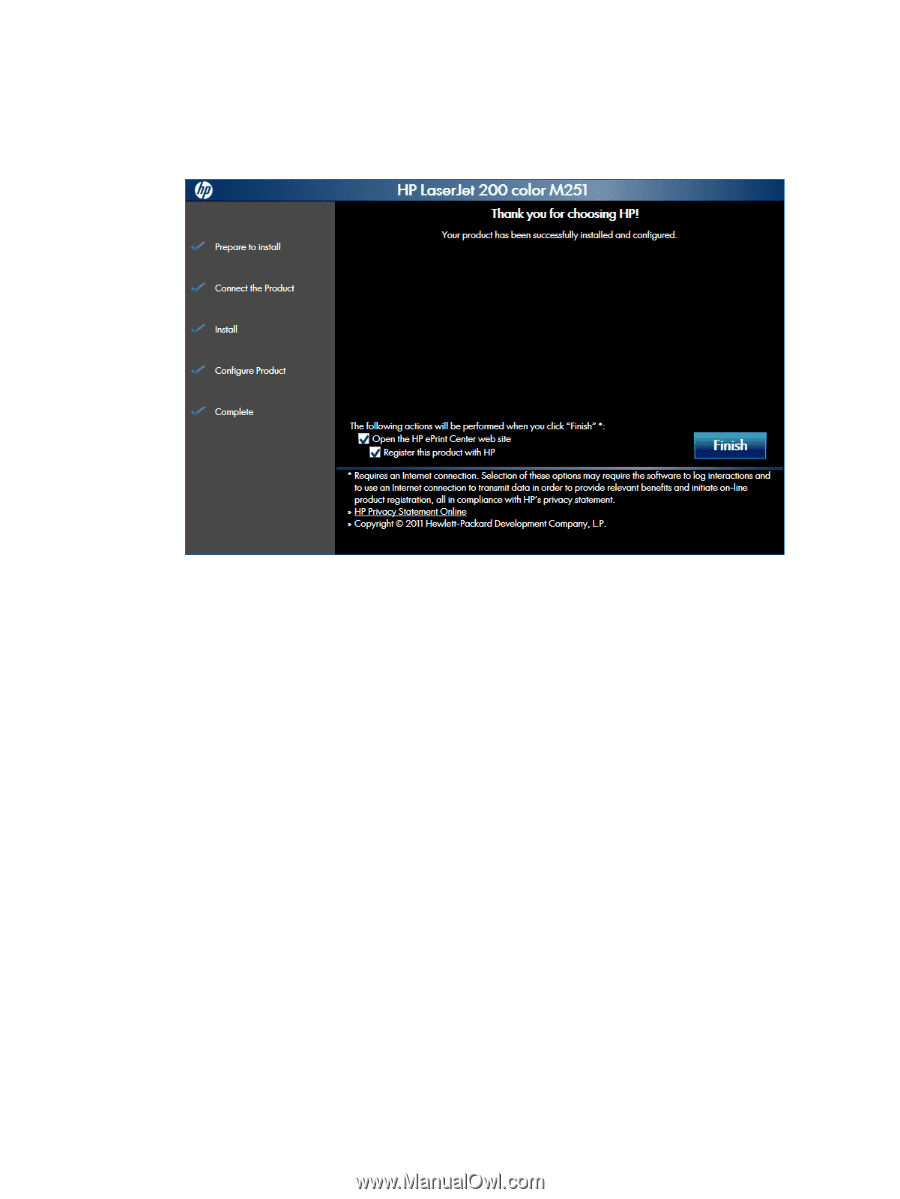
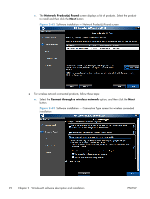
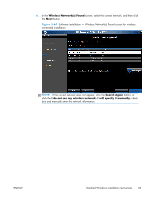
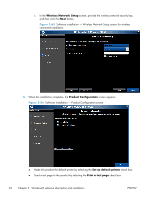
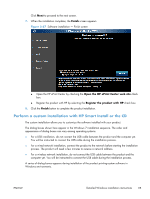
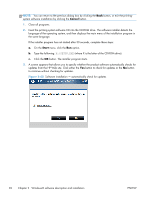
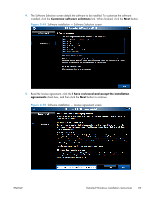
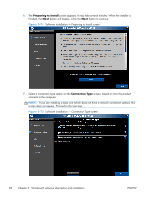
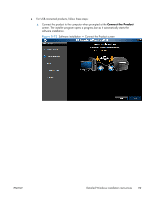
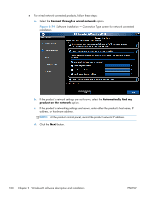
Click Next to proceed to the next screen. 7. When the installation completes, the Finish screen appears. Figure 2-67 Software installation - Finish screen ● Open the HP ePrint Center by checking the Open the HP ePrint Center web site check box. ● Register the product with HP by selecting the Register the product with HP check box. 8. Click the Finish button to complete the product installation. Perform a custom installation with HP Smart Install or the CD The custom installation allows you to customize the software installed with your product. The dialog boxes shown here appear in the Windows 7 installation sequence. The order and appearance of dialog boxes can vary among operating systems. ● For a USB installation, do not connect the USB cable between the product and the computer yet. You will be instructed to connect the USB cable during the installation process. ● For a wired network installation, connect the product to the network before starting the installation process. The product will need a few minutes to receive a network address. ● For a wireless network installation, do not connect the USB cable between the product and the computer yet. You will be instructed to connect the USB cable during the installation process. A series of dialog boxes appears during installation of the product printing-system software in Windows environments. ENWW Detailed Windows installation instructions 95
-
 1
1 -
2
-
3
-
4
-
5
-
6
-
7
-
8
-
9
-
10
-
11
-
12
-
13
-
14
-
15
-
16
-
17
-
18
-
19
-
20
-
21
-
22
-
23
-
24
-
25
-
26
-
27
-
28
-
29
-
30
-
31
-
32
-
33
-
34
-
35
-
36
-
37
-
38
-
39
-
40
-
41
-
42
-
43
-
44
-
45
-
46
-
47
-
48
-
49
-
50
-
51
-
52
-
53
-
54
-
55
-
56
-
57
-
58
-
59
-
60
-
61
-
62
-
63
-
64
-
65
-
66
-
67
-
68
-
69
-
70
-
71
-
72
-
73
-
74
-
75
-
76
-
77
-
78
-
79
-
80
-
81
-
82
-
83
-
84
-
85
-
86
-
87
-
88
-
89
-
90
-
91
-
92
-
93
-
94
-
95
-
96
-
97
-
98
-
99
-
100
-
101
-
102
-
103
-
 104
104 -
 105
105 -
 106
106 -
 107
107 -
 108
108 -
 109
109 -
 110
110 -
 111
111 -
 112
112 -
 113
113 -
 114
114 -
115
-
116
-
117
-
118
-
119
-
120
-
121
-
122
-
123
-
124
-
125
-
126
-
127
-
128
-
129
-
130
-
131
-
132
-
133
-
134
-
135
-
136
-
137
-
138
-
139
-
140
-
141
-
142
-
143
-
144
-
145
-
146
-
147
-
148
-
149
-
150
-
151
-
152
-
153
-
154
-
155
-
156
-
157
-
158
-
159
-
160
-
161
-
162
-
163
-
164
-
165
-
166
-
167
-
168
-
169
-
170
-
171
-
172
 |
 |