HP LaserJet Pro 200 HP LaserJet Pro 200 Color M251 - Software Technical Refere - Page 110
Cancel, Start,
 |
View all HP LaserJet Pro 200 manuals
Add to My Manuals
Save this manual to your list of manuals |
Page 110 highlights
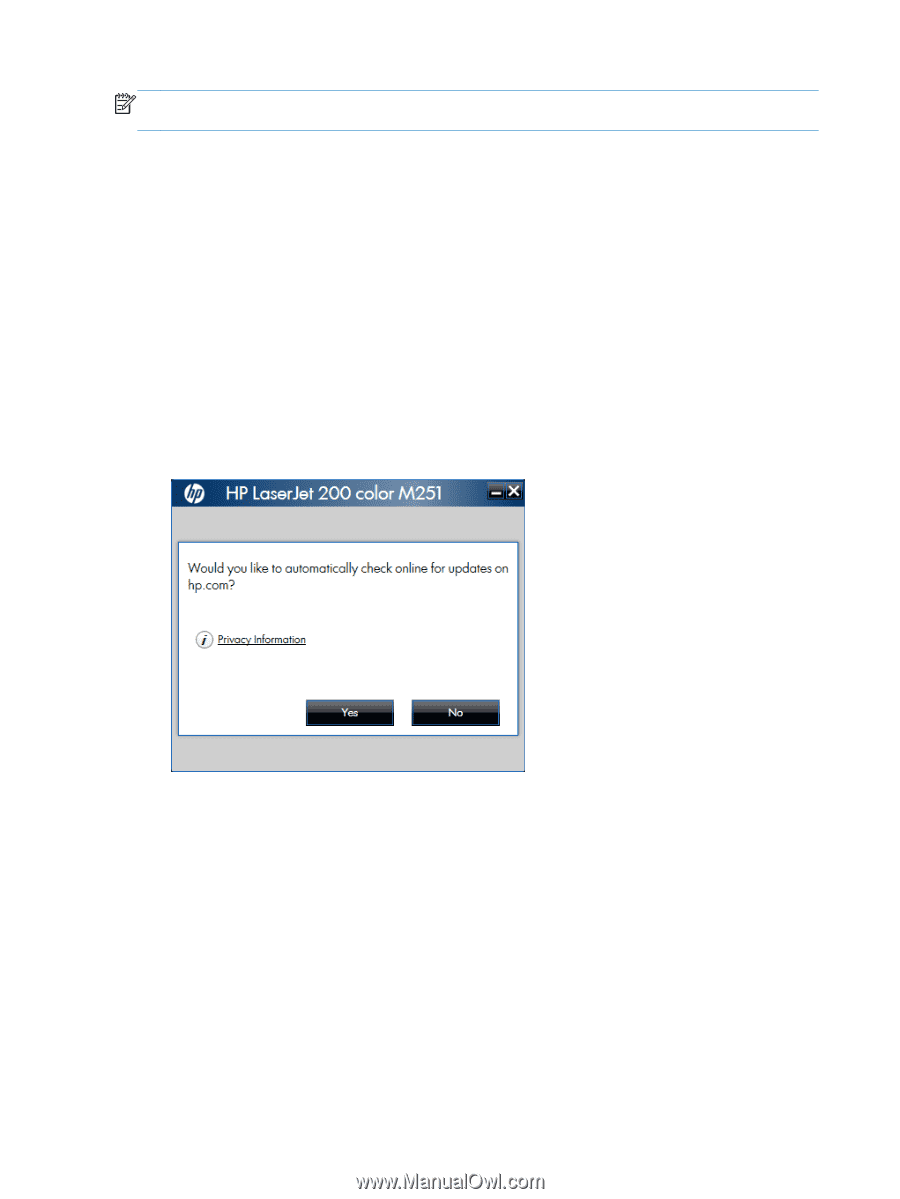
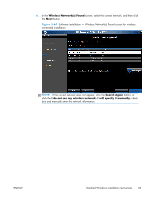
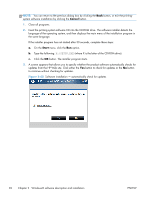
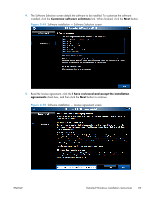
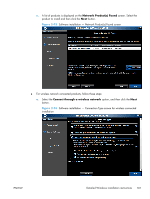
NOTE: You can return to the previous dialog box by clicking the Back button, or exit the printingsystem software installation by clicking the Cancel button. 1. Close all programs. 2. Insert the printing system software CD into the CD-ROM drive. The software installer detects the language of the operating system, and then displays the main menu of the installation program in the same language. If the installer program has not started after 30 seconds, complete these steps: a. On the Start menu, click the Run option. b. Type the following: X:\SETUP.EXE (where X is the letter of the CD-ROM drive). c. Click the OK button. The installer program starts. 3. A screen appears that allows you to specify whether the product software automatically checks for updates from the HP Web site. Click either the Yes button to check for updates or the No button to continue without checking for updates. Figure 2-68 Software installation - automatically check for updates 96 Chapter 2 Windows® software description and installation ENWW
-
 1
1 -
2
-
3
-
4
-
5
-
6
-
7
-
8
-
9
-
10
-
11
-
12
-
13
-
14
-
15
-
16
-
17
-
18
-
19
-
20
-
21
-
22
-
23
-
24
-
25
-
26
-
27
-
28
-
29
-
30
-
31
-
32
-
33
-
34
-
35
-
36
-
37
-
38
-
39
-
40
-
41
-
42
-
43
-
44
-
45
-
46
-
47
-
48
-
49
-
50
-
51
-
52
-
53
-
54
-
55
-
56
-
57
-
58
-
59
-
60
-
61
-
62
-
63
-
64
-
65
-
66
-
67
-
68
-
69
-
70
-
71
-
72
-
73
-
74
-
75
-
76
-
77
-
78
-
79
-
80
-
81
-
82
-
83
-
84
-
85
-
86
-
87
-
88
-
89
-
90
-
91
-
92
-
93
-
94
-
95
-
96
-
97
-
98
-
99
-
100
-
101
-
102
-
103
-
104
-
 105
105 -
 106
106 -
 107
107 -
 108
108 -
 109
109 -
 110
110 -
 111
111 -
 112
112 -
 113
113 -
 114
114 -
 115
115 -
116
-
117
-
118
-
119
-
120
-
121
-
122
-
123
-
124
-
125
-
126
-
127
-
128
-
129
-
130
-
131
-
132
-
133
-
134
-
135
-
136
-
137
-
138
-
139
-
140
-
141
-
142
-
143
-
144
-
145
-
146
-
147
-
148
-
149
-
150
-
151
-
152
-
153
-
154
-
155
-
156
-
157
-
158
-
159
-
160
-
161
-
162
-
163
-
164
-
165
-
166
-
167
-
168
-
169
-
170
-
171
-
172
 |
 |