HP LaserJet Pro 200 HP LaserJet Pro 200 Color M251 - Software Technical Refere - Page 71
HP Reconfiguration Utility, Font support, Devices and Printers - wireless setup
 |
View all HP LaserJet Pro 200 manuals
Add to My Manuals
Save this manual to your list of manuals |
Page 71 highlights
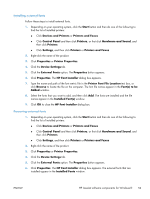
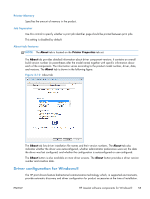
NOTE: Depending on which settings were updated, the Update Now feature might change the configuration information that displays on the print-driver tabs, instead of (or in addition to) changing the information on the Device Settings tab. NOTE: The Update Now feature is not supported in environments where shared Windows® XP clients are connected to Windows® XP hosts. To activate the Update Now feature, follow these steps: 1. Depending on your operating system, click the Start button and then do one of the following to find the list of installed printers: ● Click Devices and Printers or Printers and Faxes ● Click Control Panel and then click Printers, or first click Hardware and Sound, and then click Printers ● Click Settings, and then click Printers or Printers and Faxes 2. Right-click the product name. 3. Click the Properties or Printer Properties item. 4. Click the Device Settings tab. 5. If necessary, click the Installable Options list to expand it and show the options. 6. In the Automatic Configuration drop-down menu, select the Update Now item. 7. Click the OK button to save the setting. HP Reconfiguration Utility If you are already using the product and you wish to change the way it is connected, use the HP Reconfiguration Utility to set up the connection. For example, you can reconfigure the product to use a different wireless address, to connect to a wired or wireless network, or change from a network connection to a USB connection. You can change the configuration without inserting the product CD. After you select the type of connection you wish to make, the program goes directly to the portion of the product setup procedure that needs to change. The HP Reconfiguration Utility is located in the HP programs group on your computer. This utility is only available with the full install. Font support The basic fonts listed here are included with Microsoft Windows software. ENWW HP LaserJet software components for Windows® 57
-
 1
1 -
2
-
3
-
4
-
5
-
6
-
7
-
8
-
9
-
10
-
11
-
12
-
13
-
14
-
15
-
16
-
17
-
18
-
19
-
20
-
21
-
22
-
23
-
24
-
25
-
26
-
27
-
28
-
29
-
30
-
31
-
32
-
33
-
34
-
35
-
36
-
37
-
38
-
39
-
40
-
41
-
42
-
43
-
44
-
45
-
46
-
47
-
48
-
49
-
50
-
51
-
52
-
53
-
54
-
55
-
56
-
57
-
58
-
59
-
60
-
61
-
62
-
63
-
64
-
65
-
 66
66 -
 67
67 -
 68
68 -
 69
69 -
 70
70 -
 71
71 -
 72
72 -
 73
73 -
 74
74 -
 75
75 -
 76
76 -
77
-
78
-
79
-
80
-
81
-
82
-
83
-
84
-
85
-
86
-
87
-
88
-
89
-
90
-
91
-
92
-
93
-
94
-
95
-
96
-
97
-
98
-
99
-
100
-
101
-
102
-
103
-
104
-
105
-
106
-
107
-
108
-
109
-
110
-
111
-
112
-
113
-
114
-
115
-
116
-
117
-
118
-
119
-
120
-
121
-
122
-
123
-
124
-
125
-
126
-
127
-
128
-
129
-
130
-
131
-
132
-
133
-
134
-
135
-
136
-
137
-
138
-
139
-
140
-
141
-
142
-
143
-
144
-
145
-
146
-
147
-
148
-
149
-
150
-
151
-
152
-
153
-
154
-
155
-
156
-
157
-
158
-
159
-
160
-
161
-
162
-
163
-
164
-
165
-
166
-
167
-
168
-
169
-
170
-
171
-
172
 |
 |
