HP LaserJet Pro CP1525 Service Manual - Page 122
Use paper that meets HP specifications, Color, Automatic, Manual, Print in Grayscale
 |
View all HP LaserJet Pro CP1525 manuals
Add to My Manuals
Save this manual to your list of manuals |
Page 122 highlights
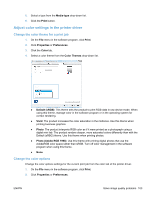
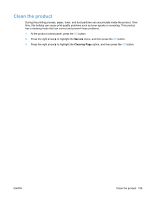
3. Click the Color tab. 4. Click the Automatic or Manual setting. ● Automatic setting: Select this setting for most color print jobs ● Manual setting: Select this setting to adjust the color settings independent from other settings. NOTE: Changing color settings manually can impact output. HP recommends that only color graphics experts change these settings. 5. Click the Print in Grayscale option to print a color document in black and white. Use this option to print color documents for photocopying or faxing. 6. Click the OK button. Use paper that meets HP specifications Use different paper if you are having any of the following problems: ● The printing is too light or seems faded in areas. ● Specks of toner are on the printed pages. ● Toner is smearing on the printed pages. ● Printed characters seem misformed. ● Printed pages are curled. Always use a paper type and weight that this product supports. In addition, follow these guidelines when selecting paper: ● Use paper that is of good quality and free of cuts, nicks, tears, spots, loose particles, dust, wrinkles, voids, staples, and curled or bent edges. ● Use paper that has not been previously printed on. 104 Chapter 2 Solve problems ENWW
-
 1
1 -
2
-
3
-
4
-
5
-
6
-
7
-
8
-
9
-
10
-
11
-
12
-
13
-
14
-
15
-
16
-
17
-
18
-
19
-
20
-
21
-
22
-
23
-
24
-
25
-
26
-
27
-
28
-
29
-
30
-
31
-
32
-
33
-
34
-
35
-
36
-
37
-
38
-
39
-
40
-
41
-
42
-
43
-
44
-
45
-
46
-
47
-
48
-
49
-
50
-
51
-
52
-
53
-
54
-
55
-
56
-
57
-
58
-
59
-
60
-
61
-
62
-
63
-
64
-
65
-
66
-
67
-
68
-
69
-
70
-
71
-
72
-
73
-
74
-
75
-
76
-
77
-
78
-
79
-
80
-
81
-
82
-
83
-
84
-
85
-
86
-
87
-
88
-
89
-
90
-
91
-
92
-
93
-
94
-
95
-
96
-
97
-
98
-
99
-
100
-
101
-
102
-
103
-
104
-
105
-
106
-
107
-
108
-
109
-
110
-
111
-
112
-
113
-
114
-
115
-
116
-
 117
117 -
 118
118 -
 119
119 -
 120
120 -
 121
121 -
 122
122 -
 123
123 -
 124
124 -
 125
125 -
 126
126 -
 127
127 -
128
-
129
-
130
-
131
-
132
-
133
-
134
-
135
-
136
-
137
-
138
-
139
-
140
-
141
-
142
-
143
-
144
-
145
-
146
-
147
-
148
-
149
-
150
-
151
-
152
-
153
-
154
-
155
-
156
-
157
-
158
-
159
-
160
-
161
-
162
-
163
-
164
-
165
-
166
-
167
-
168
-
169
-
170
-
171
-
172
-
173
-
174
-
175
-
176
-
177
-
178
-
179
-
180
-
181
-
182
-
183
-
184
-
185
-
186
-
187
-
188
-
189
-
190
-
191
-
192
 |
 |
