HP LaserJet Pro CP1525 Service Manual - Page 123
Print a cleaning Calibrate the product to align the colors, Check the print cartridges, Service - color laser printer
 |
View all HP LaserJet Pro CP1525 manuals
Add to My Manuals
Save this manual to your list of manuals |
Page 123 highlights
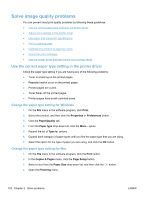
● Use paper that is designed for use in laser printers. Do not use paper that is designed only for use in Inkjet printers. ● Use paper that is not too rough. Using smoother paper generally results in better print quality. Print a cleaning page Print a cleaning page to remove dust and excess toner from the paper path if you are having any of the following problems: ● Specks of toner are on the printed pages. ● Toner is smearing on the printed pages. ● Repeated marks occur on the printed pages. Use the following procedure to print a cleaning page. 1. At the product control panel, press the OK button. 2. Press the right arrow to highlight the Service menu, and then press the OK button. 3. Press the right arrow to highlight the Cleaning Page option, and then press the OK button. Calibrate the product to align the colors If the printed output has colored shadows, blurry graphics, or areas that have poor color, you might need to calibrate the product to align the colors. Print the Diagnostics Page from the Reports menu on the control panel to check the color alignment. If the blocks of color on that page are not aligned with each other, you need to calibrate the product. 1. On the product control panel, open the System Setup menu. 2. Open the Print quality menu, and select the Calibrate color item. 3. Select the Calibrate now option. Check the print cartridges Check each print cartridge, and replace it if necessary, if you are having any of the following problems: ● The printing is too light or seems faded in areas. ● Printed pages have small unprinted areas. ● Printed pages have streaks or bands. If you determine that you need to replace a print cartridge, print the supplies status page to find the part number for the correct genuine HP print cartridge. ENWW Solve image quality problems 105
-
 1
1 -
2
-
3
-
4
-
5
-
6
-
7
-
8
-
9
-
10
-
11
-
12
-
13
-
14
-
15
-
16
-
17
-
18
-
19
-
20
-
21
-
22
-
23
-
24
-
25
-
26
-
27
-
28
-
29
-
30
-
31
-
32
-
33
-
34
-
35
-
36
-
37
-
38
-
39
-
40
-
41
-
42
-
43
-
44
-
45
-
46
-
47
-
48
-
49
-
50
-
51
-
52
-
53
-
54
-
55
-
56
-
57
-
58
-
59
-
60
-
61
-
62
-
63
-
64
-
65
-
66
-
67
-
68
-
69
-
70
-
71
-
72
-
73
-
74
-
75
-
76
-
77
-
78
-
79
-
80
-
81
-
82
-
83
-
84
-
85
-
86
-
87
-
88
-
89
-
90
-
91
-
92
-
93
-
94
-
95
-
96
-
97
-
98
-
99
-
100
-
101
-
102
-
103
-
104
-
105
-
106
-
107
-
108
-
109
-
110
-
111
-
112
-
113
-
114
-
115
-
116
-
117
-
 118
118 -
 119
119 -
 120
120 -
 121
121 -
 122
122 -
 123
123 -
 124
124 -
 125
125 -
 126
126 -
 127
127 -
 128
128 -
129
-
130
-
131
-
132
-
133
-
134
-
135
-
136
-
137
-
138
-
139
-
140
-
141
-
142
-
143
-
144
-
145
-
146
-
147
-
148
-
149
-
150
-
151
-
152
-
153
-
154
-
155
-
156
-
157
-
158
-
159
-
160
-
161
-
162
-
163
-
164
-
165
-
166
-
167
-
168
-
169
-
170
-
171
-
172
-
173
-
174
-
175
-
176
-
177
-
178
-
179
-
180
-
181
-
182
-
183
-
184
-
185
-
186
-
187
-
188
-
189
-
190
-
191
-
192
 |
 |
