HP P4000 HP Smart Array SAS controllers for Integrity servers support guide - Page 57
Changing the rebuild priority of a logical drive
 |
View all HP P4000 manuals
Add to My Manuals
Save this manual to your list of manuals |
Page 57 highlights
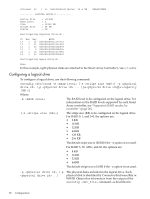
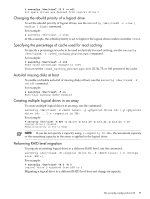
# saconfig /dev/ciss7 -D 0 -s all All spare drives are deleted from logical drive 0 Changing the rebuild priority of a logical drive To set the rebuild priority of logical drives, use the saconfig /dev/cissX -r command. For example: # saconfig /dev/ciss5 -r high In this example, the rebuild priority is set to high for the logical drives under controller ciss5. Specifying the percentage of cache used for read caching To specify a percentage of cache to be used exclusively for read caching, use the saconfig /dev/cissX -C command. For example: # saconfig /dev/ciss5 -C 100 Read cache percentage changed to 100% You can set the to 0, 25, 50, 75, or 100 percent of the cache. Auto-fail missing disks at boot To enable or disable auto-fail of missing disks at boot, use the saconfig /dev/cissX -F on|off command. For example: # saconfig /dev/ciss5 -F on Auto-fail missing disks enabled Creating multiple logical drives in an array To create multiple logical drives in an array, use the command: saconfig /dev/cissX -R -p [-p ...]-c For example: # saconfig /dev/ciss5 -R ADG -p 1I:1:9 -p 1I:1:10 -p 1I:1:11 -p 1I:1:12 -c 10 Logical drive 0 created Rebuild priority is set to High NOTE: If you do not specify a capacity using -c , the maximum capacity or the remaining capacity in the array is applied to the logical drive. Performing RAID level migration To migrate an existing logical drive to a different RAID level, use the command: saconfig /dev/cissX -M -R [-S ] For example: # saconfig /dev/ciss5 -M 0 -R 5 Logical drive 0 migrated from ADG to 5 Migrating a logical drive to a different RAID level does not change its capacity. The saconfig configuration CLI 57
-
 1
1 -
2
-
3
-
4
-
5
-
6
-
7
-
8
-
9
-
10
-
11
-
12
-
13
-
14
-
15
-
16
-
17
-
18
-
19
-
20
-
21
-
22
-
23
-
24
-
25
-
26
-
27
-
28
-
29
-
30
-
31
-
32
-
33
-
34
-
35
-
36
-
37
-
38
-
39
-
40
-
41
-
42
-
43
-
44
-
45
-
46
-
47
-
48
-
49
-
50
-
51
-
 52
52 -
 53
53 -
 54
54 -
 55
55 -
 56
56 -
 57
57 -
 58
58 -
 59
59 -
 60
60 -
 61
61 -
 62
62 -
63
-
64
-
65
-
66
-
67
-
68
-
69
-
70
-
71
-
72
-
73
-
74
-
75
-
76
-
77
-
78
-
79
-
80
-
81
-
82
-
83
-
84
-
85
-
86
-
87
-
88
-
89
-
90
-
91
-
92
-
93
-
94
-
95
-
96
-
97
-
98
-
99
-
100
-
101
-
102
-
103
-
104
-
105
-
106
-
107
-
108
-
109
-
110
-
111
-
112
-
113
-
114
-
115
-
116
-
117
-
118
-
119
-
120
-
121
-
122
-
123
-
124
-
125
-
126
-
127
-
128
-
129
-
130
-
131
-
132
-
133
-
134
-
135
-
136
-
137
-
138
-
139
-
140
-
141
-
142
 |
 |