HP PSC 1600 HP PSC 1600 All-in-One series User Guide - Page 22
Set up the HP JetDirect 175x, HP Image Zone - printer driver
 |
View all HP PSC 1600 manuals
Add to My Manuals
Save this manual to your list of manuals |
Page 22 highlights
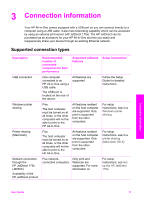
Set up the HP JetDirect 175x Your HP All-in-One can be shared by up to five computers on a local area network (LAN) by using the HP JetDirect 175x as a print server for all computers on the network. Simply connect your HP JetDirect to your HP All-in-One and router or hub, and then run the HP JetDirect installation CD. The required printer drivers (INF file) are located on the installation CD for your HP All-in-One. Note Using the HP JetDirect 175x, you can print and send a scan using Webscan from your computer. You can also make copies and print from the control panel of your HP All-in-One. To network connect your HP All-in-One using the HP JetDirect 175x (Windows) 1. Do one of the following: - If you are setting up the HP All-in-One and HP JetDirect 175x for the first time, use the Setup Guide for your HP All-in-One and follow the hardware setup instructions. - If your HP All-in-One has been connected to a computer with a USB cable and you now want to connect it to a network using an HP JetDirect 175x, uninstall the HP Image Zone software from your computer. For more information, see Uninstall and reinstall the software. 2. Follow the HP JetDirect 175x setup instructions to connect the print server to a LAN. 3. Connect the HP JetDirect to the USB port on the rear of your HP All-in-One. 4. Insert the HP JetDirect installation CD. You will use this CD to locate the HP JetDirect on the network. 5. Select Install to run the HP JetDirect installer. 6. When prompted, insert the HP All-in-One installation CD. Note If you are performing an initial installation of your HP All-in-One and HP JetDirect 175x, do not run the HP All-in-One setup wizard. Just install the drivers following the instructions below. 7. Follow the steps appropriate for your operating system: If you are using Windows XP or 2000: ➔ Browse to the root directory of the CD and select the printer driver file, hpoprn08.inf. If you are using Windows 98 or ME: a. Browse the CD for the "Drivers" folder and find the correct language subfolder. For example, for English speaking customers, navigate to the \enu\drivers \win9x_me directory, where enu is the English language directory and win9x_me is for Windows ME. The printer driver file is hpoupdrx.inf. b. If prompted, repeat for each of the files required. 8. Complete the installation following the screens on your computer. Note If at some later time you want to connect to your computer using a USB cable, disconnect the HP JetDirect from your HP All-in-One, uninstall the Connection information User Guide 19
-
 1
1 -
2
-
3
-
4
-
5
-
6
-
7
-
8
-
9
-
10
-
11
-
12
-
13
-
14
-
15
-
16
-
 17
17 -
 18
18 -
 19
19 -
 20
20 -
 21
21 -
 22
22 -
 23
23 -
 24
24 -
 25
25 -
 26
26 -
 27
27 -
28
-
29
-
30
-
31
-
32
-
33
-
34
-
35
-
36
-
37
-
38
-
39
-
40
-
41
-
42
-
43
-
44
-
45
-
46
-
47
-
48
-
49
-
50
-
51
-
52
-
53
-
54
-
55
-
56
-
57
-
58
-
59
-
60
-
61
-
62
-
63
-
64
-
65
-
66
-
67
-
68
-
69
-
70
-
71
-
72
-
73
-
74
-
75
-
76
-
77
-
78
-
79
-
80
-
81
-
82
-
83
-
84
-
85
-
86
-
87
-
88
-
89
-
90
-
91
-
92
-
93
-
94
-
95
-
96
-
97
-
98
-
99
-
100
-
101
-
102
-
103
-
104
-
105
-
106
-
107
-
108
-
109
-
110
-
111
-
112
-
113
-
114
-
115
-
116
-
117
-
118
-
119
-
120
-
121
-
122
-
123
-
124
-
125
-
126
-
127
-
128
-
129
-
130
-
131
-
132
-
133
-
134
 |
 |
