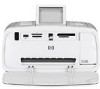
HP Photosmart 470 Photosmart 475 series User Guide - Page 16
Select Photos, To navigate the printer menu, Printer menu structure, Slide show, Improve image - series printer
 |
View all HP Photosmart 470 manuals
Add to My Manuals
Save this manual to your list of manuals |
Page 16 highlights
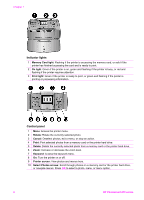
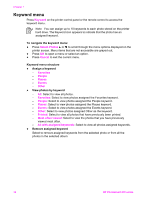
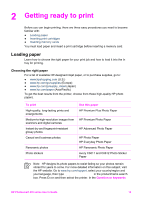
To navigate the printer menu: ● Press Select Photos or to scroll through the menu options displayed on the printer screen. Menu items that are not accessible are grayed out. ● Press OK to open a menu or select an option. ● Press Cancel to exit the current menu. Printer menu structure ● Slide show - Play currently selected slide show: Select to play the current slide show. - Play custom slide show: Select to play a custom slide show. - Pause current slide show: Select to pause the current slide show. - Resume current slide show: Select to resume playing the current slide show. - Exit current slide show: Select to exit the current slide show. - Save a custom slide show: Select to save the selected photos as a slide show. - Edit custom slide show: Select to edit a saved slide show. - Delete custom slide show: Select to delete a saved slide show. ● Improve image - Remove red-eye: Select this feature to remove red-eye from your photos. - Auto enhance: Select an enhancement option. Select Recommended, Option 2, or Option 3, to enhance the photo. Select Original (not enhanced) to not enhance the photo. - Crop: Select to crop the image. Press Zoom - to adjust the size of the cropped area. Press Select Photos or to move the cropped area. Press OK, then press OK again to save a copy of the cropped photo on the printer hard drive. - Photo brightness: Press Select Photos or to move the slider and adjust the photo brightness. ● Get creative - Frames: Select to add a frame to the current photo. - Clipart: Select to add clipart to the current photo. - Greetings: Select to add a greeting to the current photo. - Panoramic photos: Select to turn panoramic printing On or Off (default). Select On to print all selected photos with a 3:1 aspect ratio; load 10 x 30 cm (4 x 12 inches) paper before printing. When a photo is selected, a green bounding box shows the area to be printed. Select Off to print with a normal 3:2 aspect ratio. - Photo stickers: Select to turn sticker printing On or Off (default). Select On to print 16 photos per page; load special sticker media if desired. Select Off to print using one of the normal layout options. - Passport photos: Select to turn passport photo mode On or Off (default). Select size: Passport mode tells the printer to print all selected photos in the selected passport photo size. A separate page is printed for each selected photo. Each printed page contains the number of photos of the selected size that will fit on the page. - Add color effect: Choose from the following color effects: Black & white, Sepia, Antique, or No effect (default). HP Photosmart 470 series User's Guide 11
-
 1
1 -
2
-
3
-
4
-
5
-
6
-
7
-
8
-
9
-
10
-
 11
11 -
 12
12 -
 13
13 -
 14
14 -
 15
15 -
 16
16 -
 17
17 -
 18
18 -
 19
19 -
 20
20 -
 21
21 -
22
-
23
-
24
-
25
-
26
-
27
-
28
-
29
-
30
-
31
-
32
-
33
-
34
-
35
-
36
-
37
-
38
-
39
-
40
-
41
-
42
-
43
-
44
-
45
-
46
-
47
-
48
-
49
-
50
-
51
-
52
-
53
-
54
-
55
-
56
-
57
-
58
-
59
-
60
-
61
-
62
-
63
-
64
-
65
-
66
-
67
-
68
-
69
-
70
-
71
-
72
-
73
-
74
-
75
-
76
-
77
 |
 |
